u盘装系统教程win10专业版步骤图解
- 分类:U盘教程 回答于: 2021年12月10日 10:36:01
当使用的win10专业版系统出现了故障问题后,我们可以通过u盘装系统的方法修复.不过很多人不知道u盘怎么装win10专业版系统,下面小编就教下大家u盘装系统教程win10专业版步骤.
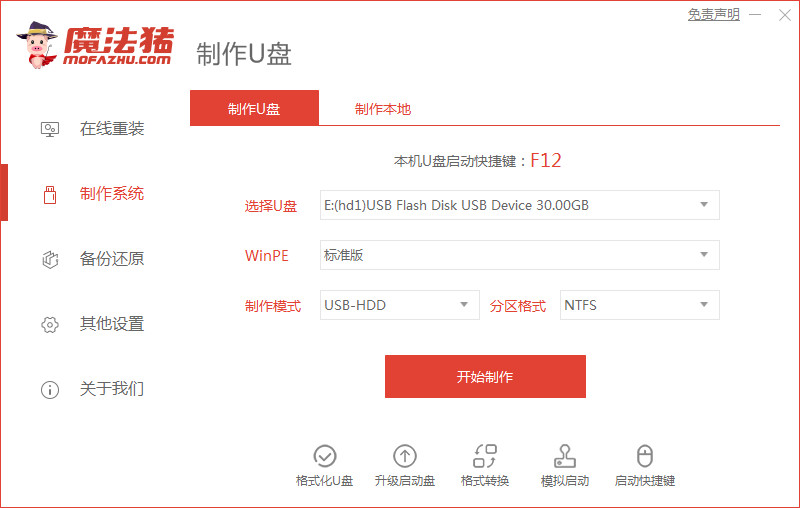
1.首先,我们下载一个魔法猪系统重新安装大师,下载安装并打开。

2.打开软件选择制作系统,然后点击制作U盘,系统会自动给出适合安装的版本。我们只需点击开始制作。

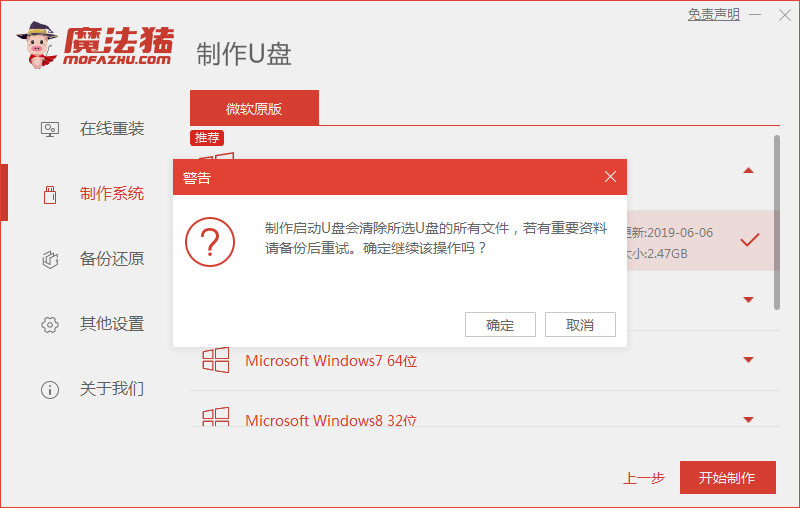
3.系统将弹出这样一个窗口,我们单击以确定是否合适。

4.下载安装资源,启动U盘制作。安装制作完成后,我们需要重新启动计算机。

5.重启电脑后,插入U盘启动,快速按F12,在启动菜单中选择U盘,我们需要返回到主页面继续安装。

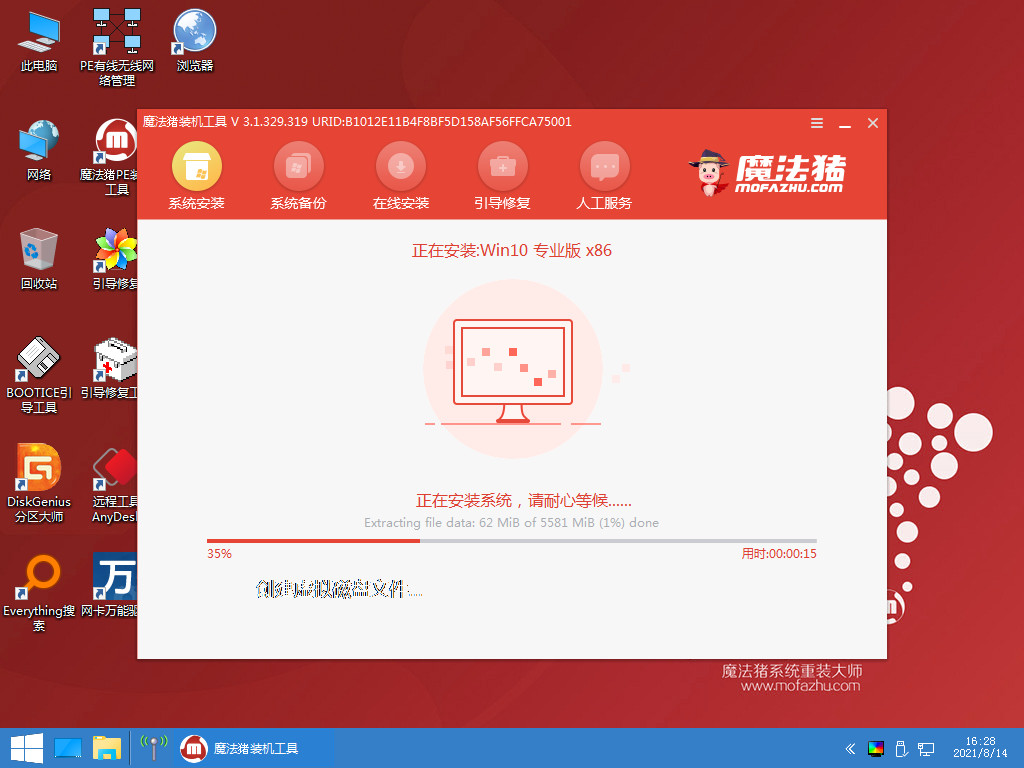
6.我们选择安装在C盘,然后会下载系统引导修复工具。

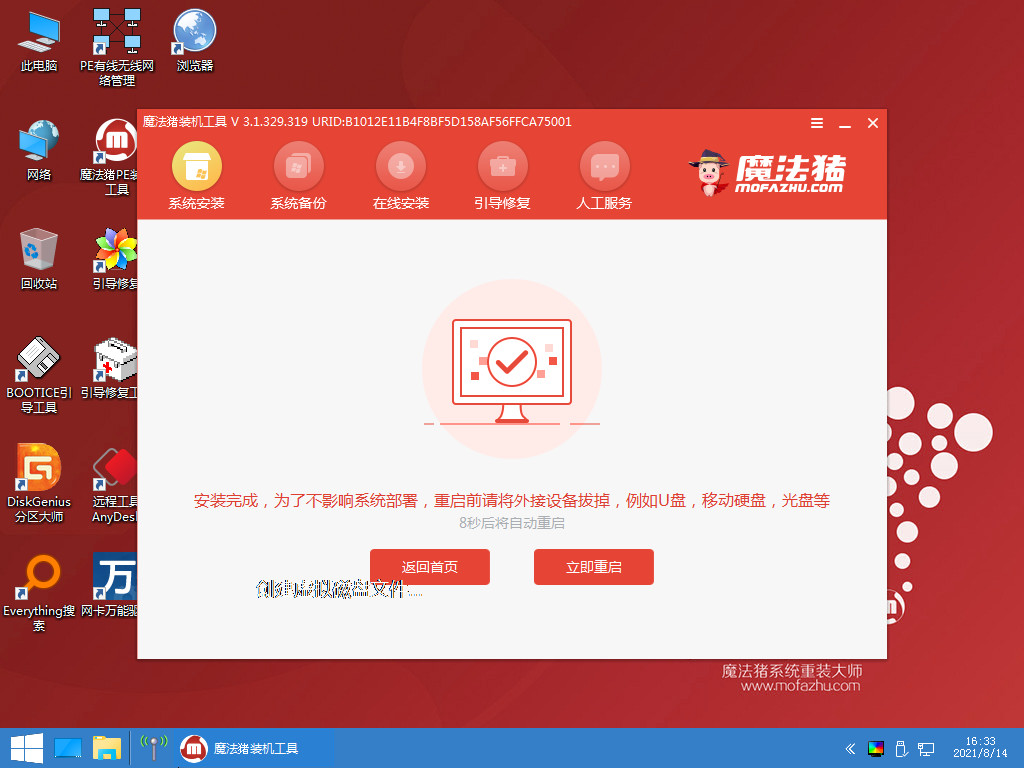
7.安装完成之后我们需要继续重启电脑。

8.重新启动计算机后,我们就可以开始安装新系统了。

以上就是u盘装系统教程win10专业版步骤图解,希望能帮助到大家。
 有用
26
有用
26


 小白系统
小白系统


 1000
1000 1000
1000 1000
1000 1000
1000 1000
1000 1000
1000 1000
1000 1000
1000 1000
1000 1000
1000猜您喜欢
- u盘启动设置_小编教你怎么设置U盘为第..2017/11/22
- 演示联想笔记本u盘启动盘重装系统教程..2021/09/13
- 手机做u盘pe系统:轻松打造随身移动系统..2024/10/08
- 重新使用U盘装系统的方法2024/03/15
- 老友U盘重装系统步骤图解2022/09/02
- u盘装系统步骤教程2023/01/19
相关推荐
- 安装系统,小编教你u盘安装系统步骤..2018/10/11
- 怎样装系统,小编教你小鱼U盘怎么重装W..2018/06/11
- 小白系统u盘启动盘制作方法是什么..2022/11/07
- u盘量产pe装系统,小编教你u盘如何安装..2018/01/20
- U盘重装电脑系统的详细步骤指南..2023/12/05
- 技术编辑教您如何使用u盘做系统..2018/12/05


 关注微信公众号


