笔记本电脑linux系统安装教程图解
- 分类:教程 回答于: 2021年11月01日 16:30:00
用惯了windows系统,想要换下口味使用下linux系统,那么要如何安装linux系统呢?最近有笔记本电脑用户就想给自己的笔记本安装linux,下面小编就教下大家笔记本电脑linux系统安装教程.
1.去https://www.centos.org/download/下载centos系统,其中CentOS-7.0-x86_64-DVD-1503-01.iso 是标准安装版,推荐下载这个;

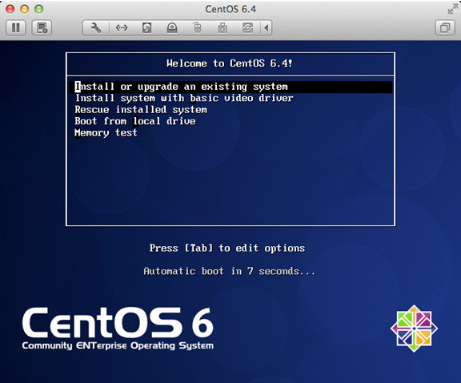
2.使用U盘或者光驱安装系统,直接选择“Install or upgrade an existing system”,按下回车就可以了;
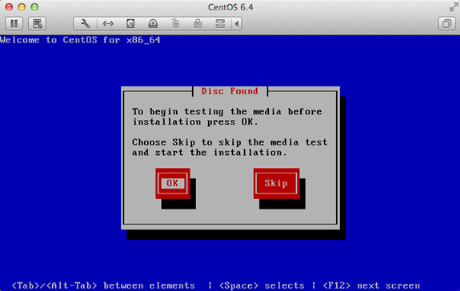
3.当系统弹出新提示时,选择“skip”即可;
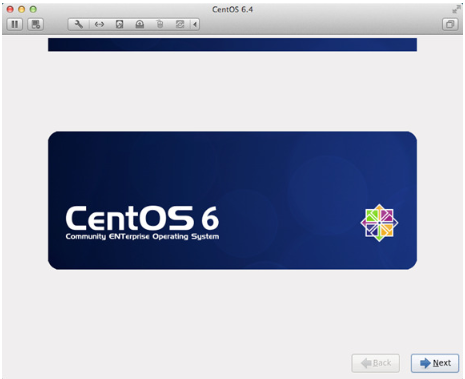
4.在新的页面右下角找到“next”并点击;
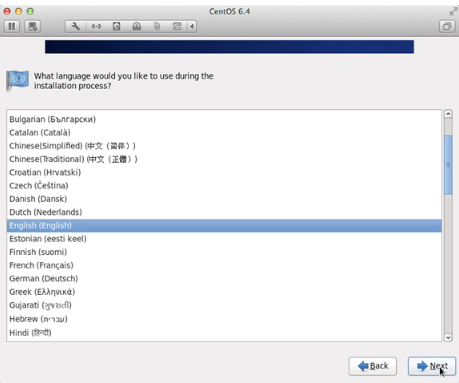
5.在语言安装程序中找到“English”,并选择“Next”;
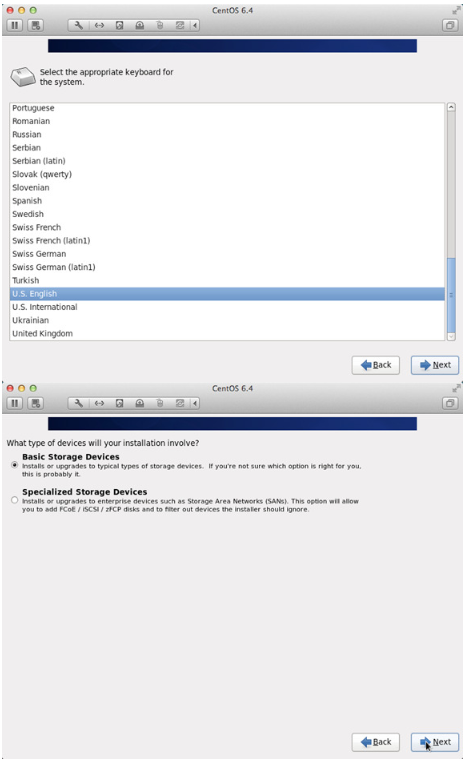
6.之后依次选择“U.S.English”—“Basic Storage Devices”;
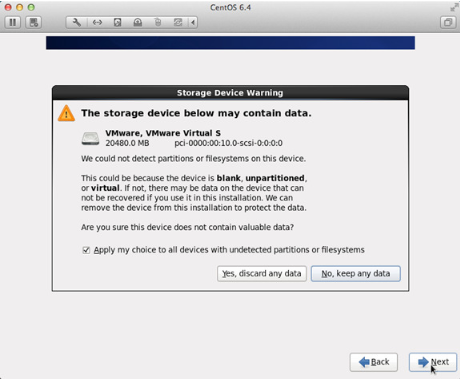
7.在电脑跳出新提示以后,选择“Yes,discard any data”;
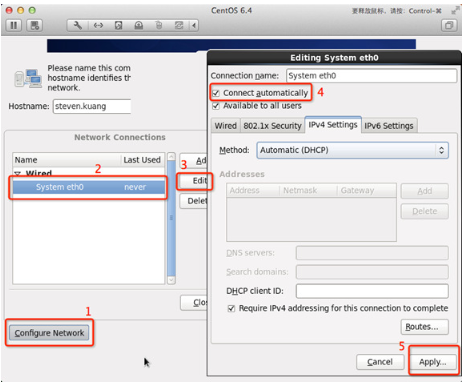
8.在“Hostname”中输入自己想的名和姓;

9.之后安装下图的顺序进行安装就可以了;
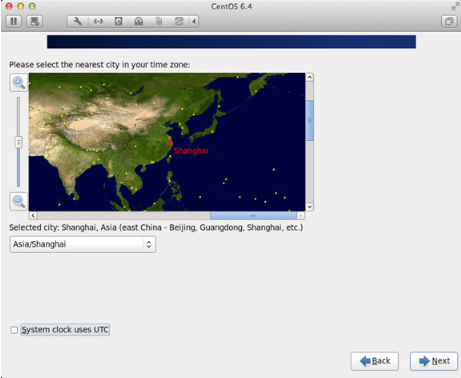
10.时区选择“Asia/Shanghai”,并且取消“System clock uses UTC”前面的对勾;
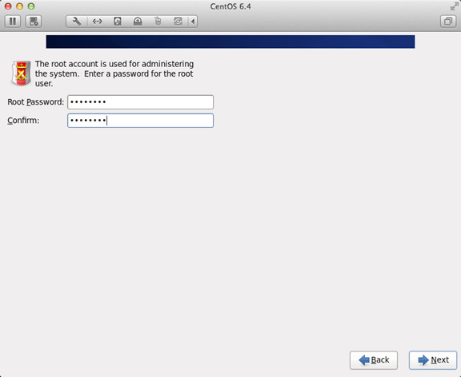
11.设置root的密码;
12.调整硬盘相关的分区,一定要按照指示来,并且一定要有/home这个分区‘’。
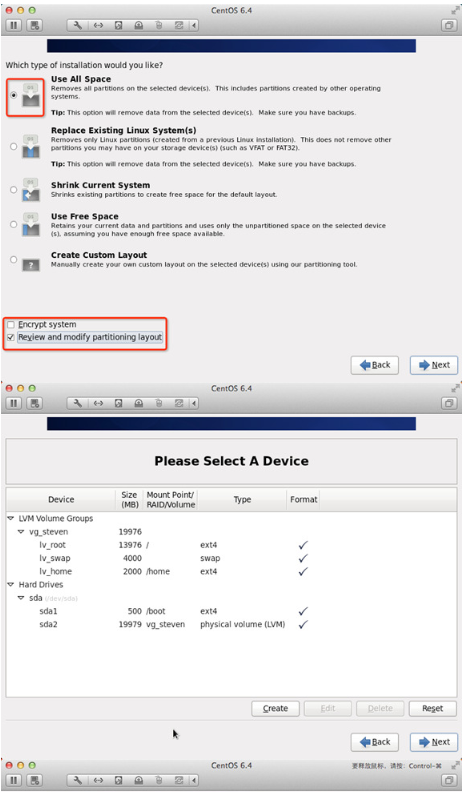
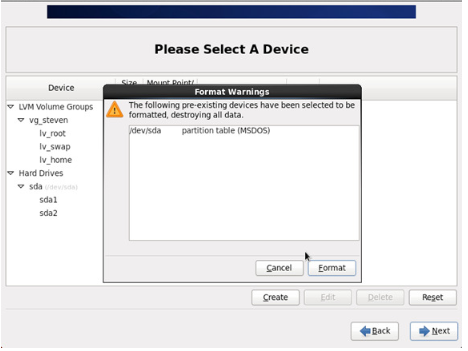
13.将更改写入到硬盘当中,继续选择“Next”,之后设置引导程序安装位置;
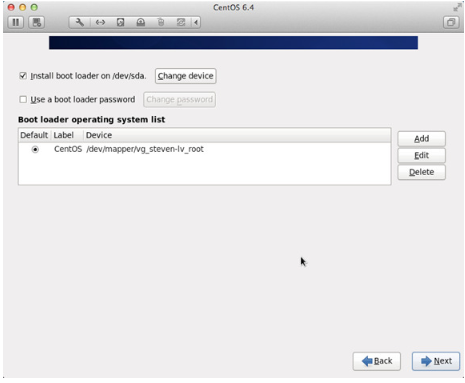
14.用户一定要根据下图的指示完成相关设置顺序;
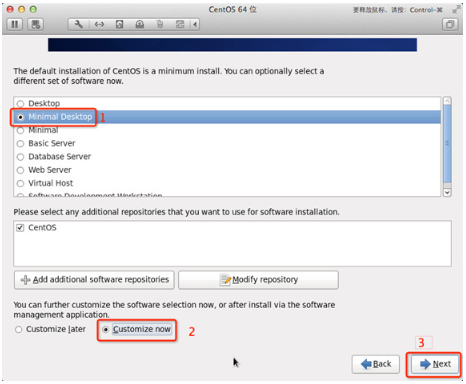
15.之后取消“Applications”、“Base System”、“Servers”中的所有选项。并且将“Desktops”中的“Desktop Debugging and Performance Tools”、“Desktop Platform”、“Remote Desktop Clients”取消。而在“Input Methods”除了“ibus-pinyin-1.3.8-1.el6.x86_64”,其余的全部取消;
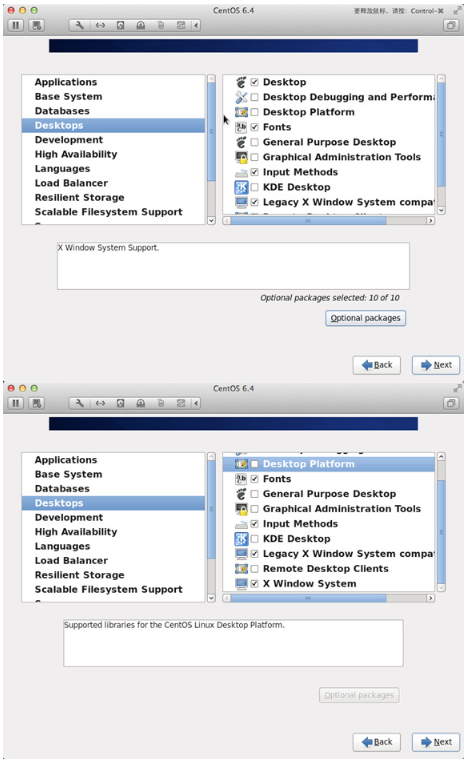
16.接着选中右侧的“Languages”,然后点击“Chinese Support”,之后点击“Optional packages”;

17.之后系统会自动进行安装,重启。我们需要重新输入自己的英文名;


18.在“Date and Time”选项中选中“Synchronize data and time over the network”,点击“Finsh”;
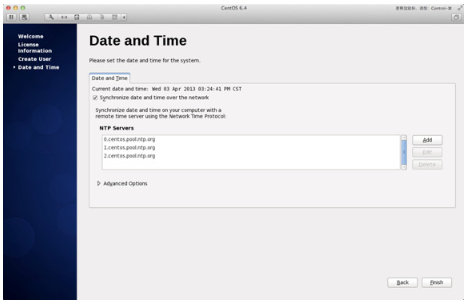
19.之后第一次进入系统不要进行任何更改,直接退出,之后进行第二次登陆。第二次登陆在语言的区域中选“other”,之后选中“汉语”;

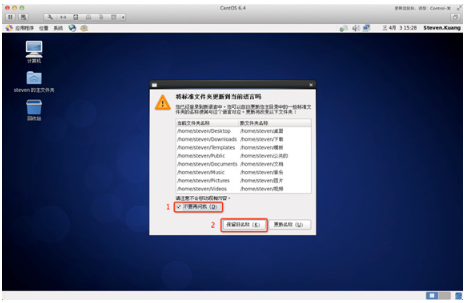
20.之后登陆系统按照下图设置就可以了。
以上就是笔记本电脑linux系统安装教程图解,希望能帮助到大家。
 有用
65
有用
65


 小白系统
小白系统


 1000
1000 1000
1000 1000
1000 1000
1000 1000
1000 1000
1000 1000
1000 1000
1000 1000
1000 1000
1000猜您喜欢
- 详解pdf阅读器下载官网有哪些编辑pdf..2024/09/22
- 安装纯净版win7系统图文教程..2017/01/02
- "驱动精灵:让电脑运行更顺畅"..2023/05/30
- 揭秘桌面游戏排行榜背后的游戏设计与..2024/09/13
- 免费数据恢复工具有哪些2023/03/30
- xp装win7 64双系统教程2016/11/08
相关推荐
- 电脑截屏有几种方法2023/03/03
- 重装系统黑屏了是为什么怎么办..2022/07/29
- 0x7fffffff是什么意思的详细介绍..2021/11/16
- 充电宝能带上飞机吗?了解航空公司规定..2024/07/04
- 小编教你xp一键安装系统要怎么做..2017/07/08
- 台式电脑一键重装系统的详细教程..2021/06/06


 关注微信公众号


