重装系统前如何备份win7
- 分类:Win7 教程 回答于: 2023年02月10日 12:40:15
使用win7的小伙伴可能都不知道重装系统前如何备份吧,平时使用电脑比较频繁的小伙伴建议备份win7系统,这样在系统需要还原的情况下,我们可以一键还原备份的系统,就不用再到网上下载系统镜像,省时省力,下面我教大家重装系统前备份教程。
工具/原料:
系统版本:win7系统
品牌型号:HP CQ43-103T
方法/步骤:
方法一:通过控制面板备份
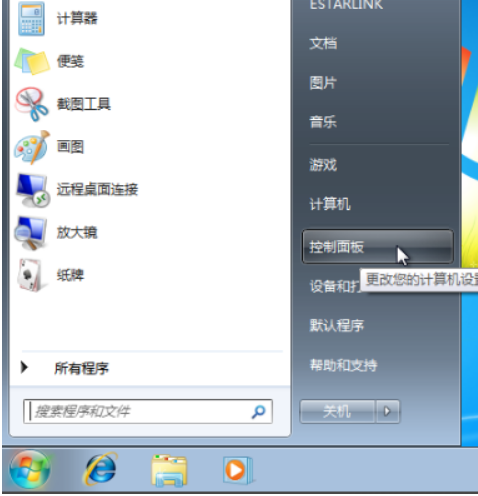
1、重装系统前如何备份呢?首点击开始菜单,点击控制面板。
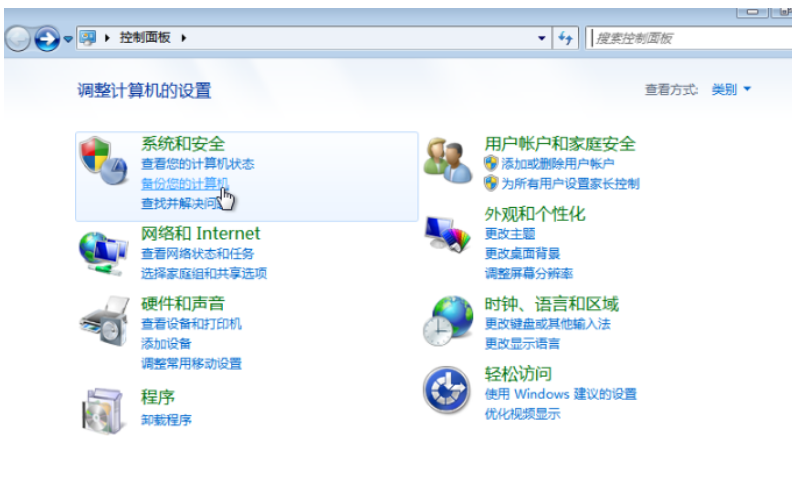
2、在打开如图界面里点击-系统和安全-下方的-备份您的计算机-
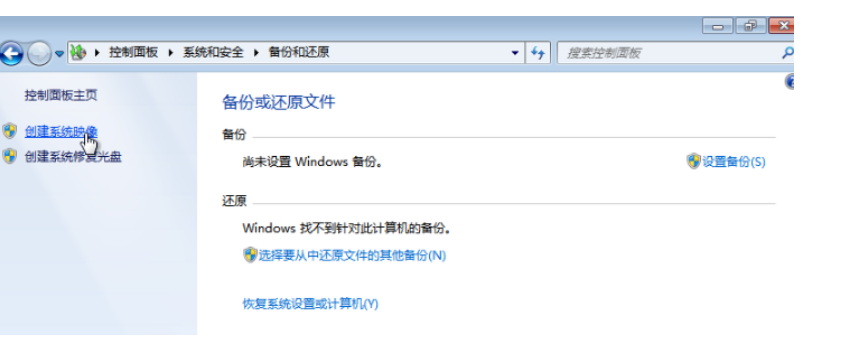
3、点击-创建系统映像选项。
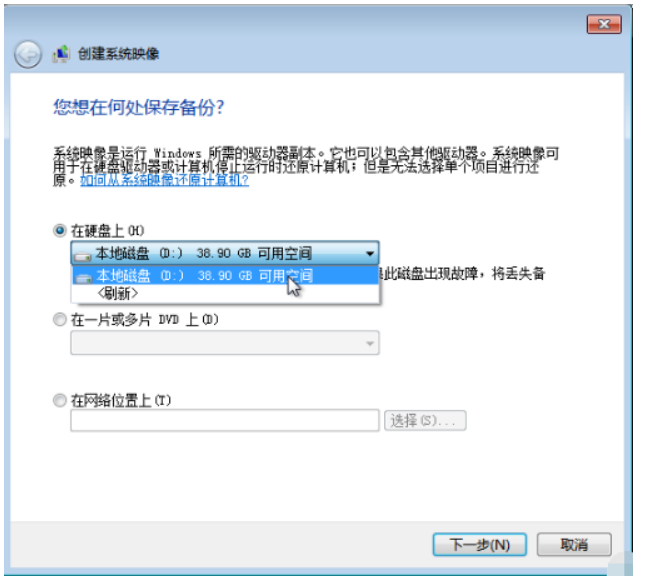
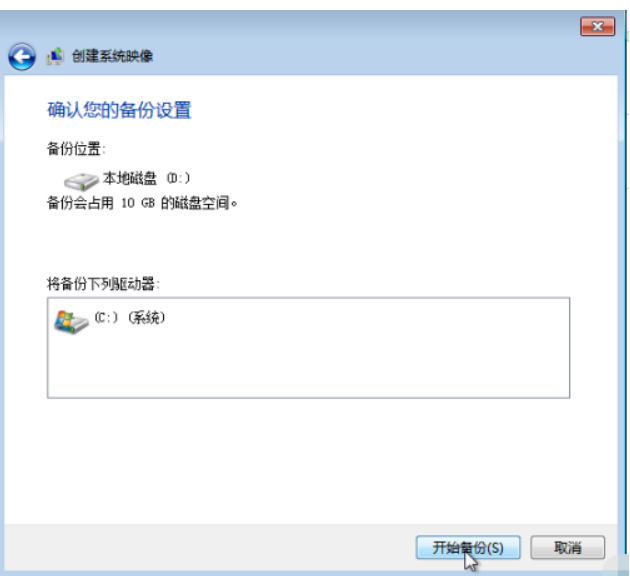
4、将备份保存任意磁盘,然后点击-下一步。
5、点击-开始备份选项。
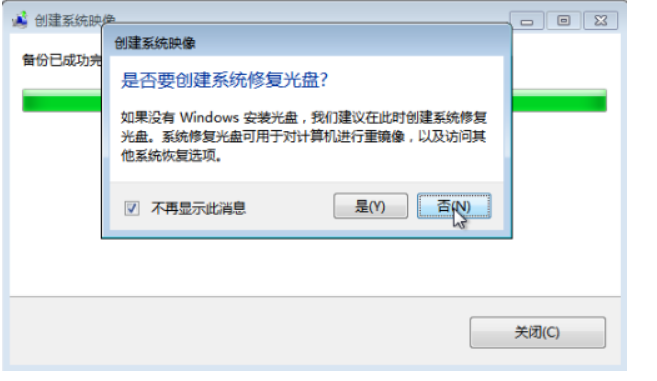
6、备份好之后,在弹出界面,需要点击-否。
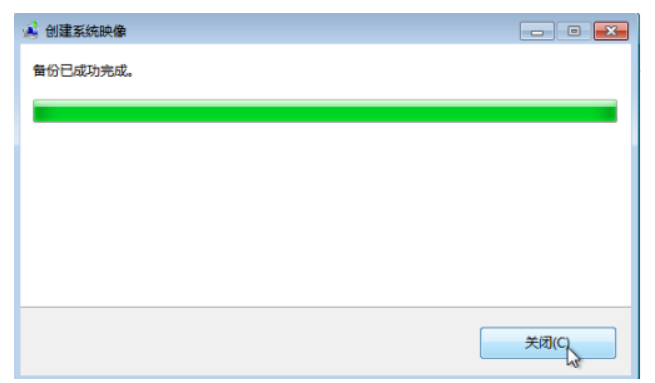
7、点击【关闭】即可
8、这时候在刚刚选择的保存路径下就可以看到了WindowsImageBackup系统备份文件

方法二:通过开始菜单备份
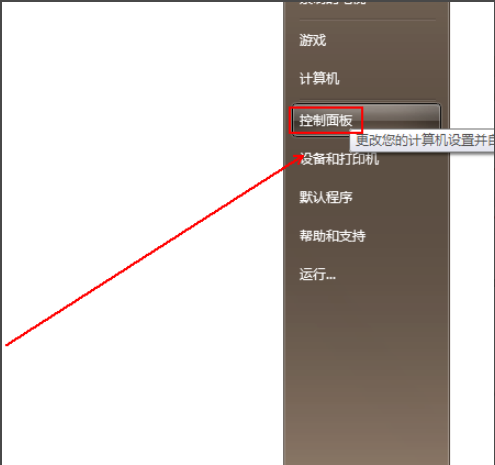
1,我们首先鼠标左键点击“开始菜单”,然后点击“控制面板”进入。
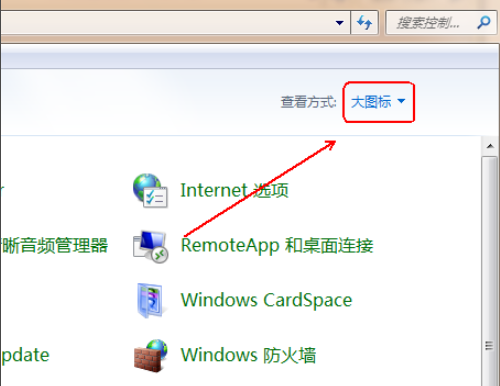
2,我们在“控制面板”文件夹内将“查看方式”更改为“大图标”选项即可。
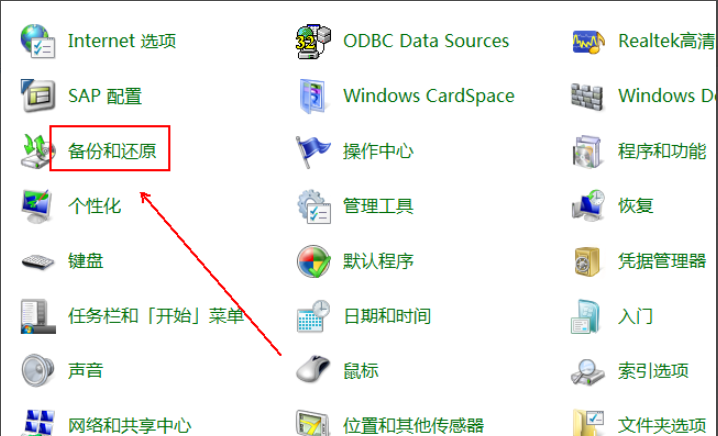
3,在下方的程序列表中点击“备份和还原”选项。
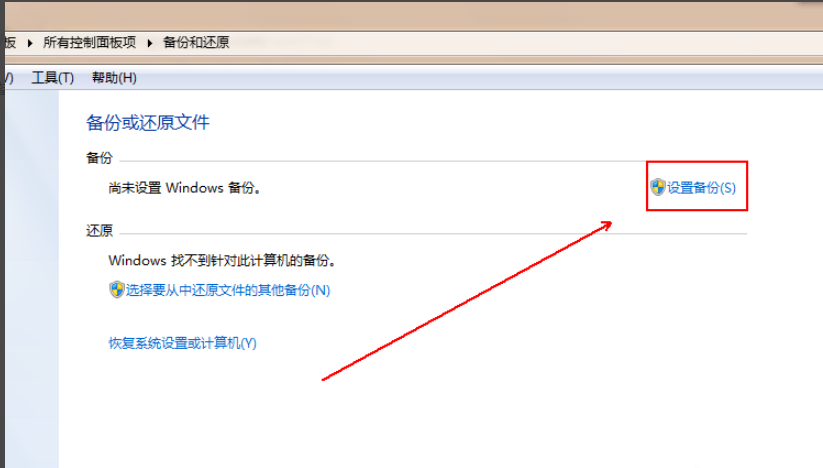
4,在如图内选择设置备份”选项。
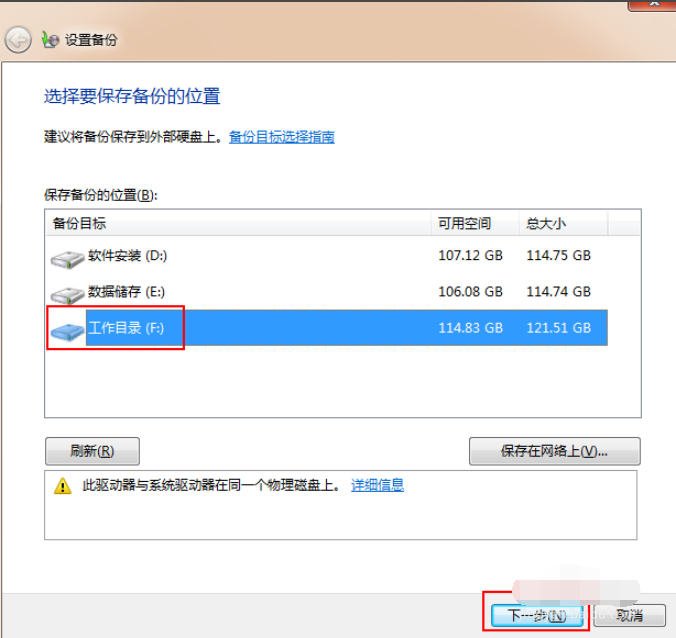
5,在“设置备份”窗口中点选备份磁盘位置并点击“下一步”按钮。
6,点击“让Windows选择(推荐)”选项然后点击“下一步”选项。
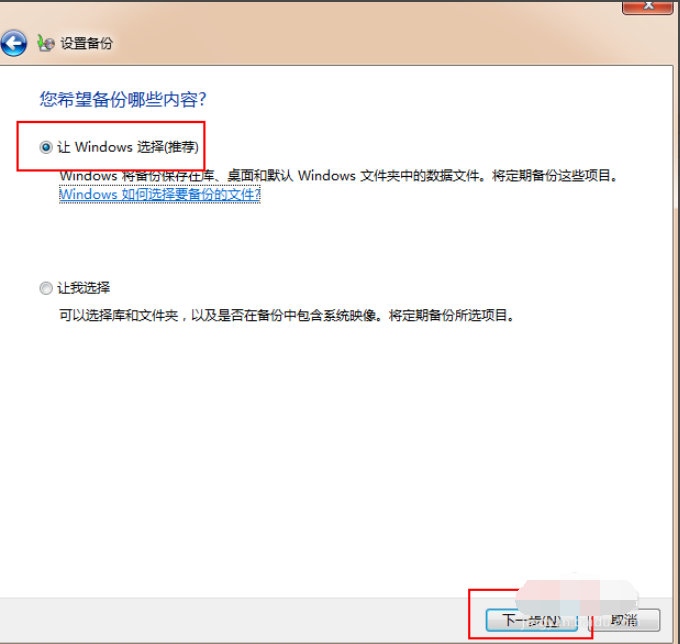
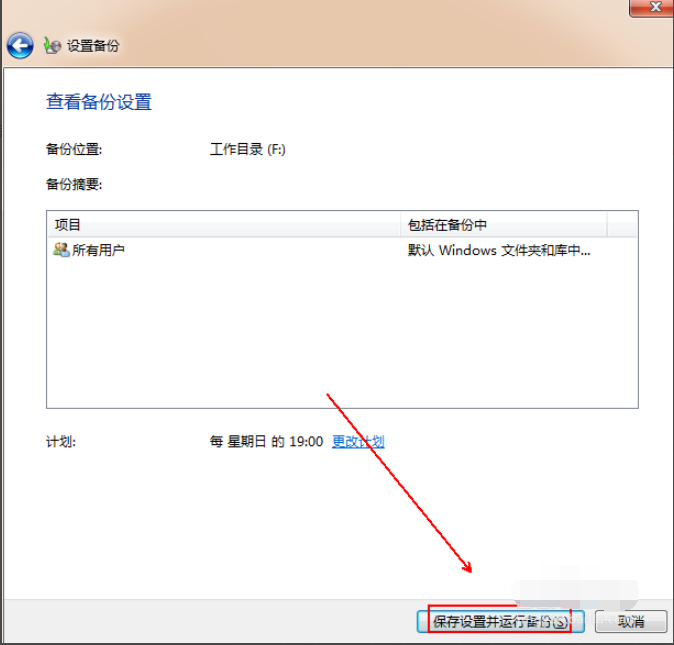
7,然后点击“保存设置并运行备份”按钮。
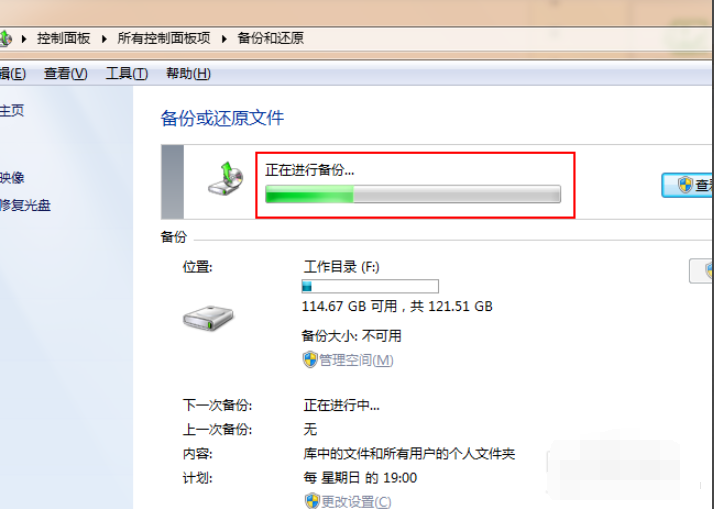
8,耐心等待备份的完成即可。
总结:
1、首打开控制面板;
2、然后跟随操作进行备份;
3、最后查看备份好的系统文件。
 有用
82
有用
82


 小白系统
小白系统


 1000
1000 1000
1000 1000
1000 1000
1000 1000
1000 1000
1000 1000
1000 1000
1000 1000
1000 1000
1000猜您喜欢
- 连接的ip,小编教你怎么解决本地连接没..2018/07/18
- 系统重装win7的步骤2022/12/06
- 网络连接被重设,小编教你网络连接被重..2018/07/24
- Win7系统一键重装:选择最佳方案..2024/06/18
- 精简win7系统:专家分享高效方法,提升系..2024/05/22
- win7官网下载地址2024/01/06
相关推荐
- win7系统备份图文教程2021/07/22
- 简述自己怎么重装系统win72022/11/20
- win7优化配置方法2023/01/24
- win8笔记本如何降级安装win72023/11/09
- 笔记本无线网络找不到,小编教你笔记本..2018/05/30
- win7升级win10升级助手2020/10/30


 关注微信公众号


