笔记本怎么重装系统win7
- 分类:Win7 教程 回答于: 2023年01月14日 11:00:07
有网友习惯使用win7系统,想把单位使用的笔记本电脑重装成win7。但是自己没有重装过系统不知道具体的操作步骤。那么笔记本怎么重装系统win7呢?下面小编就来演示下笔记本重装系统win7方法。
工具/原料:
系统版本:win7旗舰版
品牌型号:华为MateBook 14s
软件版本:小白一键重装系统v2990
方法/步骤:
方法一:一键重装win7
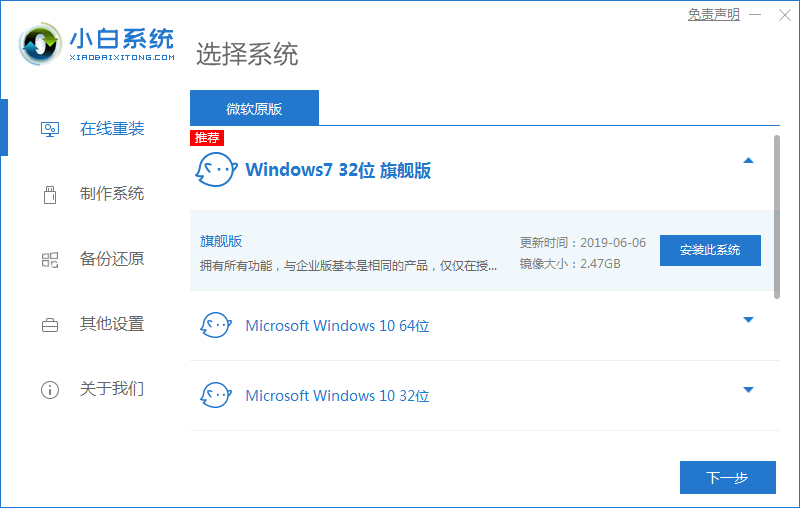
1、首先下载小白软件,打开后,选择要安装的系统版本,点击下一步。
2、勾选好要同时安装的其他软件。

3、等待软件下载安装系统的各项资源。

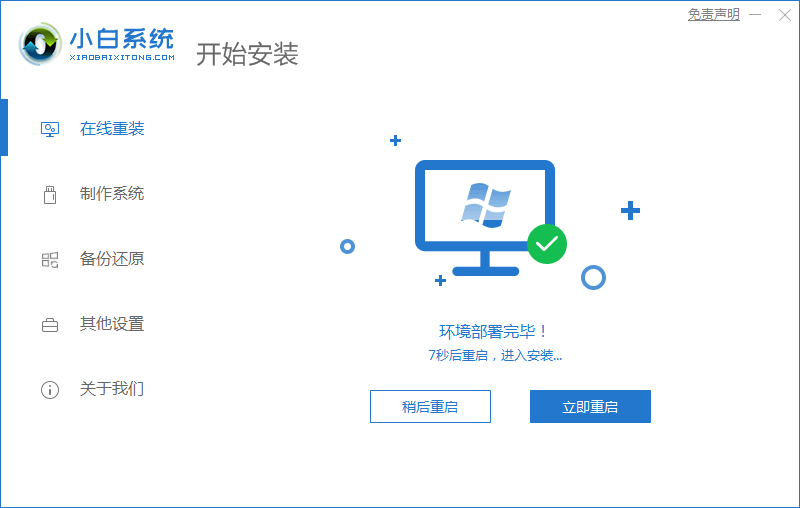
4、待系统安装环境部署完成后点击立即重启。
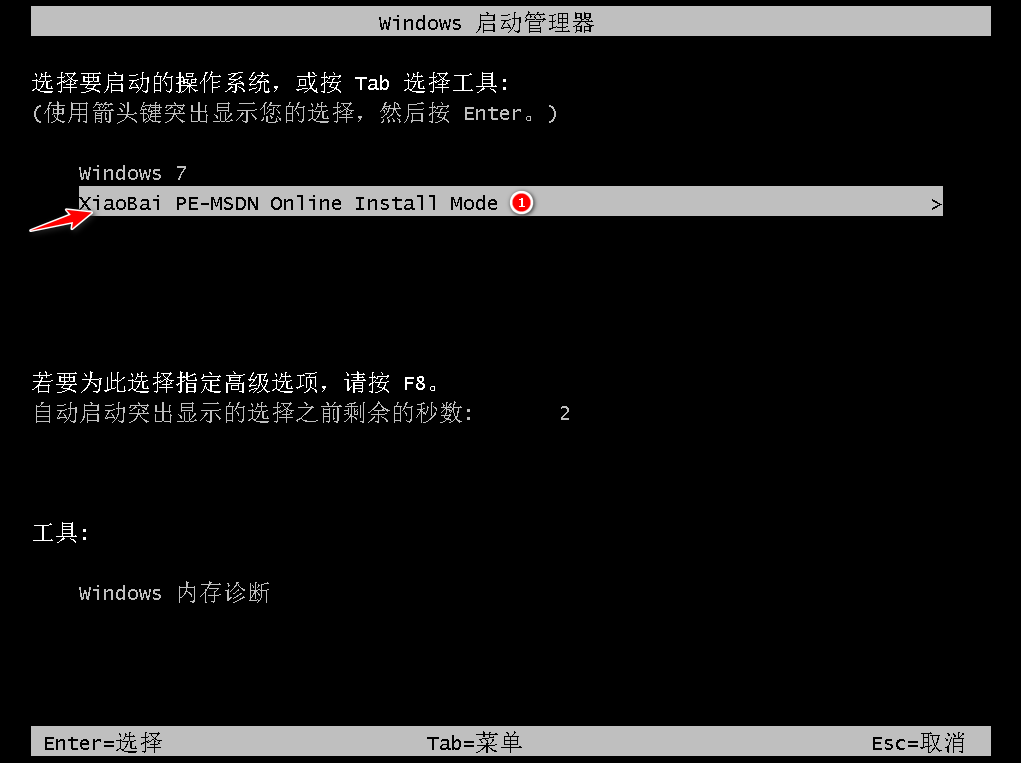
5、进入启动管理器界面,选择第二项回车。
6、等待系统自动安装。

7、进入引导修复工具界面后,在C盘前打勾,点击确定。

8、弹出提示会写PE菜单时,点击确定。

9、提示系统安装完成后点击立即重启。

10、再次进入启动管理器,选择windows7,回车。

11、进入系统桌面,完成。

方法二:u盘重装系统win7
1、下载小白系统软件后打开运行,并将u盘插入电脑,选择好u盘后,点击开始制作。
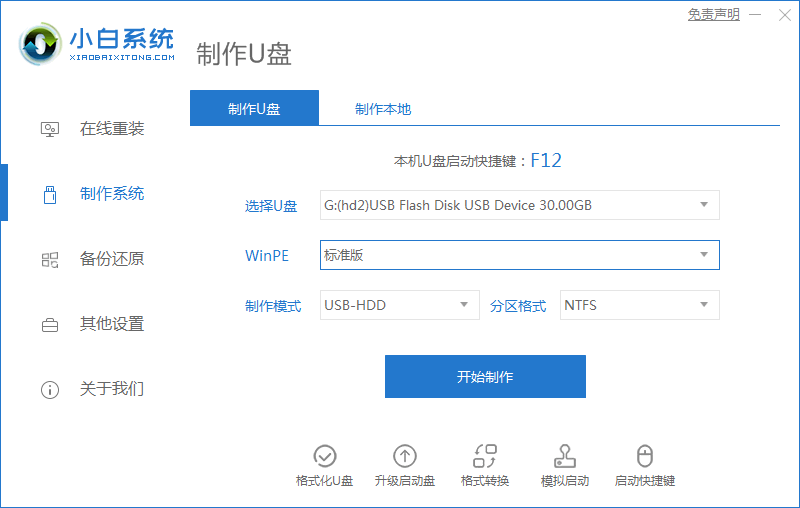
2、选择好要安装的系统,点击开始制作。
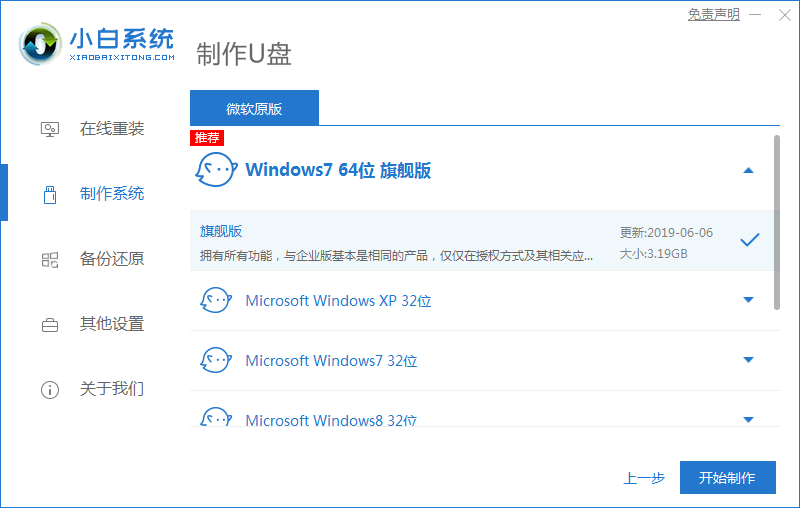
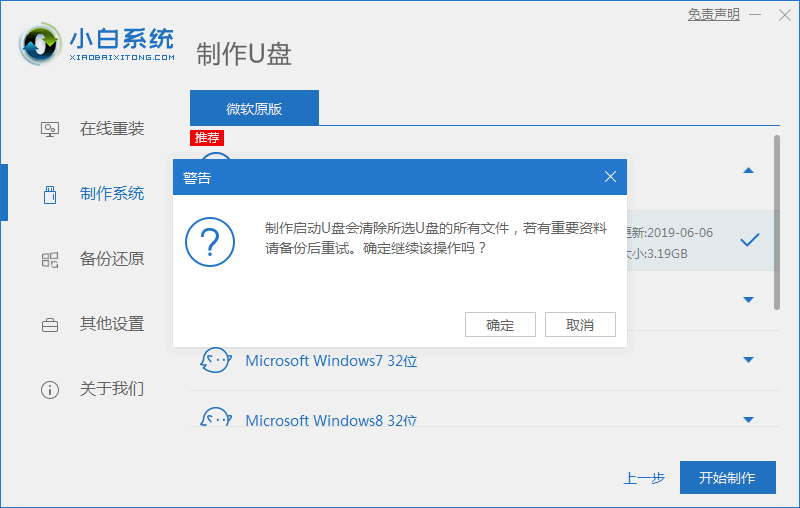
3、提示是否备份好u盘内的有用资料,确认备份好后点击确定。
4、等待下载pe系统等资源。

5、提示u盘启动盘制作完成后,点击返回。

6、开启按快捷键进入PE系统,选择usb项回车。

7、等待系统自动安装。

8、提示安装完成后点击立即重启。
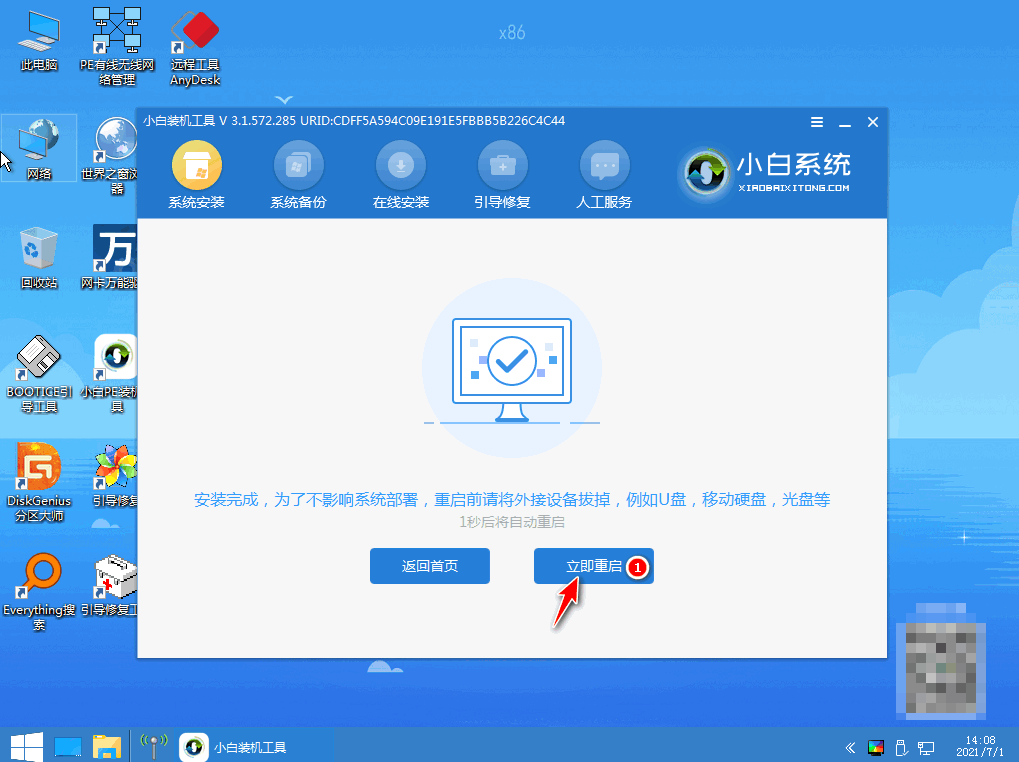
9、重启后进入win7pe系统,选择windows7,回车。

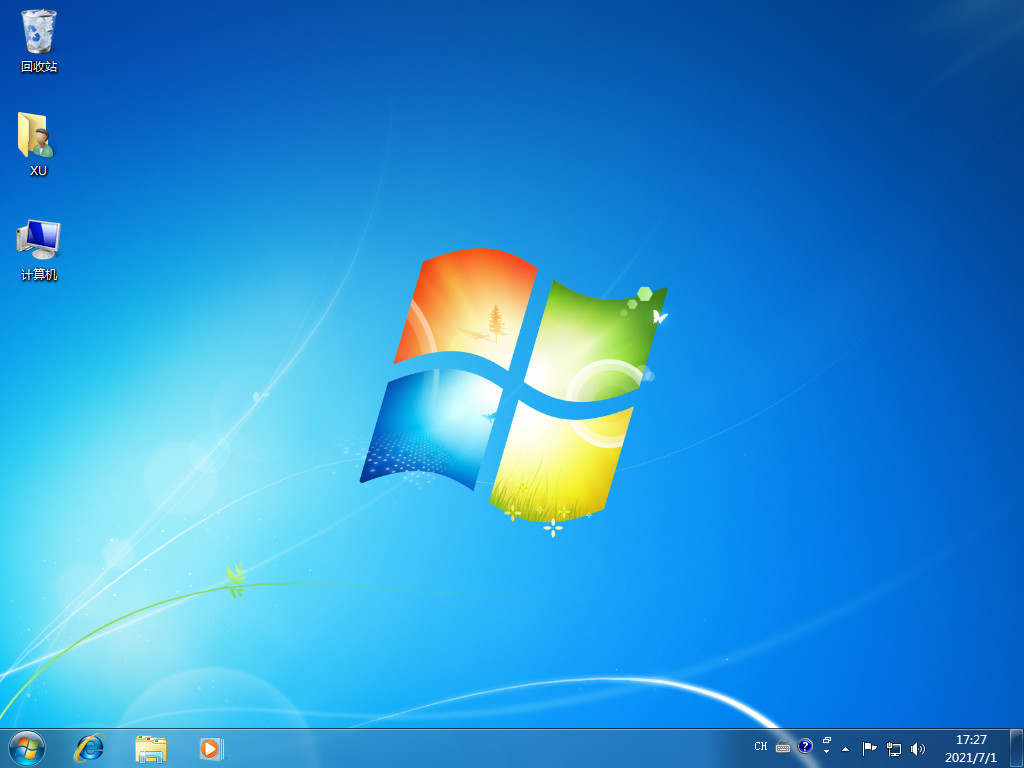
10、重启结束后进入系统桌面,完成。
方法三:自定义还原win7
1、下载安装小白软件打开后点击备份还原,在点击自定义还原选项卡。

2、选择install.wim系统,点击下一步。

3、选择要安装的系统版本,点击开始安装。

4、进入环境部署,提示环境部署完毕后点击立即重启。

5、进入启动管理器界面,选择第二项回车。

6、等待系统格式化分区自动安装。

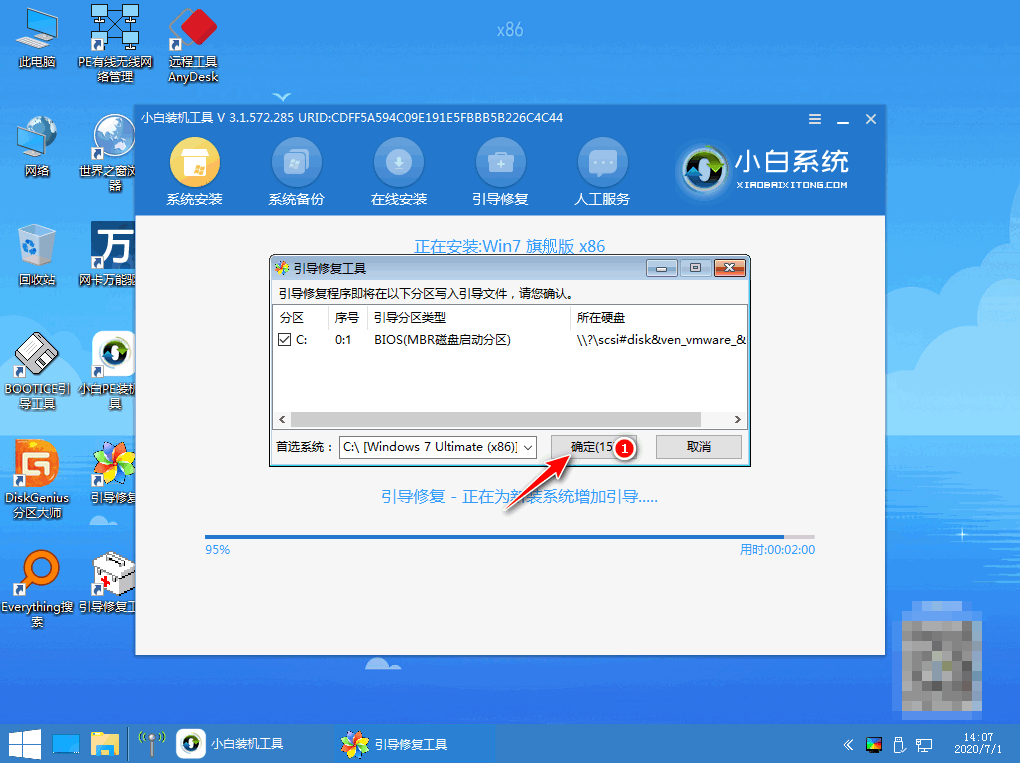
7、在引导修复工具界面点击确定。
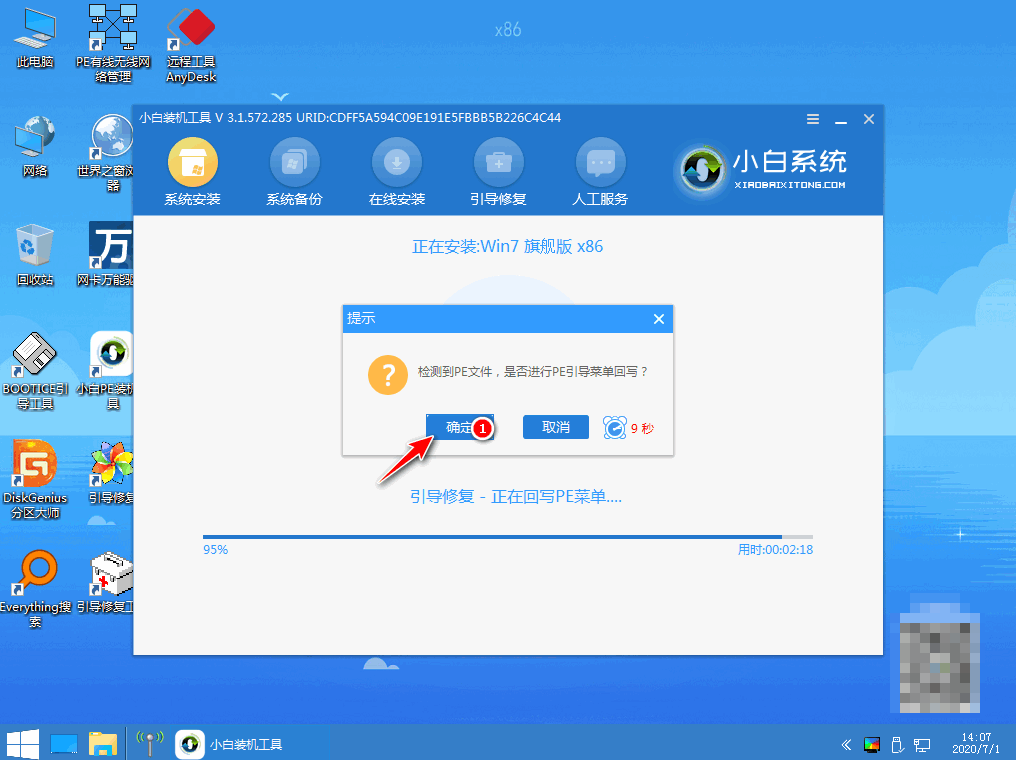
8、引导修复,确定回写PE菜单。
9、提示系统安装完成后点击立即重启。

10、进入系统桌面,安装完成。

总结:
1、一键重装win7
2、u盘重装win7
3、自定义还原win7
 有用
19
有用
19


 小白系统
小白系统


 1000
1000 1000
1000 1000
1000 1000
1000 1000
1000 1000
1000 1000
1000 1000
1000 1000
1000 1000
1000猜您喜欢
- Win7吧:探索微软经典操作系统的优势与..2024/03/13
- 联想win7笔记本重装系统,小编教你联想..2018/09/29
- win7怎么系统还原方法2022/12/25
- 电脑恢复出厂设置win7的方法..2023/12/27
- win7系统重装教程2022/10/31
- 电脑无法开机,如何重装Win7系统..2023/12/16
相关推荐
- 硬盘,小编教你移动硬盘怎么分区..2018/03/17
- 重装系统win7旗舰版的方法2023/04/29
- 重装电脑系统win7,让电脑焕然一新!..2024/01/09
- 怎样设置默认浏览器,小编教你怎样设置..2018/06/30
- U盘一键安装Win7系统教程:轻松安装稳定..2023/12/05
- 硬盘空间丢失,小编教你硬盘空间丢失怎..2018/07/18


 关注微信公众号


