win7电脑怎么恢复出厂设置教程
- 分类:Win7 教程 回答于: 2023年01月02日 14:00:37
当win7系统运行比较卡顿或者出现故障问题无法修复的时候,有不少网友想通过windows7恢复系统出厂设置解决。下面小编教大家win7电脑恢复出厂设置方法步骤。
工具/原料:
系统版本:windows7系统
品牌型号:惠普战66五代
方法/步骤:
方法一:在“系统保护”点击系统还原
1.打开开始菜单栏,选择“控制面板”;

2.在控制面板内,点击“系统”;
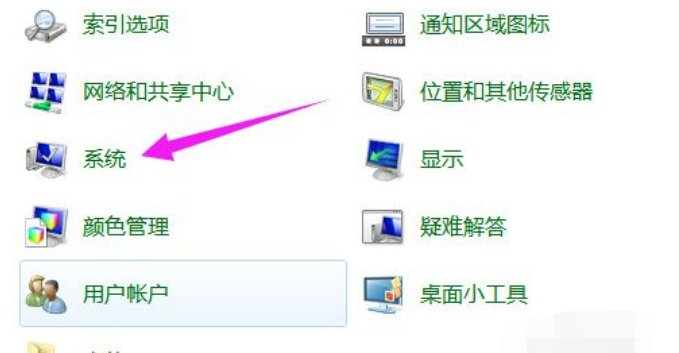
3.点击“系统保护”;

4.再点击“系统还原”;
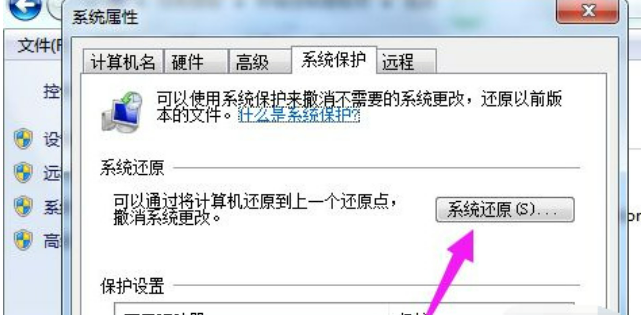
5.还原点一般默认都是出厂设置,点击“下一步”;

6.点击“还原”,系统就会进入恢复出厂设置流程。

方法二:输入“sysprep”命令运行
1.在键盘上同时按下“win”键和“R”键打开运行;
2.输入“sysprep”命令后点击确定;
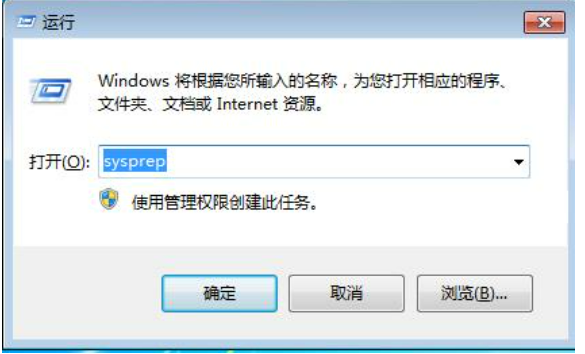
3.双击其中的“sysprep.exe”;
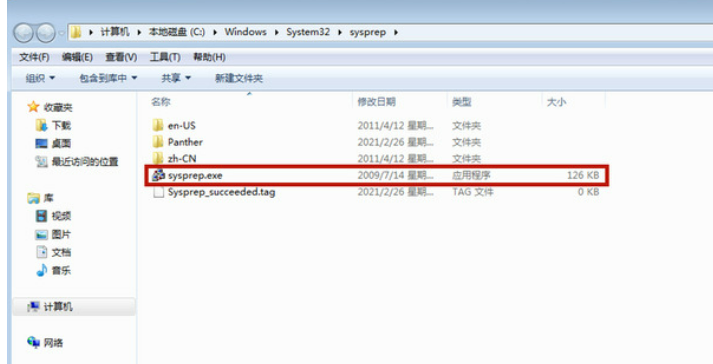
4.选择“进入系统全新体验(OOBE)”,同时选中下方的“通用”复选框,再选择“关机选项”为“重新启动”,单击“确定”;
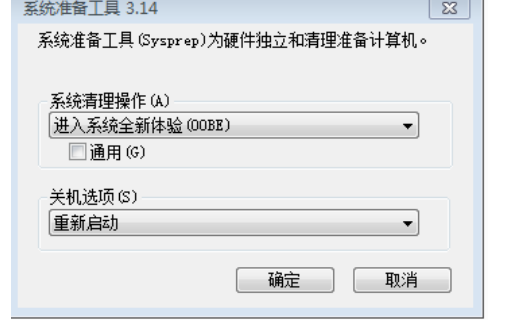
5.等待系统完成恢复出厂设置即可。
总结:
方法一:
1.打开开始菜单栏,选择“控制面板”;
2.在控制面板内,点击“系统”;
3.点击“系统保护”;
4.再点击“系统还原”。
方法二:
输入“sysprep”命令运行。
 有用
8
有用
8


 小白系统
小白系统


 1000
1000 1000
1000 1000
1000 1000
1000 1000
1000 1000
1000 1000
1000 1000
1000 1000
1000 1000
1000猜您喜欢
- 小编教你Ghost windows7系统32位升级6..2017/06/21
- searchindexer,小编教你怎么彻底禁用s..2018/09/04
- win7怎么修复计算机2023/01/25
- 详细分析电脑win7升级win10免费吗..2022/02/09
- 联想电脑win7系统怎么分硬盘..2021/03/19
- 小编详解win7如何调整图标大小..2019/01/21
相关推荐
- 笔记本电脑系统一键重装win7如何操作..2023/03/02
- 机械师电脑一键重装系统xp教程..2019/11/06
- windows7旗舰版重装系统黑屏怎么解决..2021/10/09
- 韩博士win7重装系统步骤2023/04/17
- win7系统安装,小编教你电脑怎么使用U..2017/12/21
- 新手如何装系统win72022/09/01


 关注微信公众号


