win11系统分区加密的方法
- 分类:Win11 教程 回答于: 2022年06月30日 16:38:08
win11系统发布到现在也过去好几个月了,现在win11系统也越来越完善了,我们在使用电脑的时候经常会将重要的文件存储起来,甚至win11还可以实行分区加密,但还有很多用户不知道win11系统分区加密,下面小编就给大家带来win11系统分区加密的方法.一起来看看吧。
工具/原料:
1、操作系统: windows11
2、品牌型号:联想小新笔记本电脑
3、软件版本:无
Win11系统分区加密的方法
1、在系统中打开系统中的“控制面板”。

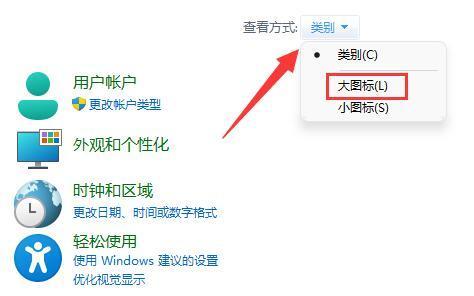
2、接着将右上角查看方式改为“大图标”。
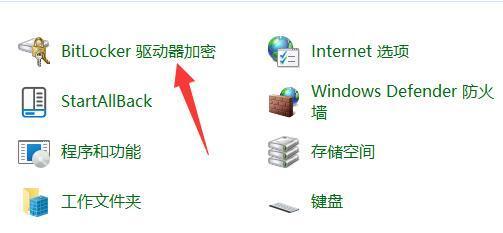
3、然后打开其中的“bitlocker驱动器加密”。
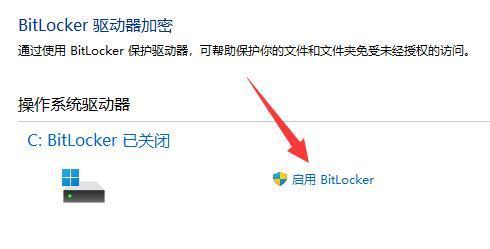
4、打开后,在下方找到想要加密的分区,点击“启用bitlocker”。
5、接着设置解锁密码。
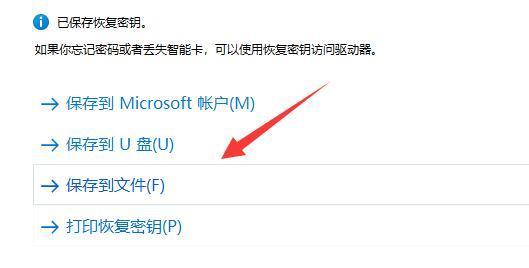
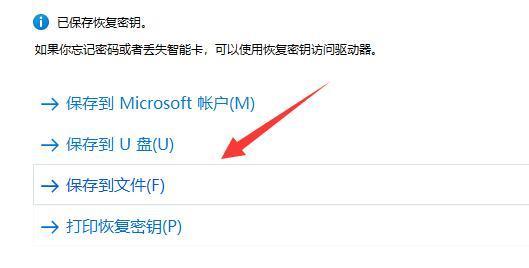
6、设置完成后保存密码避免遗忘。
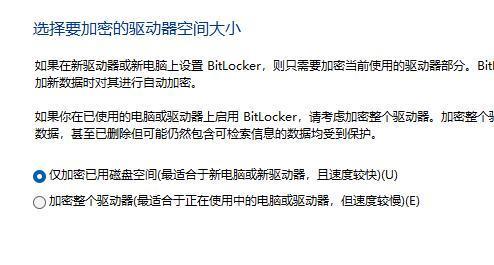
7、接下去就是选择加密的大小,默认即可。
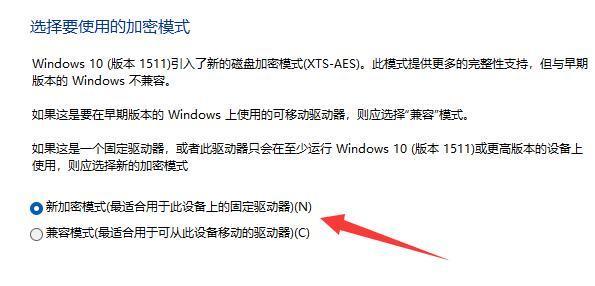
8、再选择加密模式,同样保持默认。
9、最后点击“开始加密”,等待加密完成就可以了。(分区越大加密速度越慢)

总结
控制面板--bitlocker驱动器加密--启用bitlocker--设置密码--默认加密大小---开始加密
以上就是win11系统分区加密方法的详细教程,希望能帮助到你们。
 有用
76
有用
76


 小白系统
小白系统


 1000
1000 1000
1000 1000
1000 1000
1000 1000
1000 1000
1000 1000
1000 1000
1000 1000
1000 0
0猜您喜欢
- 简述提示升级win11怎么关闭2023/04/25
- 自己在家怎么重装系统win112023/04/03
- Win11 正式版的使用体验如何?..2024/08/22
- win11摄像头打开后出现黑屏问题解决方..2023/12/29
- macbookpro安装win11教程-小白装机教..2022/03/09
- win11任务栏空白无响应怎么办..2022/06/29
相关推荐
- 华硕笔记本如何重装系统win11..2022/07/13
- 如何将Win11锁屏壁纸设置为桌面壁纸?快..2024/10/08
- Win11关闭7G预留空间2024/01/30
- win11摄像头怎么打开2021/12/13
- win11如何启动安全模式教程2021/10/06
- 如何取消Win11开机自动启动软件..2023/12/18


 关注微信公众号


