u盘重装系统win10教程
- 分类:Win10 教程 回答于: 2022年11月17日 08:44:00
win10系统是现今微软主流的操作系统,使用的人也很多,有不少人都有重装win10系统的需求。有网友想了解借助U盘怎么重装系统win10,下面给大家演示u盘重装系统win10步骤方法。
工具/原料:
系统版本:windows10系统
品牌型号:惠普战66五代
软件版本:老毛桃u盘启动装机工具
方法/步骤:
通过下载安装老毛桃u盘启动装机工具完成重装:
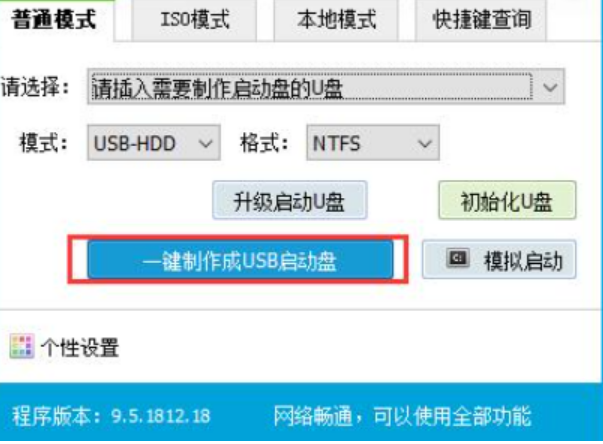
1、下载安装老毛桃u盘启动装机工具打开。插入U盘,可以看到如图所示U盘winpe系统制作界面。

2、在普通模式下“请选择”中选择自身U盘设备名称。

3、接着选择“一键制作成USB启动盘”按钮制作u盘启动盘,无需操作。

4、等待软件自动制作完成后,将镜像复制到U盘根目录或电脑其他分区中(除C盘外),然后拔除u盘启动盘插入需要重装的电脑。

5、在pe选择界面选择“【1】启动Win10 X64PE(2G以上内存)”后回车进入。

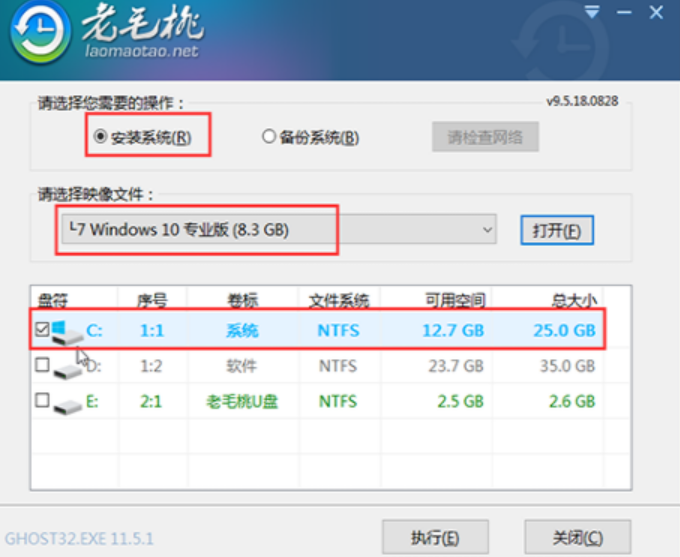
6、接着进入pe界面后就可以打开老毛桃一键装机工具,选择需要安装的win10系统镜像安装到系统盘c盘即可。

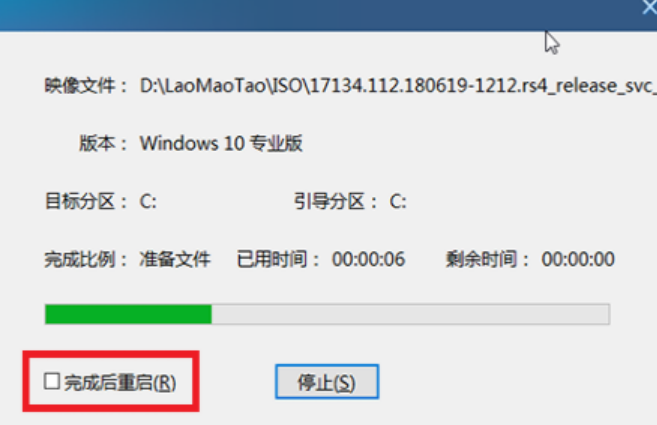
7、等待安装完成重启电脑。

8、重启后等待进入到新的系统桌面。

参考内容:想要了解更多关于重装的文章可以点击重装教程栏目了解更多详情。
总结:
1、下载安装老毛桃u盘启动装机工具打开。
2、等待软件自动制作完成后,将镜像复制到U盘根目录或电脑其他分区中(除C盘外),然后拔除u盘启动盘插入需要重装的电脑。
3、接着进入pe界面后就可以打开老毛桃一键装机工具,选择需要安装的win10系统镜像安装到系统盘c盘即可。
 有用
26
有用
26


 小白系统
小白系统


 1000
1000 1000
1000 1000
1000 1000
1000 1000
1000 1000
1000 1000
1000 1000
1000 1000
1000 1000
1000猜您喜欢
- 电脑系统怎么重装win10家庭版..2022/01/11
- Win10误删除文件恢复指南:快速找回丢失..2024/08/18
- win10永久激活方法大全2023/12/18
- Win10升级Win11,全新体验等你来!..2024/01/08
- Win10重装系统教程:简单易懂的操作指南..2024/01/10
- win7升级win10文件还在吗2021/11/11
相关推荐
- 电脑重新装系统win10的详细步骤..2024/01/12
- win10怎么恢复出厂设置2022/09/15
- 小编教你win10故障转储如何消除..2021/03/25
- windows10官网打不开怎么办2023/01/27
- 如何重装win10系统?win10重装教程..2021/02/20
- win10账号激活的方法是什么2022/12/21


 关注微信公众号


