u盘启动盘制作步骤
- 分类:U盘教程 回答于: 2022年11月20日 09:41:00
U盘是我们在工作以及生活中的好帮手,能储存以及传递数据文件,重要的是,U盘还可以制作成启动盘,主要用来修复以及重装系统的,在电脑操作系统无法进入或崩溃时进行补救操作,可谓是作用极其之大,下面小编就为大家介绍u盘启动盘制作步骤,一起来看看吧。
工具/原料:
系统版本:win7旗舰版
品牌型号:华为MateBook X
软件版本:咔咔装机 v3.1.329.319
方法/步骤:
u盘启动盘制作步骤:
1、下载安装咔咔装机软件并打开,选择U盘重装系统。

2、将U盘插入电脑上,选择U盘设备,点击开始制作。
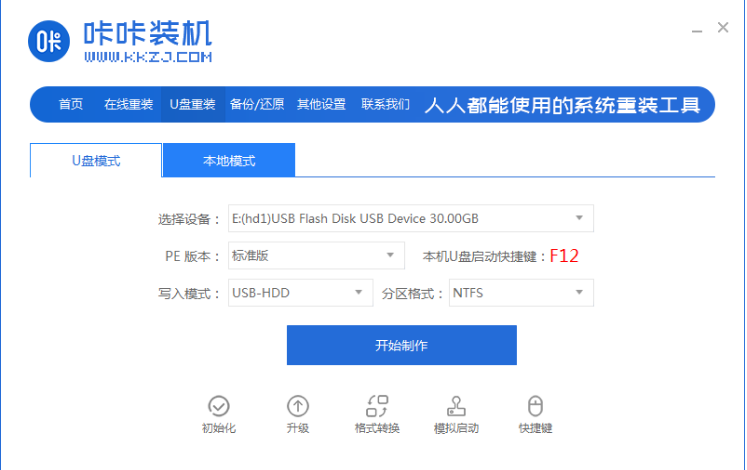
3、选择需要下载的系统,点击开始制作。

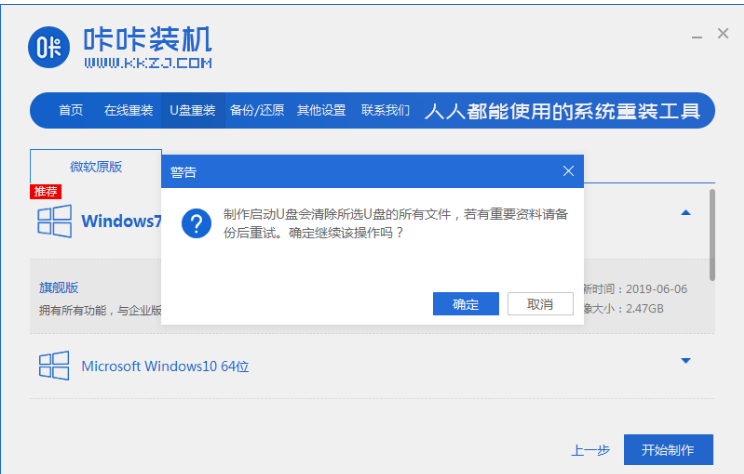
4、确保U盘内没有重要文件资料,或者已备份过文件资料,点击确定。
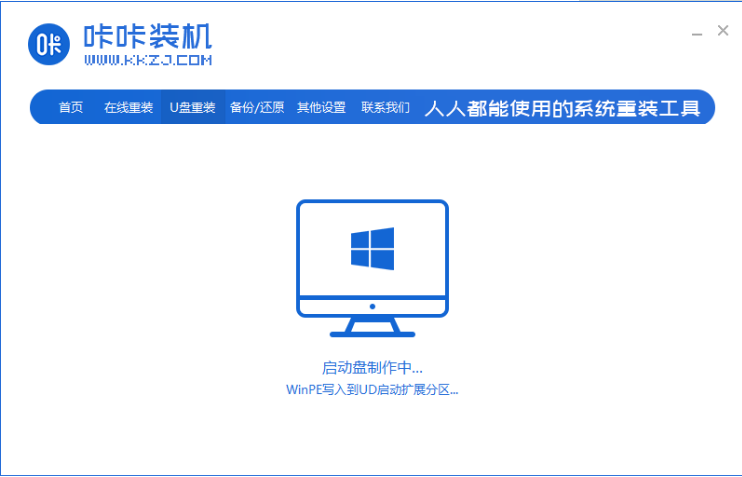
5、耐心等待系统下载系统弄镜像等资料,自动制作u盘启动盘等等。

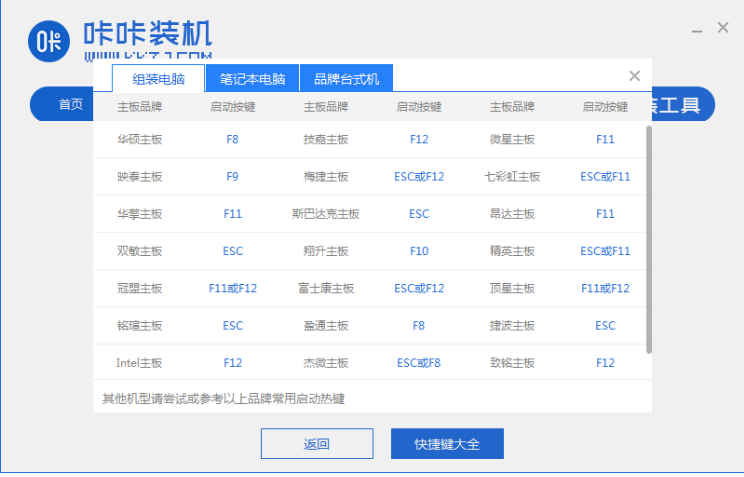
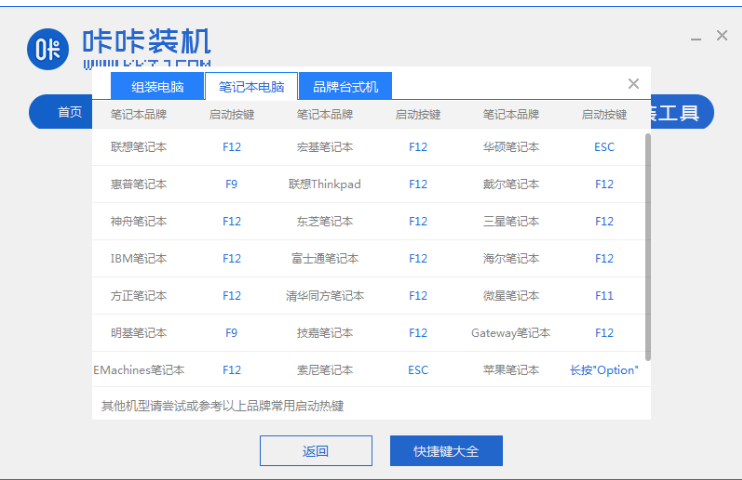
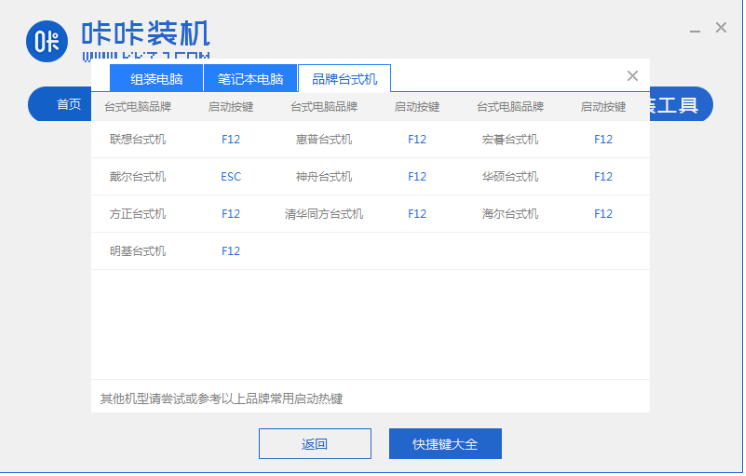
6、然后U盘启动盘制作成功,点击预览,记住自己电脑的启动快捷键即可。

总结:
1、打开咔咔装机软件,选择U盘重装系统。
2、将U盘插入电脑选择U盘设备,选择系统,点击开始制作。
3、等待系统下载系统弄镜像等等资料。
4、U盘启动盘制作成功。
 有用
26
有用
26


 小白系统
小白系统


 1000
1000 1000
1000 1000
1000 1000
1000 1000
1000 1000
1000 1000
1000 1000
1000 1000
1000 1000
1000猜您喜欢
- u盘分区fat32和ntfs的区别是什么..2021/12/04
- U盘重装系统的操作指南2023/12/11
- 教你如何BIOS设置U盘启动设置的方法..2022/11/09
- 联想U盘重装系统步骤详解:快速解决系统..2024/10/06
- u盘启动盘装系统步骤图解2022/04/24
- windows无法完成格式化u盘2021/12/10
相关推荐
- 如何用u盘安装win7系统2022/05/08
- 教你如何使用u盘安装Linux系统..2018/11/16
- U盘重装Windows系统:简单操作指南..2024/02/21
- 教大家怎么用u盘重装系统的方法..2021/09/04
- 如何使用U盘制作系统盘:详细步骤!..2023/11/14
- 小白演示联想bios设置u盘启动方法..2021/11/07


 关注微信公众号


