u盘装系统教程win7步骤讲解
- 分类:U盘教程 回答于: 2022年03月26日 08:39:00
u盘装系统教程win7步骤讲解,U盘重装系统是一个非常好用的重装系统方法,通过该方法可以修复很多电脑系统故障问题.有网友想用u盘重装win7,不知道具体如何重装win7系统。下面就教下大家u盘装系统教程win7步骤讲解。
工具/原料:笔记本电脑
系统版本:windows7系统
品牌型号:戴尔
软件版本:小白一键重装系统
u盘装系统教程win7步骤讲解:
1.首先我们准备一个u盘接入一个联网电脑,打开小白一键重装系统软件。(这里以Windows7 64位旗舰版举例)
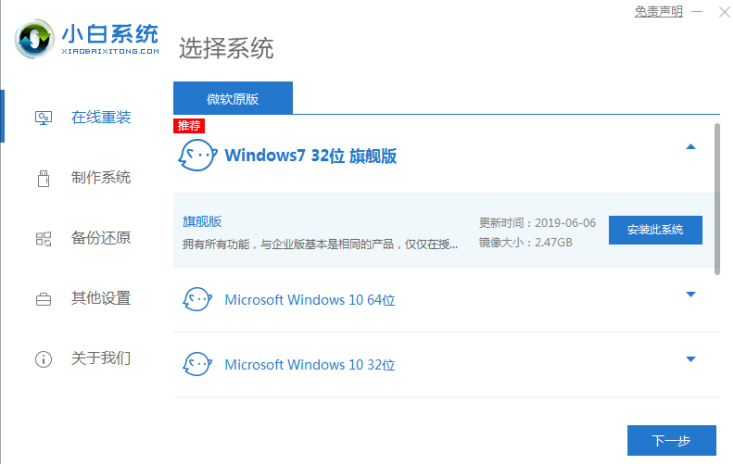
2、接着我们点击制作系统选项,点击开始制作。

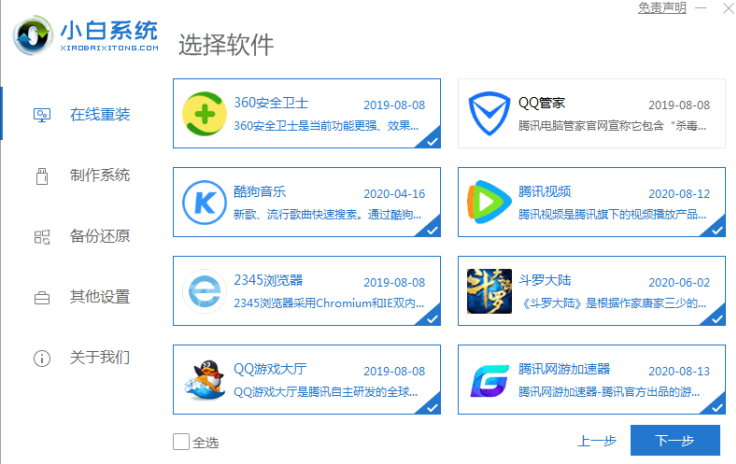
3、选择我们需要的软件点击下一步。
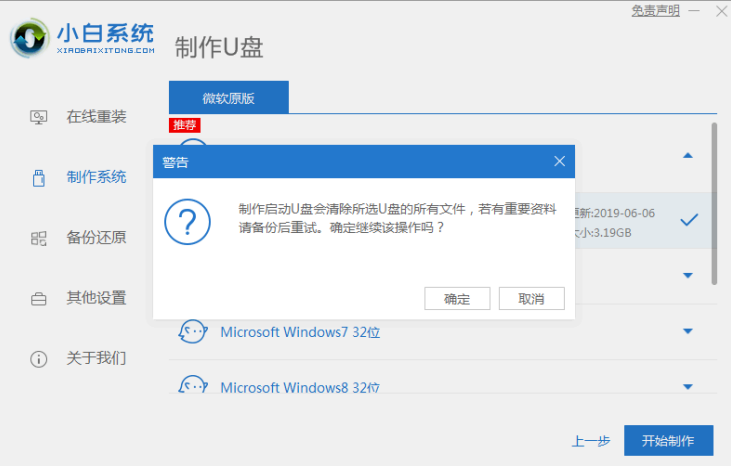
4、等待系统文件下载,制作U盘启动盘会格式化U盘,所以请提前备份好U盘的资料。
5、制作完成后,将制作好的u盘拔出即可。

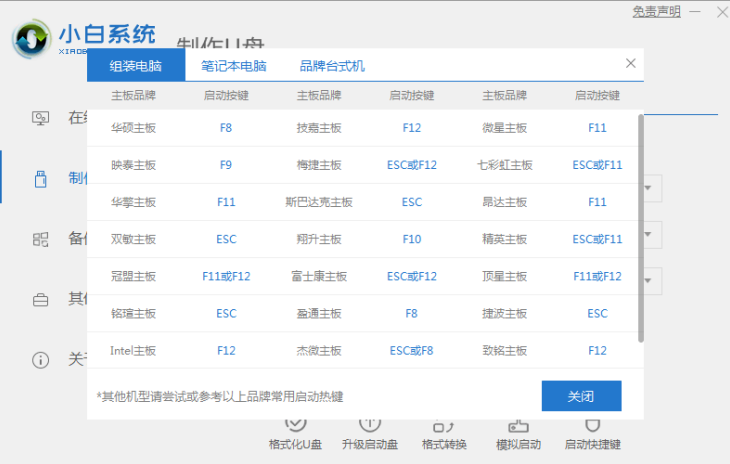
U盘启动快捷键
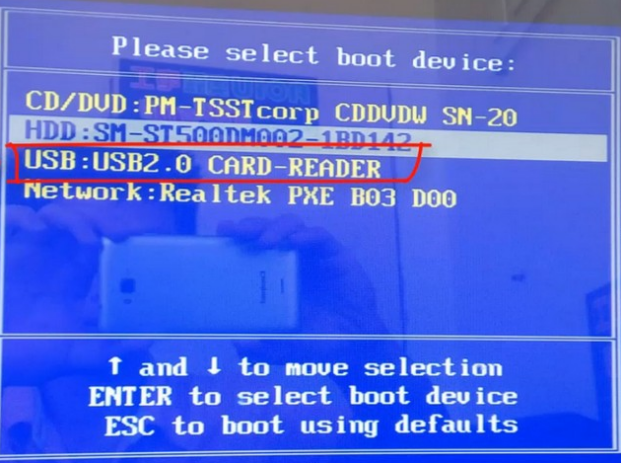
6.重启电脑后按U盘启动热键(U盘启动热键在下面的“热键按键”板块里),选择U盘启动。这里是按 F12 进入的快速引导菜单。有些新电脑重装win7系统需要进入bios进行修改设置,一般预安装的是win10系统,具体操作方法可以参考http://www.kkzj.com/
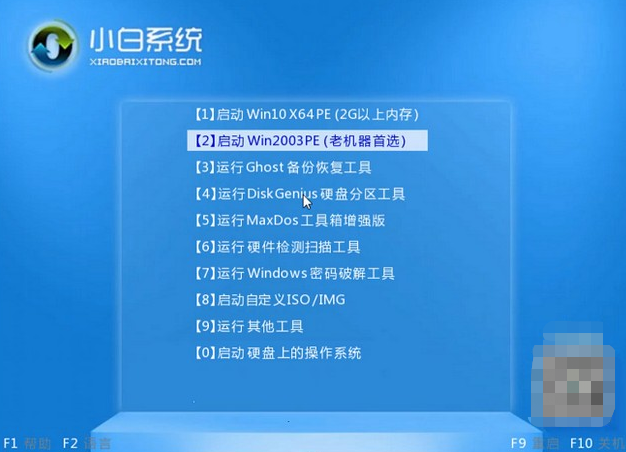
7.接着我们进入到pe系统选择,新电脑选择第一个PE进入,老电脑选择第二个PE进入。
8、接着我们进入到pe系统,点击自己要安装的系统后面的安装按钮。

9、接着我们等待安装完成后点击立即重启按钮。
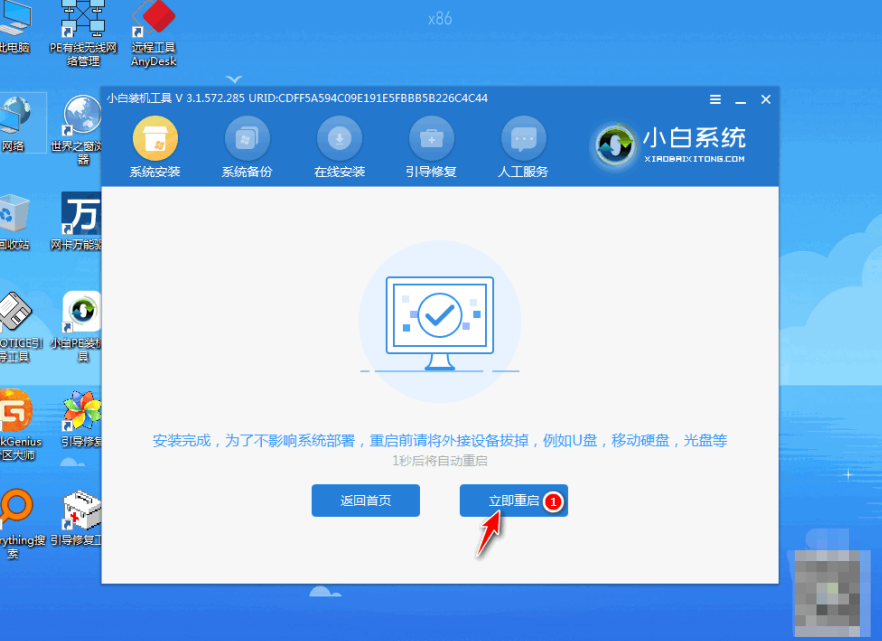
10、等待进入系统桌面后,就代表系统已经安装好了可以使用啦。

注意事项:
1、先拷贝好C盘和桌面的重要文件,以免数据丢失。
2、一般3G及以下内存选择32位(x86)系统,4G及以上内存选择64位(x64)系统。
3、开机后插入驱动光盘,安装驱动,否则可能无法上网。此方法能安装WIN7、WIN8系统。
总结
以上就是关于u盘装系统教程win7步骤讲解的全部文章内容,看完了小编上述提供的u盘重装电脑系统教程之后,大家还觉得拿u盘电脑重装系统很难吗?不难是不是,那就都来一起学习一下拿u盘电脑重装系统步骤吧,现在u盘重装电脑系统可是非常流行的,希望以上内容可以帮到大家。
 有用
41
有用
41


 小白系统
小白系统


 1000
1000 1000
1000 1000
1000 1000
1000 1000
1000 1000
1000 1000
1000 1000
1000 1000
1000 1000
1000猜您喜欢
- 怎么用u盘安装xp详细教程2021/05/13
- 华硕主板用U盘重装系统2022/10/06
- u盘操作系统win7重装教程2022/12/19
- U盘启动大师:轻松实现U盘启动,让你的电..2023/12/23
- U盘装系统:简单操作教程2024/02/22
- u盘文件恢复方法2020/03/18
相关推荐
- 小编教你uefi如何引导系统2017/09/12
- 重新使用U盘装系统的方法2024/03/15
- 2020年大白菜超级u盘启动制作工具最新..2020/06/29
- 金士顿U盘低格工具:快速解决U盘故障,恢..2024/03/12
- U盘数据格式化后是否可恢复?..2024/08/24
- 深度解析U盘之家:专家分享U盘维护与优..2024/06/04


 关注微信公众号


