u盘做系统详细步骤图解
- 分类:U盘教程 回答于: 2022年03月18日 09:18:00
u盘做系统详细步骤图解,现在很多电脑都不再配置光驱,所以这些电脑就不能用光盘做系统,取而代之的是体积更加小巧的U盘,电脑都有usb接口,这样一来用U盘做电脑系统就非常方便,部分新手用户还不会用U盘做电脑系统,其实U盘做电脑系统步骤并不难,制作好U盘启动盘之后,再设置U盘启动,就可以做系统,下面小编跟大家介绍u盘做系统详细步骤图解。
工具/原料:笔记本电脑
系统版本:windows系统
品牌型号:联想
软件版本:小白一键重装系统
u盘做系统详细步骤图解
1、双击打开小白一键重装系统工具,制作U盘启动工具前请关闭电脑上面的杀毒软件哦,避免影响制作效果,下图所示:

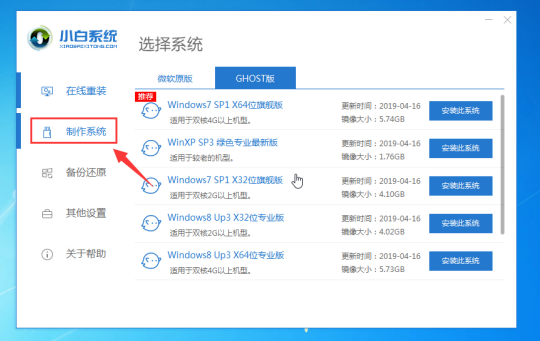
3、出现的界面,我们选择左侧的制作系统栏目,然后下图所示:
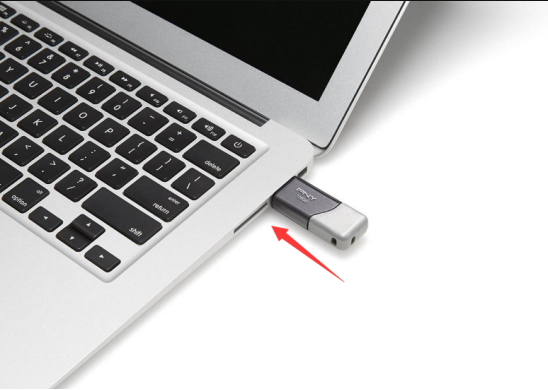
4、这个时候我们插入U盘,记得U盘的资料请先单独备份哦,会删除掉的哦,下图所示:
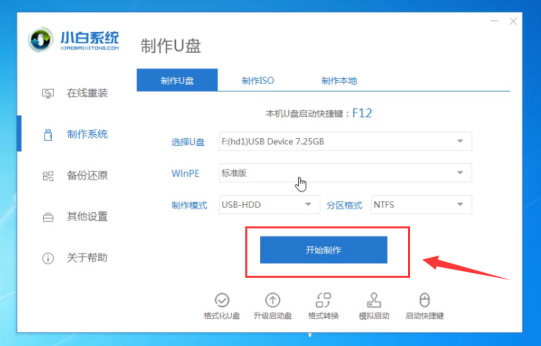
5、选择制作U盘,然后点击 开始制作,下图所示:
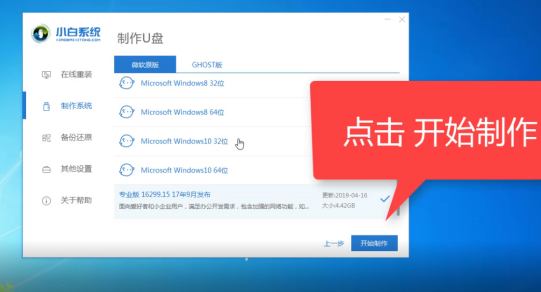
6、选择需要安装的系统镜像,我们选择win7 64位 专业版系统,然后点击开始制作,下图所示:
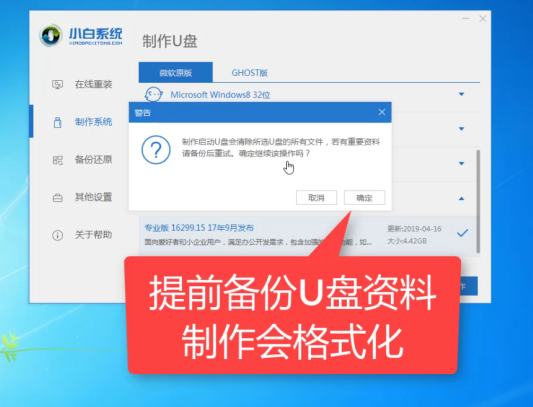
7、弹出警告,确定后点击格式化U盘制作工具,下图所示:
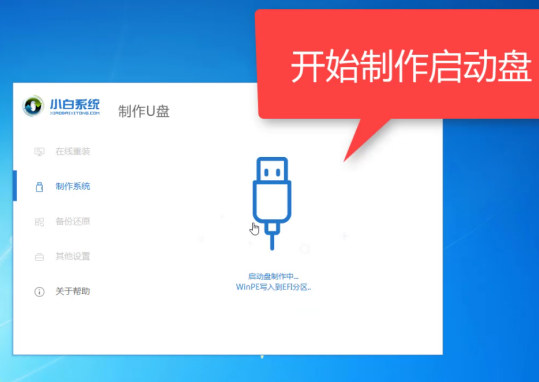
8、接着开始下载系统包和制作工具,期间不建议操作电脑以及拔插U盘哦,下图:
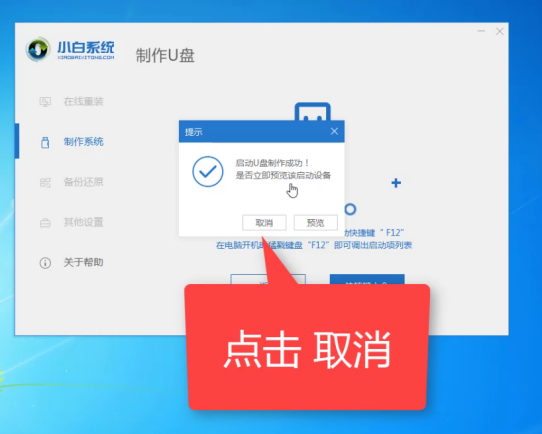
9、最后会弹出提示制作成功,我们点击取消,下图所示:
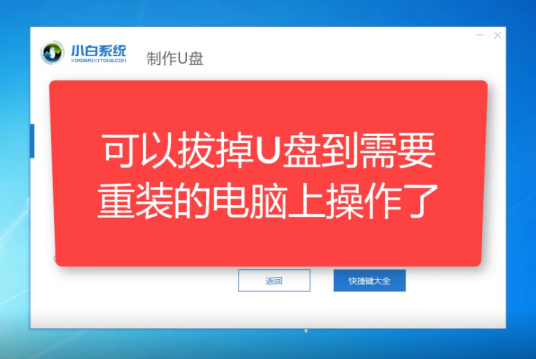
10、接着可以退出U盘,插到需要重装系统的笔记本上面操作哦,下图所示:
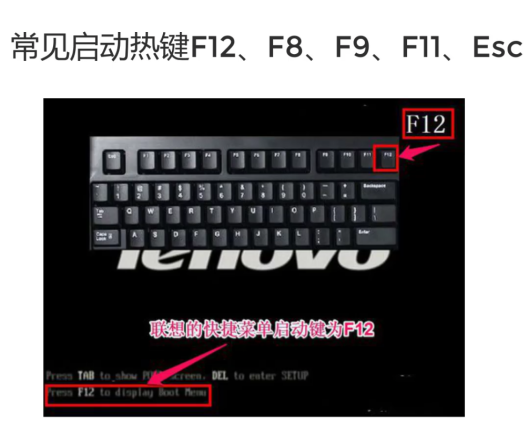
11、重启电脑,马上按启动热键(快速间断的按)F12,下图所示:
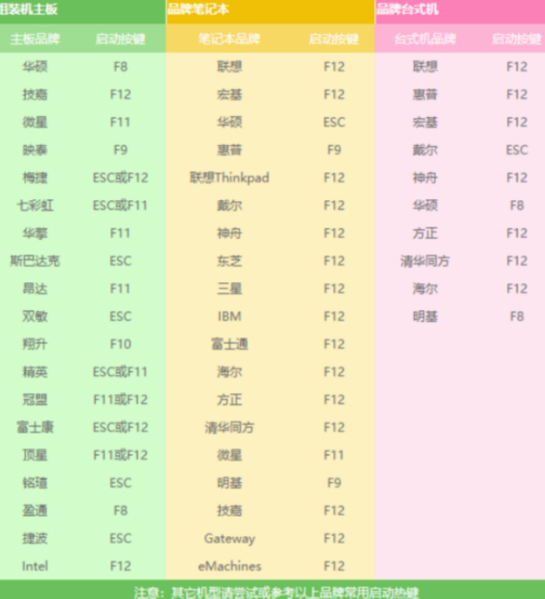
12、请参考以下启动热键大全图,下图:
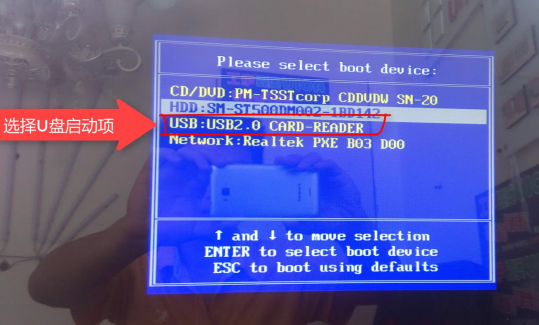
13、接着进入启动菜单,选择 USB开头或者U盘品牌名称的启动选项,方向键上下选择按回车键确定,参考下图:
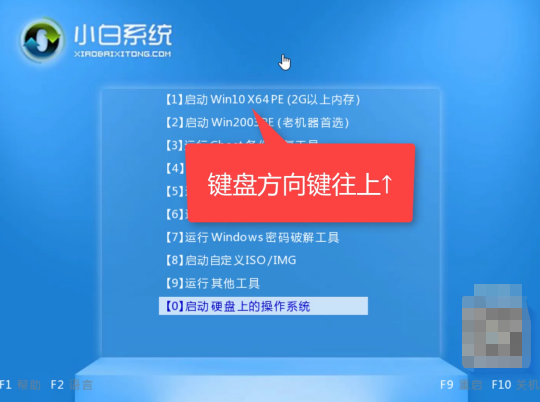
14、到了小白系统界面,我们选择【1】启动win10x64位PE,然后按回车键进去,下图所示:
15、加载完成后进入PE系统,自动弹出小白装机工具,我们选择好系统,点击安装,下图所示:
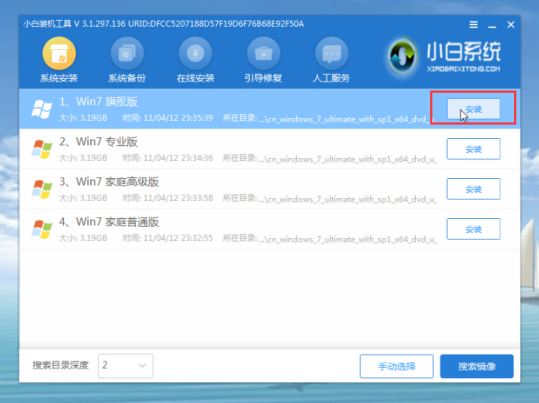
16、选择安装的系统盘C,然后点击开始安装,下图所示:
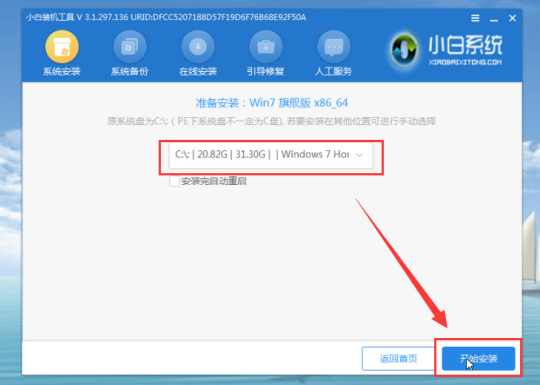
17、出现的提示,我们点击确定,下图所示:
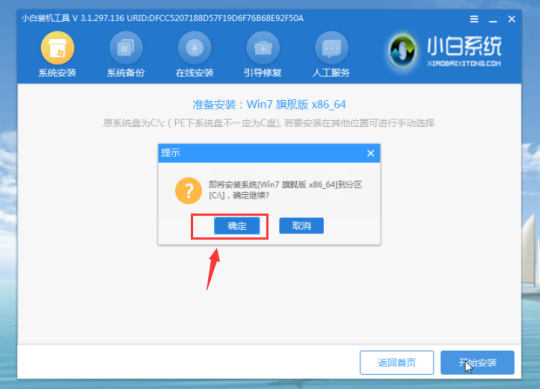
18、正式开始安装系统,请您耐心等候哦,不要操作电脑哦,下图所示:
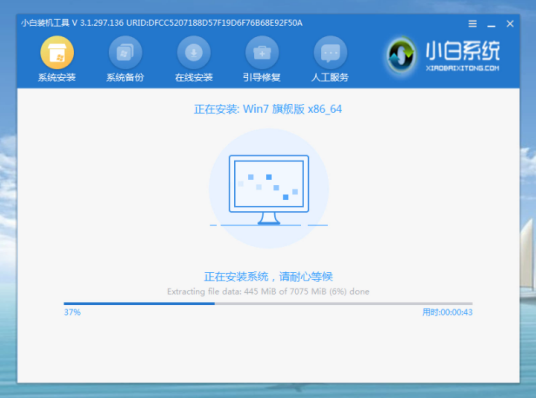
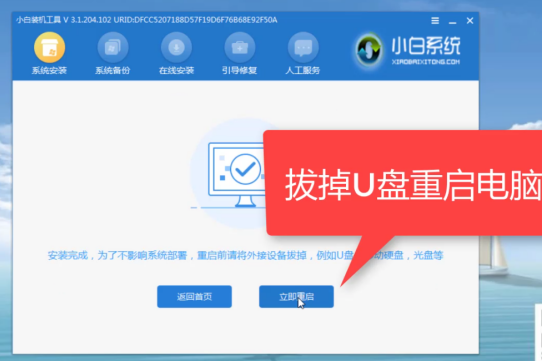
19、安装完成后,我拔掉U盘点击立即重启,下图所示:
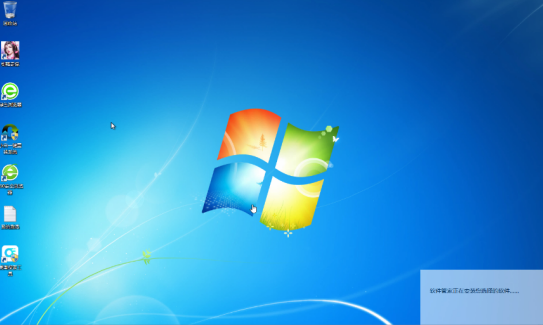
20、接着开始正式加载系统,期间会多次自动重启,然后进入系统就安装成功了,下图所示:
注意事项:
1、如果是新电脑或当前系统无法使用,需要借助另一台可用电脑制作启动U盘。
2、一般3G及以下内存选择32位(x86)系统,4G及以上内存选择64位(x64)系统。
3、重装前请关闭电脑杀毒软件,以及备份电脑上的所有数据以免丢失。
总结
关于拿u盘做系统详细步骤图解的全部文章内容介绍到此就结束了,看完了小编上述提供的u盘重装电脑系统教程之后,大家还觉得拿u盘电脑重装系统很难吗?不难是不是,那就都来一起学习一下拿u盘电脑重装系统步骤吧,现在u盘重装电脑系统可是非常流行的,希望以上内容能帮到大家。
 有用
26
有用
26


 小白系统
小白系统


 1000
1000 1000
1000 1000
1000 1000
1000 1000
1000 1000
1000 1000
1000 1000
1000 1000
1000 1000
1000猜您喜欢
- 细说u盘不能格式化怎么办2019/01/18
- 系统安装步骤,小编教你U盘安装win10系..2017/12/21
- 金士顿U盘写保护功能:保护您的数据安全..2023/12/27
- win系统U盘价格多少?2024/01/29
- U盘装系统教程:轻松实现一键装机!..2023/10/25
- 小编教你怎么将U盘数据恢复..2017/08/23
相关推荐
- U盘启动大师:轻松实现U盘启动,让你的电..2023/12/23
- U盘电脑重装系统,轻松解决电脑疑难杂症..2023/11/01
- u盘映像总裁怎么重装系统win7..2023/04/14
- u盘数据恢复软件免费版介绍..2023/02/09
- 电脑系统坏了怎么用U盘重装系统..2022/06/06
- win7 u盘安装操作教程2017/10/18


 关注微信公众号


