小白一键重装系统u盘教程
- 分类:U盘教程 回答于: 2020年08月06日 11:54:00
小白一键重装系统u盘教程小编已经分享在下面了,想要使用U盘装系统的小伙伴赶紧过来看看吧!希望能够帮助到你!
工具/原料:
系统版本:windows 7
品牌型号: 联想(Lenovo)天逸510S
软件版本:小白一键重装系统软件+8g的U盘
方法/步骤:
1.如下图所示,关闭电脑杀毒工具,打开小白一键重装系统软件

2.在制作U盘启动工具之前,耐心等待检测安装环境。

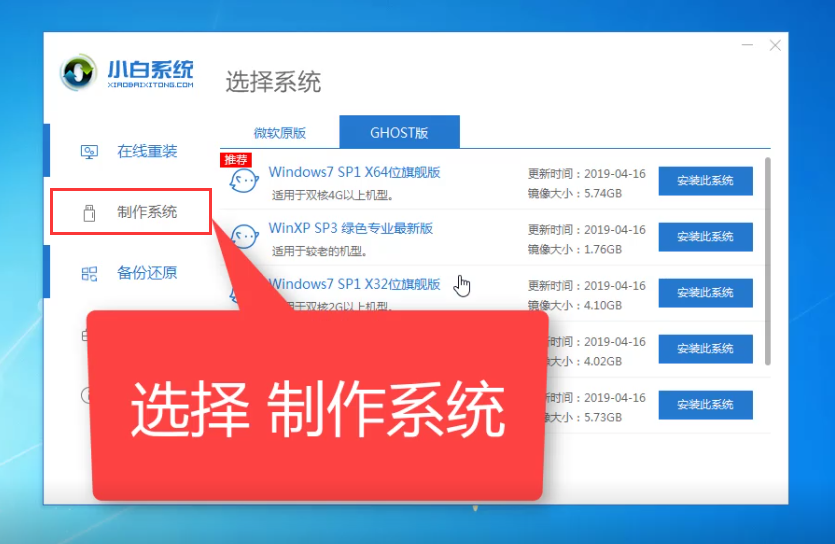
3.在出现的界面中,我们选择左侧的[制作系统]。
4.此时,我们插入U盘,请记住您需要单独备份U盘上的数据,否则将对其进行格式化。

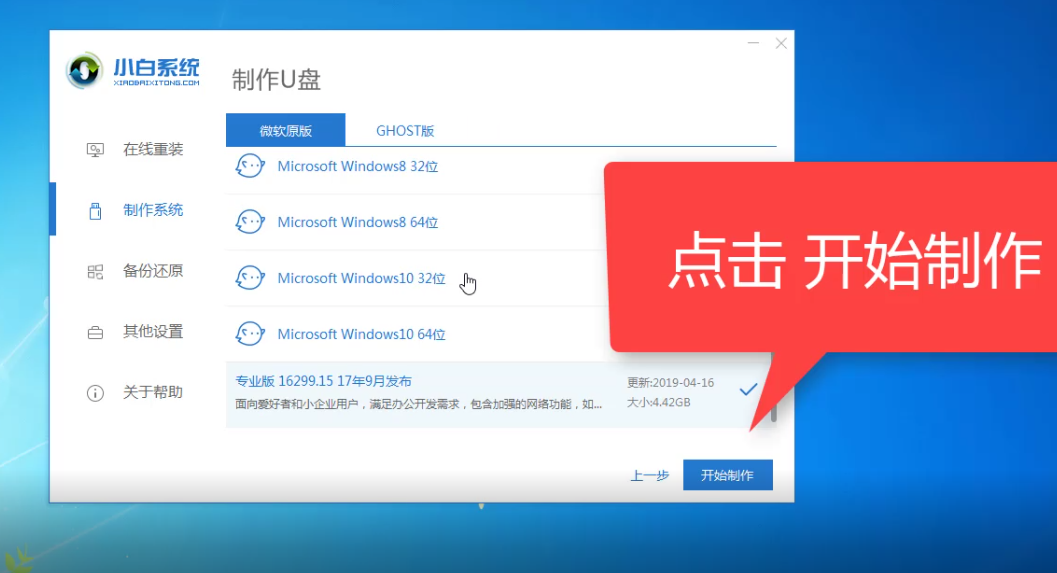
5.选择制作一个U盘,然后单击【开始制作】。

6.选择需要安装的系统镜像,我们选择win10 64位系统,然后单击以【开始制作】。
7.单击“确定”格式化U盘。

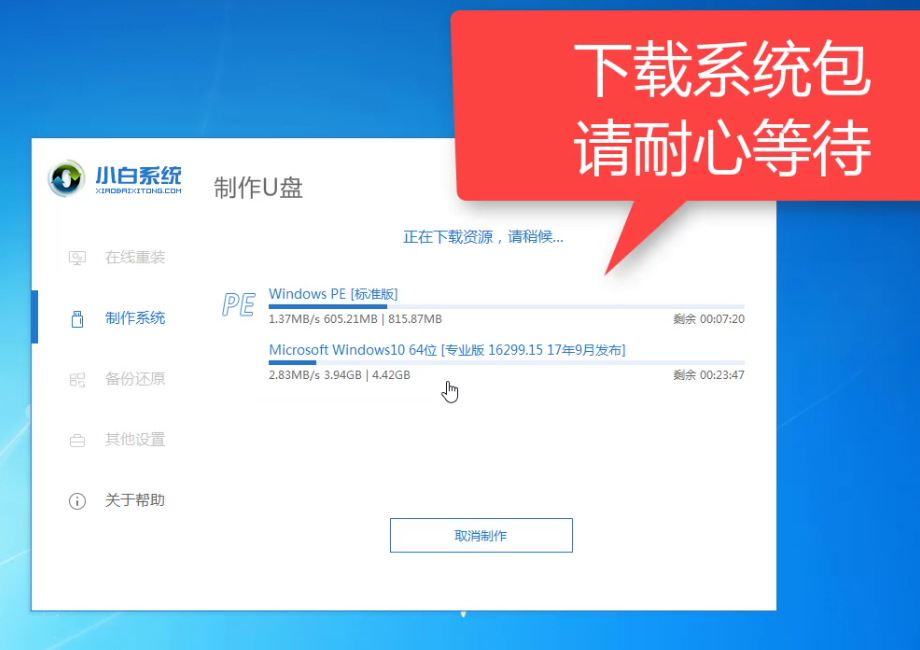
8.开始下载以下系统软件包并制作U盘工具。不建议在此期间操作计算机。

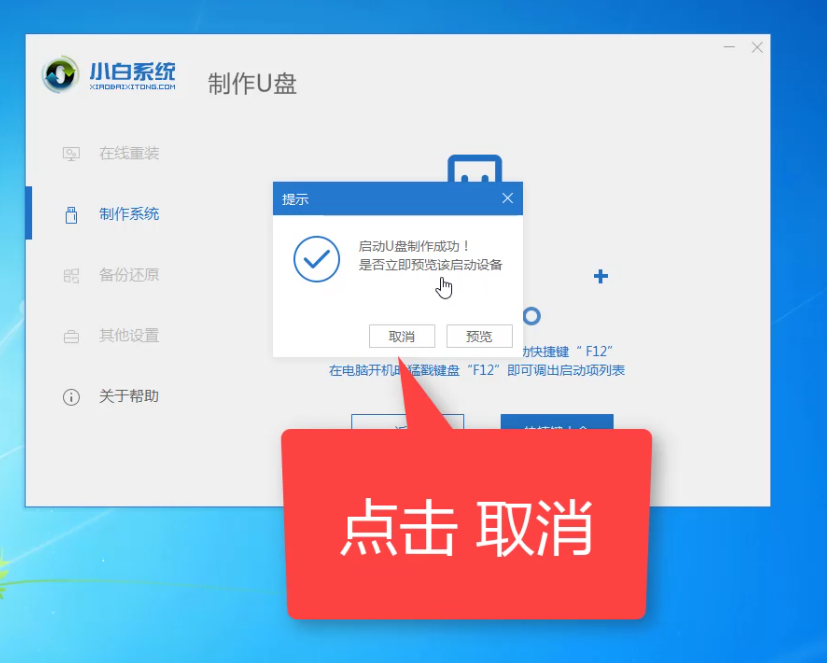
9.最后小白一键重装系统软件将提示制作成功,我们单击“取消”,如下图所示:
10.然后,您可以退出U盘并将其插入需要重新安装系统的计算机中。

11.重新启动计算机,快速简单敲击启动热键F12。
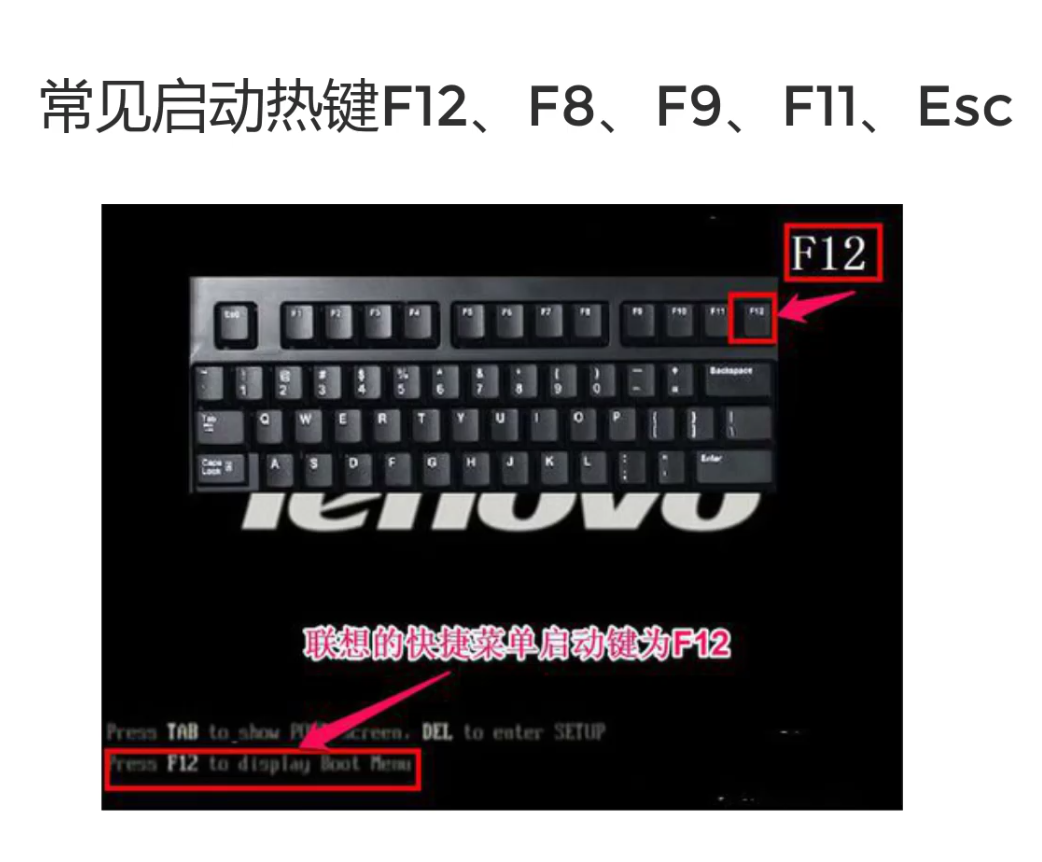
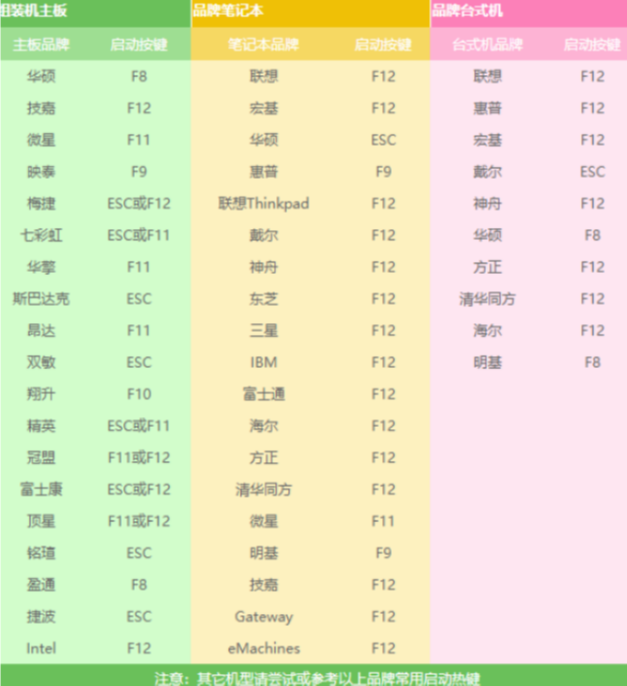
12.您可以参考以下启动热键的完整图片:
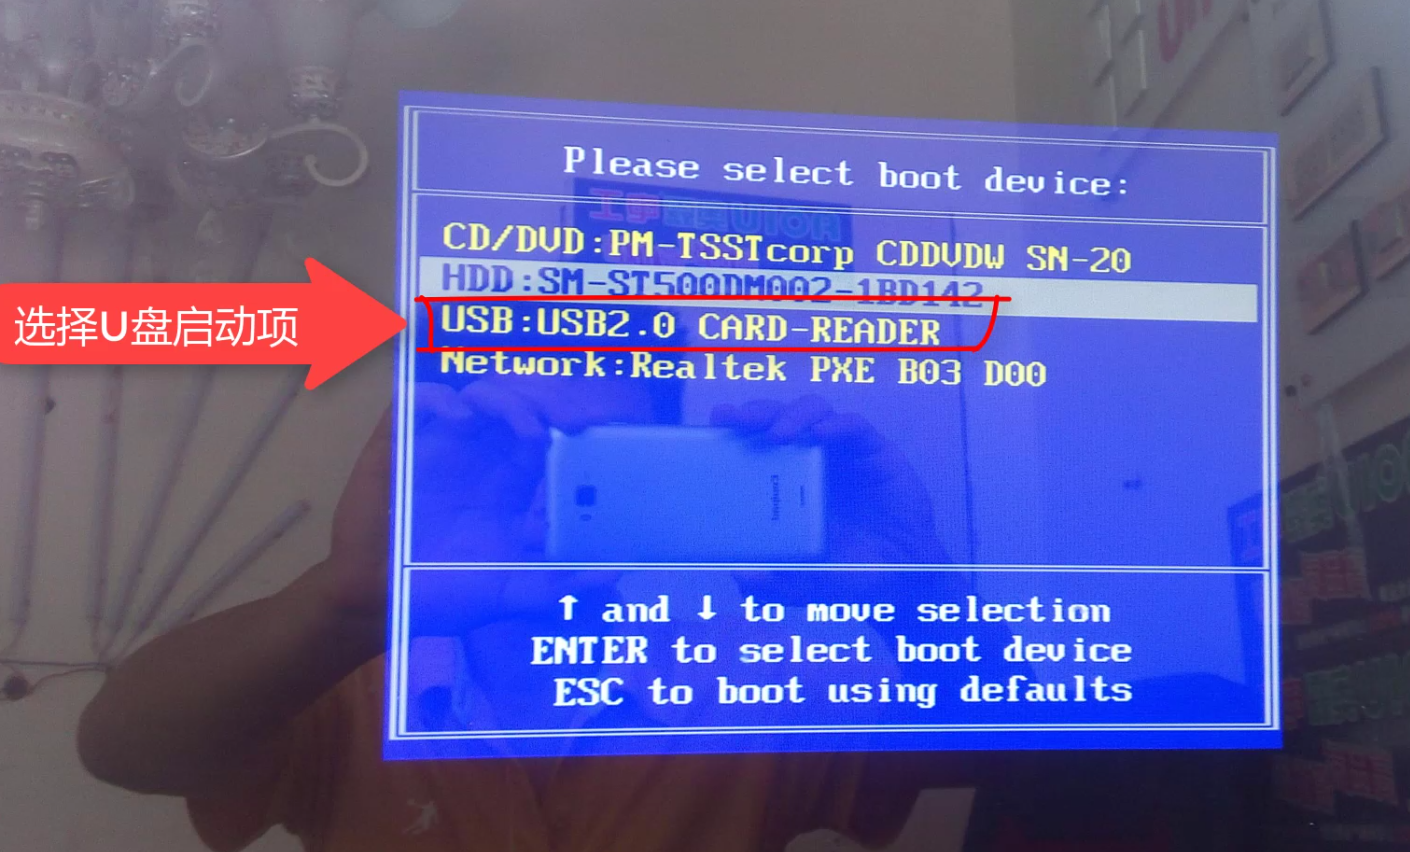
13.然后进入启动界面,在Boot Menu界面中选择USB启动选项,上下选择箭头键,然后按Enter确认,请参见下图:
14.当出现小白一键重装系统软件PE界面时,我们选择第一个项目启动win10x64位PE,然后按Enter进入。

15.加载完成后,弹出小白装机工具,选择系统,然后单击“安装”。

16.选择要安装的系统盘C,然后单击开始安装,如下图所示:

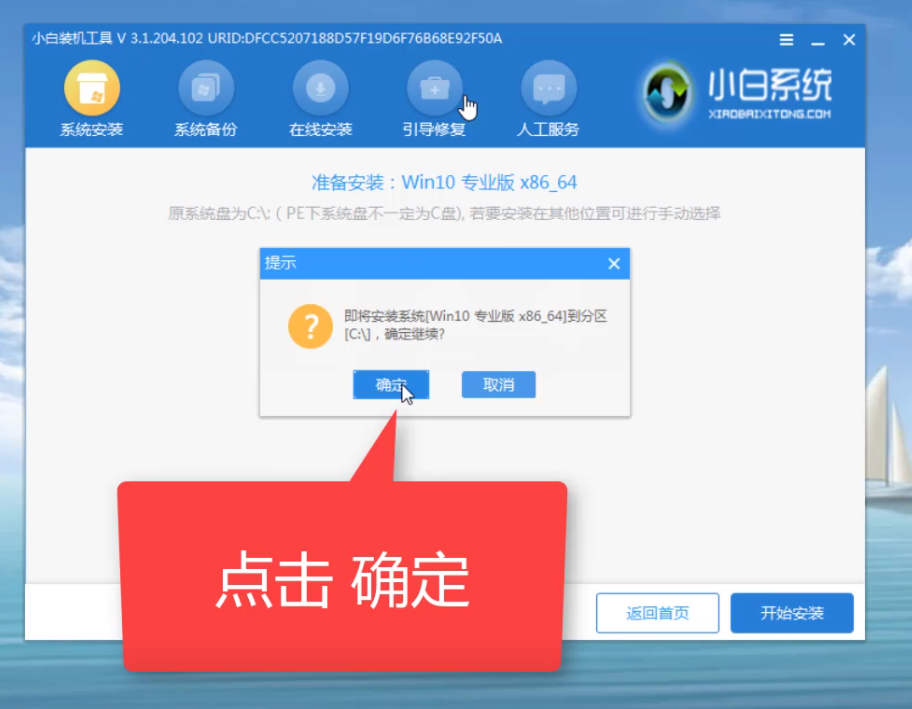
17.出现提示时,我们单击OK,如下所示:
18.系统的安装已正式开始,请耐心等待,如下图:

19.安装完成后,我拔下U盘并单击以立即重新启动,如下所示:

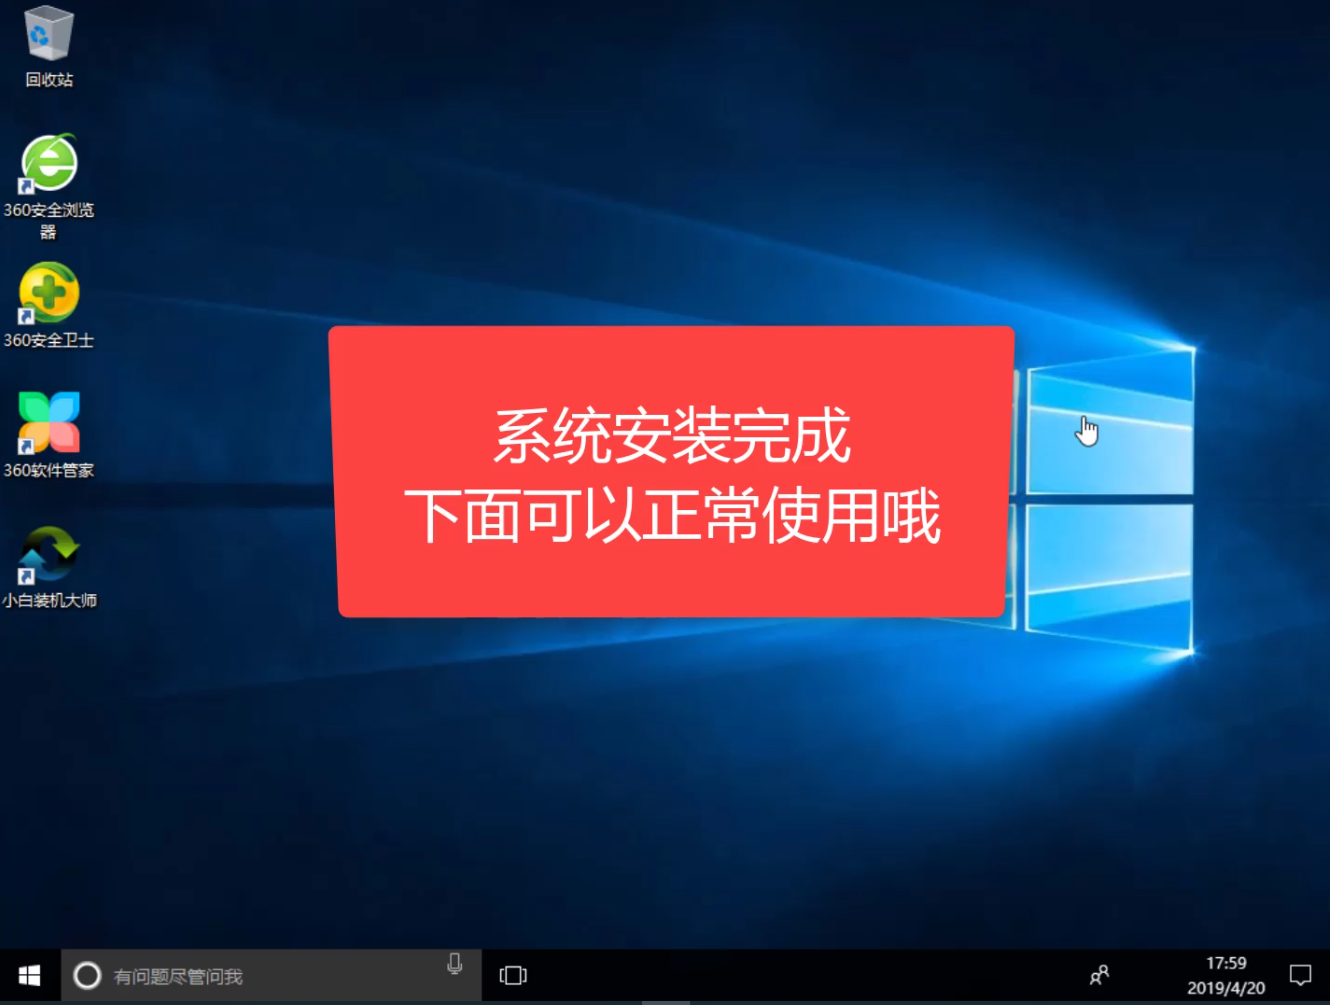
20.然后开始正式加载系统,在此期间它将自动重新启动几次,然后进入系统,安装成功,如下所示:
总结:上述是小白一键重装系统u盘教程。
 有用
26
有用
26


 小白系统
小白系统


 1000
1000 1000
1000 1000
1000 1000
1000 1000
1000 1000
1000 1000
1000 1000
1000 1000
1000 1000
1000猜您喜欢
- U盘不能打开?简单修复方法分享..2023/11/15
- 电脑bios恢复出厂设置的方法..2022/01/12
- U盘不显示,如何解决?2024/01/03
- emmc,小编教你eMMC和UFS闪存有什么区..2018/03/26
- 东芝u盘写保护怎么去掉,小编教你如何..2017/12/12
- 用u盘重装系统xp教程方法2023/01/13
相关推荐
- 一步学会制作u盘系统盘,简明易懂的教程..2024/08/22
- 如何解除U盘写保护2023/12/27
- 电脑找不到U盘怎么解决?五个步骤帮你快..2024/10/08
- u盘启动盘无法进入引导安装系统的解决..2022/03/17
- 小编教你u盘出现乱码该怎么办..2017/08/18
- u盘怎么安装xp系统,小编教你怎么安装..2017/11/11


 关注微信公众号


