


小白UEFI启动重装系统教程
- 分类:教程 回答于: 2022年12月19日 14:01:41


现在随着硬件技术的不断发展,新出的电脑很多都是采用uefi启动方式,由于uefi启动方式跟传统的启动方式不一样,uefi主板无法识别传统的U盘启动盘,需要使用支持uefi的启动U盘。下面,小编就给大家带来,白UEFI启动重装系统步骤,一起往下看。
工具/原料:
系统版本:windows系统
品牌型号:联想yoga13
软件版本:小白一键重装系统v2290
方法/步骤:
方法一:小白一键重装系统UEFI启动重装系统win10
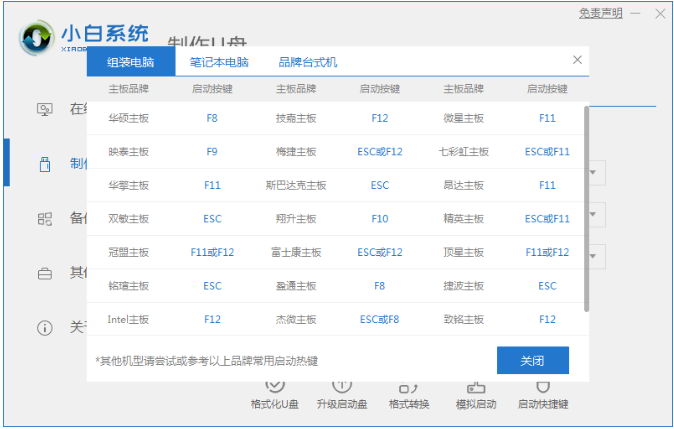
1、小白UEFI启动重装系统步骤,插入带有win10系统镜像文件的U盘启动盘到电脑usb接口,启动电脑,按快捷键进入BIOS。
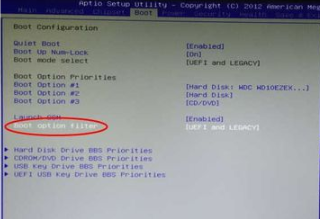
2、在“BOOT”下选中“Boot option filter”按回车键。
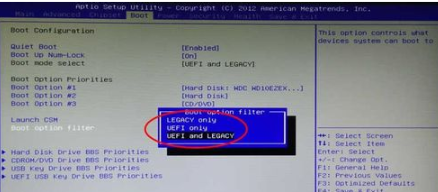
4、有“ LEGACY only”、“UEFI only”、“UEFI and LEGACY” 三个选项。选择需要的启动选项,“UEFI only”是单一的UEFI启动环境,“UEFI and LEGACY”是支持UEFI,又支持传统BIOS启动。
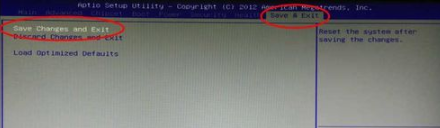
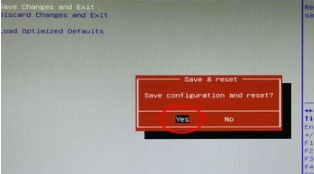
5、设置成功了之后,选择“Save & Exit”下的“Save Changes and Exit”回车。
6、 这里点击yes,回车即可。
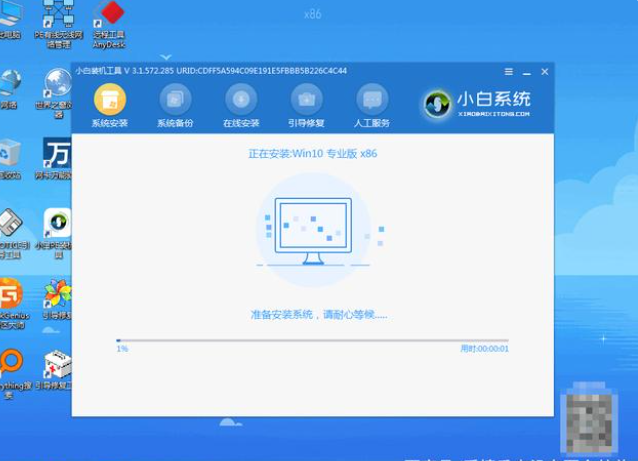
7、进入到pe桌面,装机工具会自动进行系统的安装操作,等待系统安装完成。
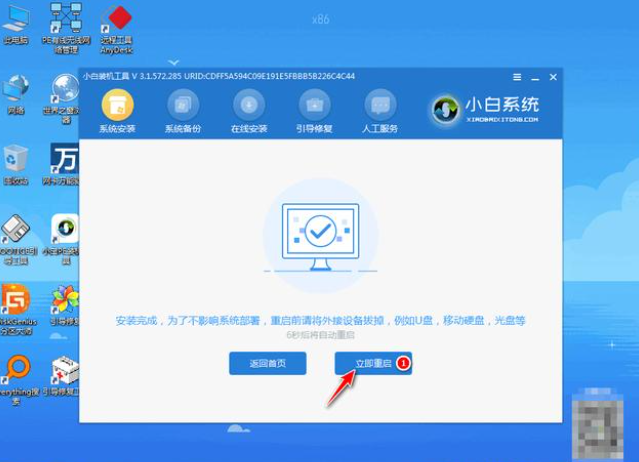
8、系统安装完成,重启电脑。
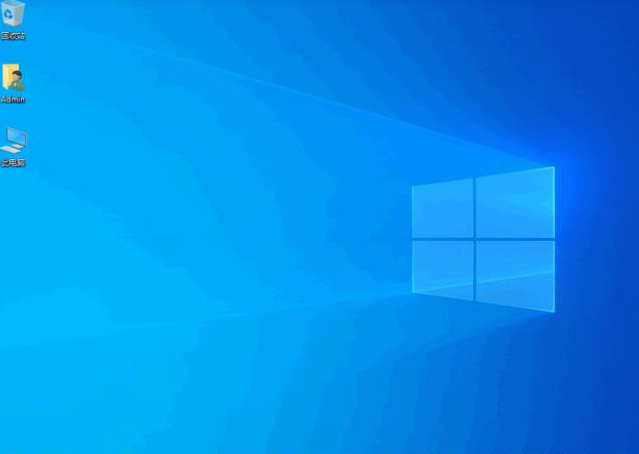
9、重启后进入新的桌面,安装成功。
方法二:小白一键重装系统UEFI启动重装系统win11
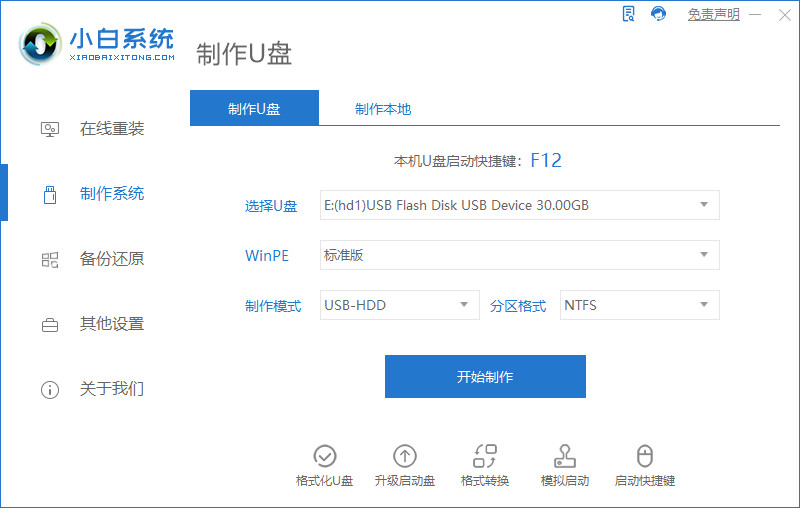
1、下载小白系统,准备制作U盘。
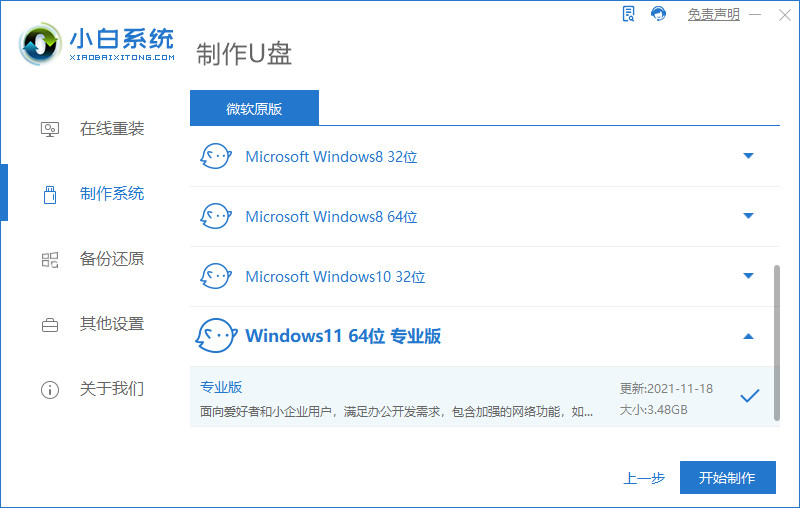
2、选择Windows11的安装。
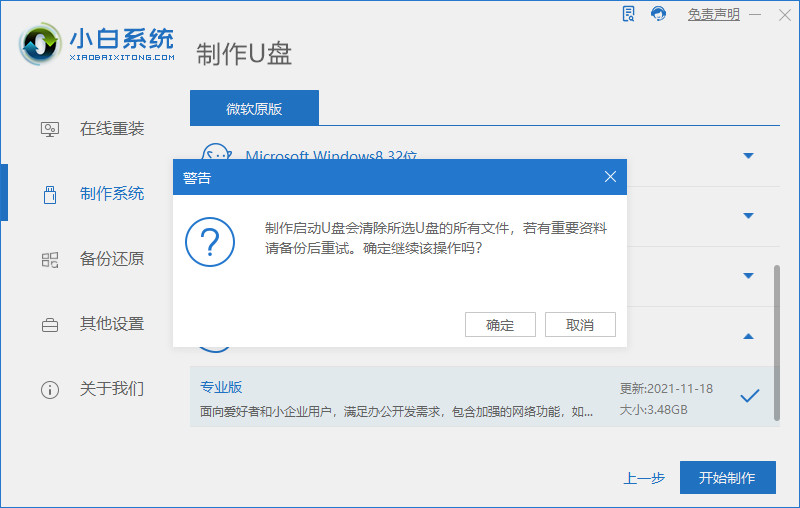
3、准备U盘的制作。
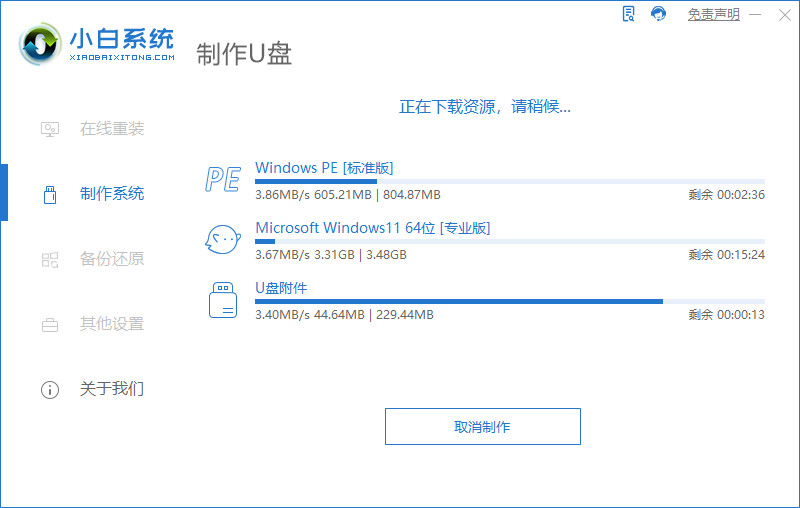
4、准备下载资源。
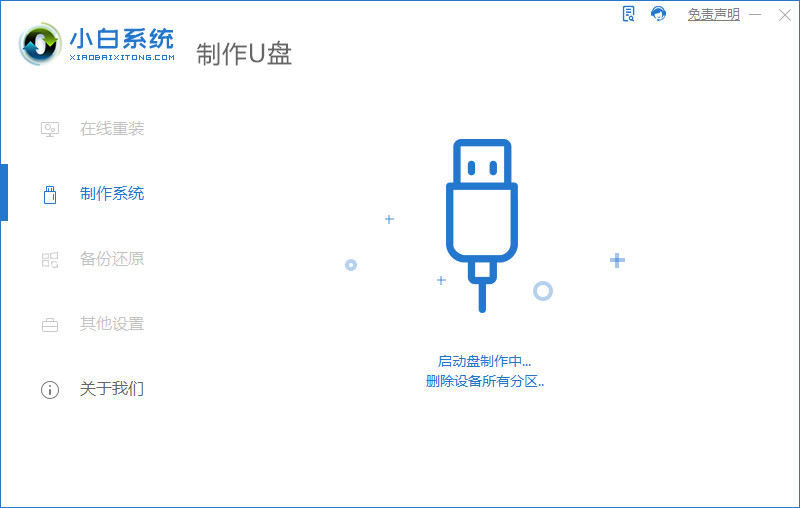
5、等待设备删除分区。
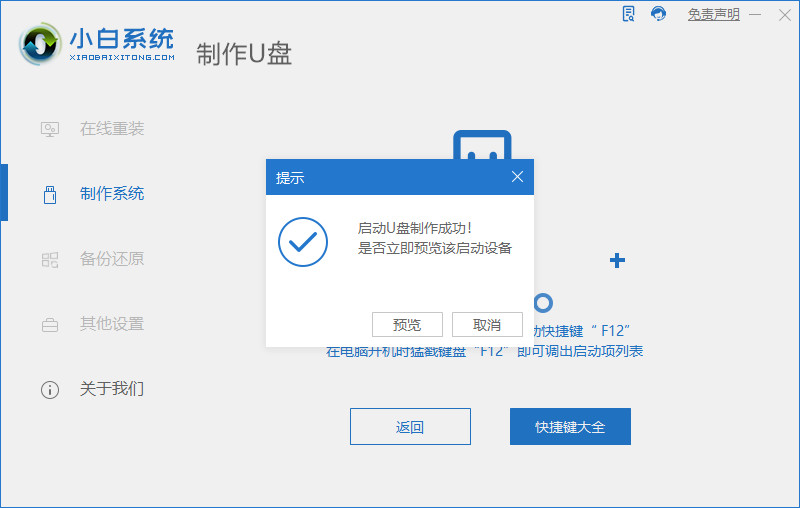
6、点击选择预览启动设备。
7、选择BOOT optipn。

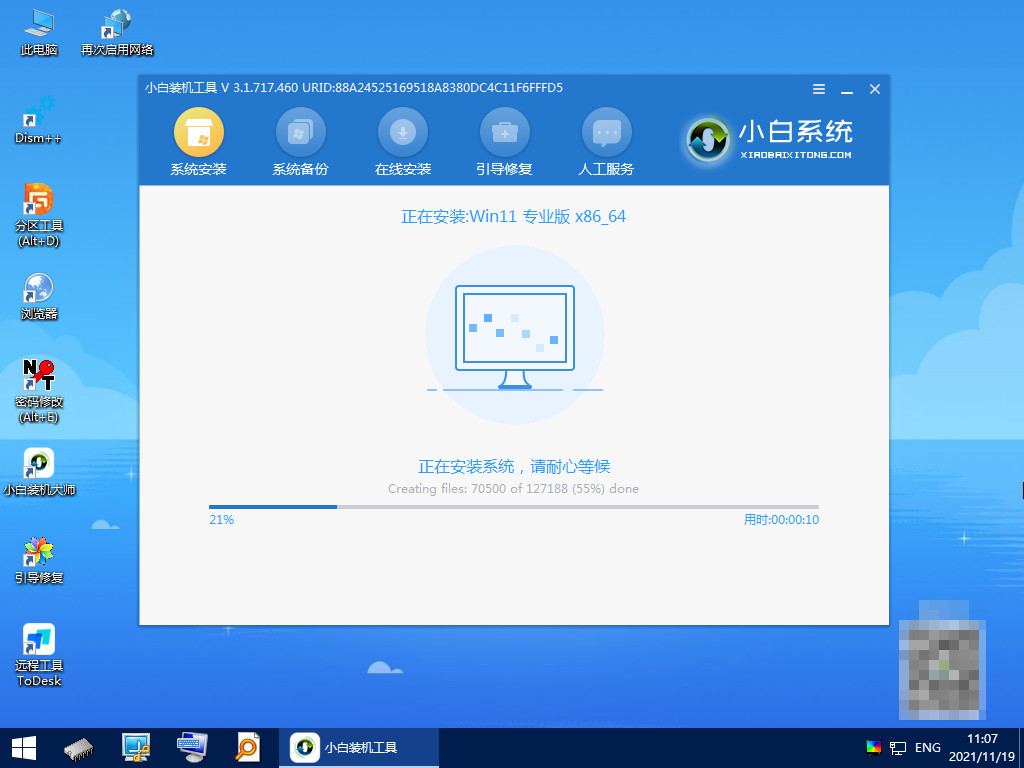
8、等待win11的安装。
9、准备重启电脑。

总结:
方法一:小白一键重装系统UEFI启动重装系统win10
1、插入U盘启动盘,重启电脑进入BIOS界面。
2、在BOOT下选择UEFI选项。
3、在Save & Exit下保存更改。
4、进入pe系统安装,然后重启即可。
方法二:小白一键重装系统UEFI启动重装系统win11
1、下载小白系统,准备制作U盘,选择Windows11的安装。
2、准备U盘的制作,准备下载资源,等待设备删除分区。
3、点击选择预览启动设备,选择BOOT optipn,等待win11的安装。
 有用
20
有用
20

分享

转载请注明:文章转载自 www.01xitong.com
 小白系统
小白系统
小白帮助
如果该页面中上述提供的方法无法解决问题,您可以通过使用微信扫描左侧二维码加群让客服免费帮助你解决。备注:人工客服仅限正常工作时间(周一至周六:9:00~12:00 2:00~6:00)


分享到
 微信好友
微信好友 朋友圈
朋友圈 QQ好友
QQ好友 QQ空间
QQ空间 新浪微博
新浪微博 复制链接
复制链接取消
长按或点击右侧按钮复制链接,去粘贴给好友吧~
https://www.01xitong.com/jiaocheng/65598.html
取消
复制成功
怎样进行电脑系统重装(适合电脑小白的方法图解)
 1000
10002023/04/17
黑屏解决办法(黑屏原因)
10002022/11/08
MicrosoftOffice2021 最新永久激活密钥
10002022/11/03
热门搜索
电脑重装系统大概多少钱
10002022/10/29
电子邮箱格式怎么写教程
10002022/10/23
神舟电脑怎么进入bios重装系统
10002022/10/13
苹果序列号含义
10002022/10/07
五种方法教你电脑开不了机怎么办
10002022/07/19
小白一键重装系统后怎么激活windows
10002022/07/08
超详细原版windows系统下载图文教程
10002022/06/30
上一篇:小鱼一键重装系统可靠吗
下一篇:小白重装xitong怎么操作
猜您喜欢
- 装机大师装的系统是正版吗..2020/06/13
- windows系统怎么重装2022/11/11
- 豌豆荚下载,让你畅享海量应用资源..2024/02/08
- 电脑重装系统怎么弄2022/11/04
- 华硕台式电脑一键重装系统详细步骤..2021/06/06
- 小编叫你怎么重装win72021/04/16
相关推荐
- 电脑实用技巧大揭秘!学会这些截图技巧,..2024/02/22
- 华为笔记本电脑哪个系列好 2022高性价..2022/11/05
- 金山一键重装下载2016/10/22
- 不是有效的win32应用程序怎么解决,小..2018/04/18
- 华硕笔记本重装系统按哪个键进入..2023/04/28
- windows更新教程2023/01/26
文章已经到底了,点击返回首页继续浏览新内容。


 关注微信公众号