笔记本独立显卡使用率0怎么办
- 分类:教程 回答于: 2022年06月29日 11:18:03
最近有网友反映自己的笔记本电脑上查看GPU使用情况时发现独立显卡使用率0的现象,那么当我们遇到这种情况如何处理呢?下面,小编就把笔记本电脑独立显卡使用率0的解决方法分享给大家。
工具/原料
系统版本:win7家庭版
品牌型号:联想小新Pro 16 2021
方法一、笔记本独立显卡使用率0怎么办
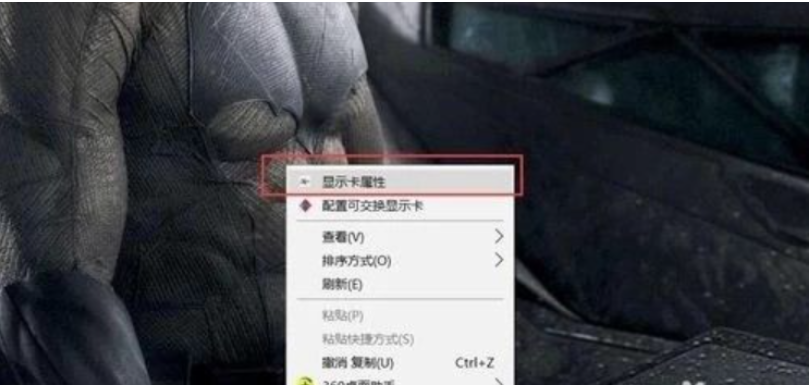
1、首先,我们在电脑桌面上的空白位置点击鼠标右键, 在系统弹出的菜单栏中选择“显示卡属性”,进入显卡设置页面。
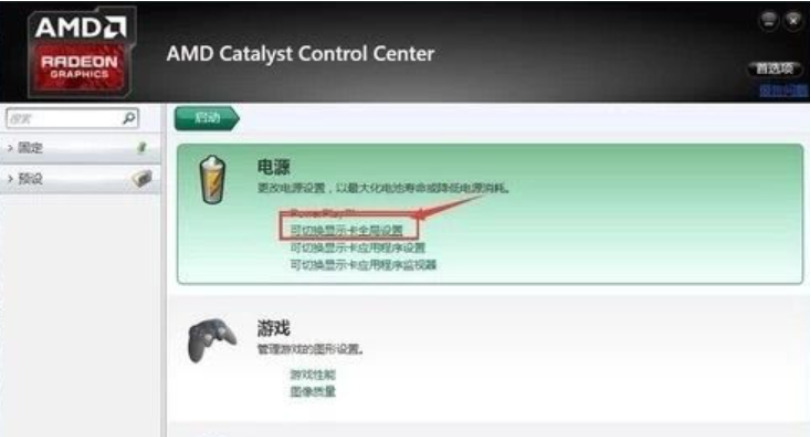
2、在显示卡的设置窗口中,我们选择“切换显示卡全局设置”, 进入到显示卡的全局设置中,我们可以设置显卡性能。
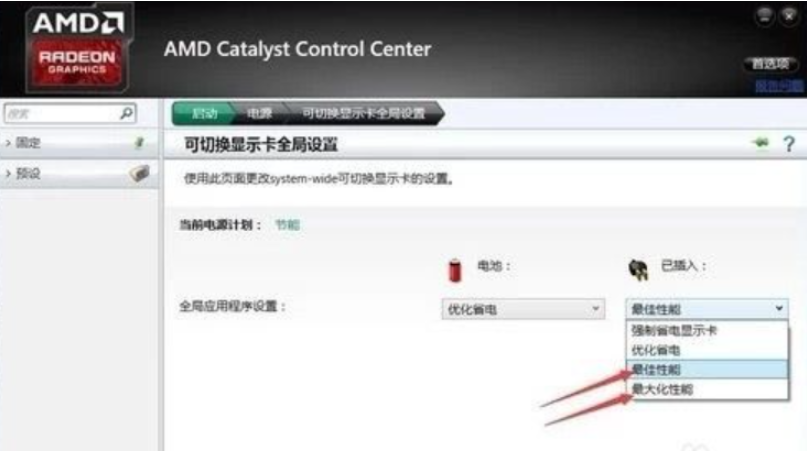
3.如果是笔记本一般设置都是省电设置, 我们可以直接设置为最大化性能,但是最好根据电脑性能以及配 置合理选择。
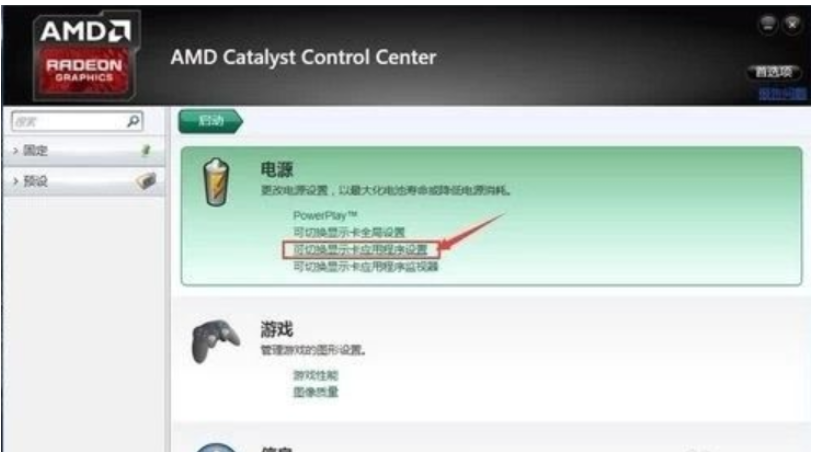
4.之后,我们回到显卡的设置窗口中, 选择“可切换显示卡应用程序设置”,进入到各种应用程序的显卡设置。
5.在进入到设置页面后, 我们可以看到有些应用程序中的显示卡设置为“省电”,这些应用就不会进行全部的显 卡性能。
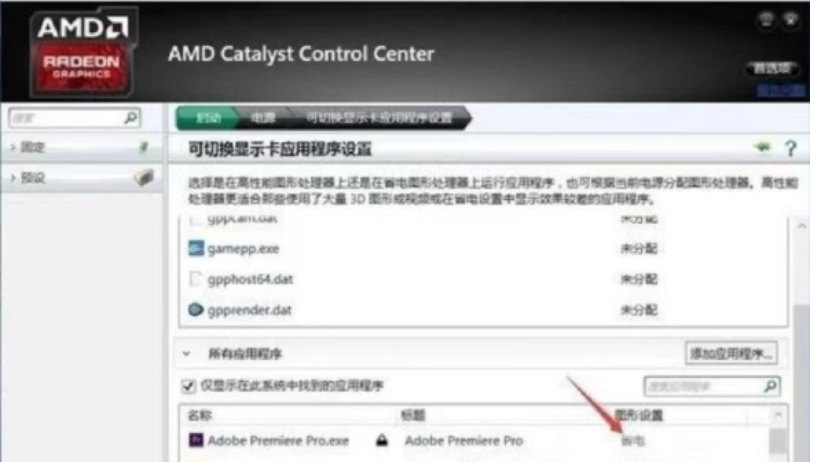
6.我们直接点击省电的设置, 在弹出的设置选项中选择“高性能”,即可将对应应用程序设置为全部显卡性能,从而 提高显卡使用率。
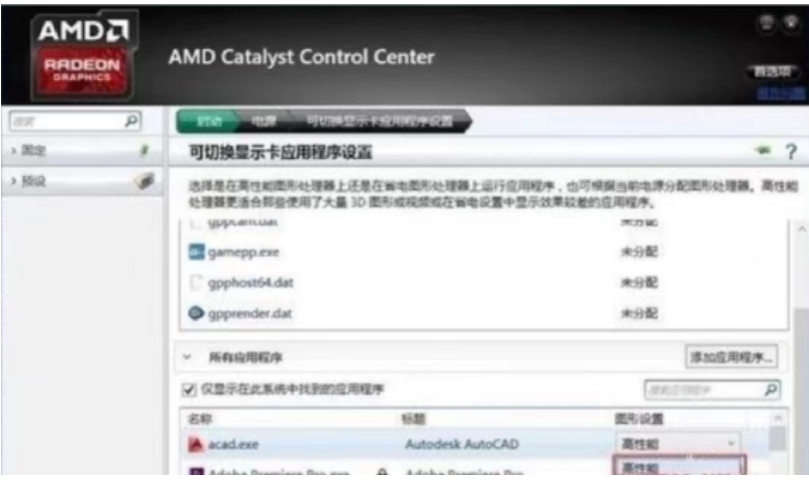
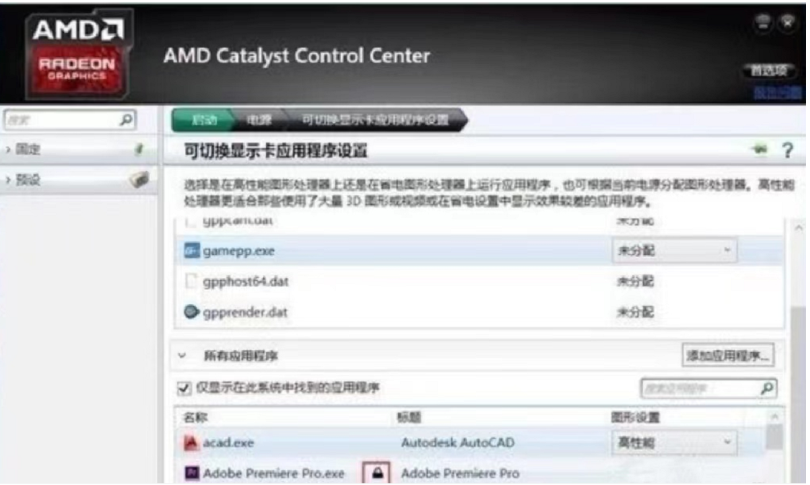
7.但是有些应用程序会由于系统兼容性问题,只能够使用“省电”配置,其他的常用程序 可以设置为高性能,设置完成后我们点击下面的应用进行设置应用,提高显卡的使用率。
注意事项:
1、笔记本一般设置都是省电设置, 我们可以直接设置为最大化性能
总结:
1.位置点击鼠标右键, 在系统弹出的菜单栏中选择“显示卡属性”,进入显卡设置页面。
2.进入到显示卡的全局设置中
3. 选择“可切换显示卡应用程序设置”,进入到各种应用程序的显卡设置。
4.在进入到设置页面后, 我们可以看到有些应用程序中的显示卡设置为“省电”,这些应用就不会进行全部的显卡性能。
5.我们直接点击省电的设置, 在弹出的设置选项中选择“高性能”,即可将对应应用程序设置为全部显卡性能,从而提高显卡使用率。
 有用
70
有用
70


 小白系统
小白系统


 1000
1000 1000
1000 1000
1000 1000
1000 1000
1000 1000
1000 1000
1000 1000
1000 1000
1000 1000
1000猜您喜欢
- 超级简单的win8降级win7步骤2017/01/08
- 联想g50重装系统步骤2022/11/10
- 超级硬盘数据恢复软件哪个好用..2023/04/11
- 惠普电脑重装系统方法2023/03/18
- 电脑双硬盘双系统简单安装教程..2020/04/16
- 小白重装系统报错怎么办2022/10/27
相关推荐
- 台式电脑双系统安装教程2022/03/30
- 机械革命重装系统后没有声音怎么 办..2023/04/20
- 换硬盘重装系统的详细步骤..2023/04/20
- 联想台式电脑重装系统按f几..2023/04/01
- xp原版系统iso镜像安装的步骤教程..2021/09/10
- office2013激活工具如何使用2022/10/19


 关注微信公众号


