电脑系统还原怎么操作
- 分类:教程 回答于: 2022年06月05日 11:36:00
有很多小伙伴在后台反映,自己的电脑系统出现问题,自己想尝试电脑系统还原来解决,但是自己又是小白不会具体操作,今天小编就把电脑系统还原的方法步骤带给大家,简单操作易上手,小白也能轻松掌握。
工具/原料:
系统版本:Windows7系统
品牌型号:honor magic book
方法/步骤:方法一:使用系统自带的还原功能
1.首先在开始菜单中打开控制面板,打开控制面板之后,在控制面板的众多选择项中打开备份和还原选项。

2.在接下来的界面中选择恢复系统设置和计算机。如果电脑没有开启还原的功能,可能需要开启这个功能。

3.然后点击:“打开系统还原”按钮,如果有账户控制则会有所提示,通过即可。

4.然后会开始还原文件和设置的向导,只需要按照向导的提示做就好了。直接点击下一步。

5.在系统还原点的选项当中,选择一个还原点,要确保所选择的还原点是之前系统正常时的还原点,因为如果是不正常的还原点则会出现问题。

6.确定之后,会出现一个确认的页面,上面显示了关于还原的详细的信息,要确保它没有错误之后,点击完成按钮,开始系统的还原,系统的还原会重启,然后在开机的过程中进入相关的还原操作。

方法二:借助工具生成ghost文件还原系统
1、一种是网上的“一键ghost”,可以自行百度搜索下载,一般用于整个系统软件安装完成后,直接执行一键备份,可以将C盘打包备份到最后一个盘,如果后期系统出现问题可以一键还原,属于傻瓜式操作。
2、PE里的ghost备份与还原
(1)现在的PE都会有2种ghost方式,一种简化的,一种还是手动运行的。

(2)简化版的内含如图三种模式:

(3)简易模式:备份系统—选择要备份的分区—“浏览”选择备份到的位置和名字—点击“备份选择的分区”即可。

(4)还原系统:选择要还原的分区,“浏览”中选择要还原的镜像文件,点击“恢复选择的分区”即可。

(5)高级模式:分为对分区和硬盘两种操作模式,如图:


3、手动运行ghost
(1)打开后点击OK。

(2)菜单首页local。

(3)二级菜单:disk硬盘,partition分区。

(4)disk to disk:硬盘对拷;disk to image:将硬盘做成.GHO的镜像文件;disk from image:从.GHO镜像还原到硬盘。

(5)partition to partition:分区对拷;partition to image:将分区生成.GHO镜像文件;partition from image:从.GHO镜像文件还原到分区。

(6)使用ghost一般备份还原分区的时候多,便于记忆可以这样记:生成镜像—122;还原镜像—123。
(7)例如制作全盘镜像:选择磁盘—OK。(这里使用虚拟机演示的,虚拟机是两块20G的硬盘,没有分区)

(8)选择镜像存放目录,并取好镜像名称。

(9)一般选fast(快速)即可,high代表高压缩,之后即开始镜像制作进程了。

(10)还原全盘镜像:选择要还原的镜像文件(这里演示随意选择的)。

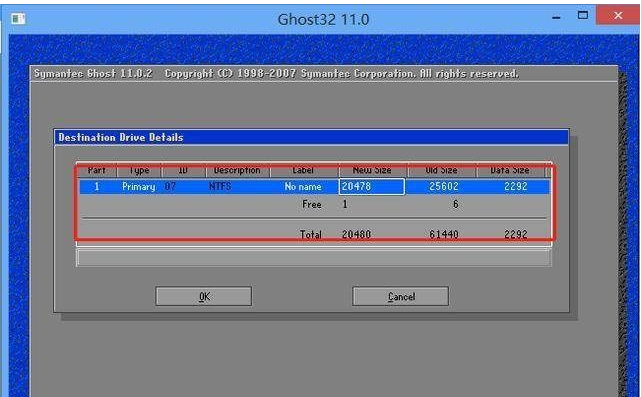
(11)选择要还原的硬盘。

(12)使用虚拟机演示的,硬盘没有分区,如果是真实电脑分区的,有几个分区就可以看见几个分区。

(13)点击yes,开始还原进程,完成后重启即可。

4、分区的备份与还原不再赘述,与磁盘的备份与还原操作一样,只是也需要注意备份和还原时要注意选择对分区。
总结:
以上就是电脑系统还原的操作步骤啦,主要分为两大类,一个是借助系统自带的还原功能实现,另一个则是借助ghost工具等实现,希望对你有所帮助。
 有用
26
有用
26


 小白系统
小白系统


 1000
1000 1000
1000 1000
1000 1000
1000 1000
1000 1000
1000 1000
1000 1000
1000 1000
1000 1000
1000猜您喜欢
- ios镜像文件怎么装系统具体步骤..2021/04/11
- 一键装机xp系统教程2016/11/05
- 台式电脑重装系统怎么做2023/04/15
- 重装系统后如何恢复以前的文件..2023/03/27
- 教你怎么启动usb重装系统2022/01/16
- 最新系统win11怎么样2021/06/30
相关推荐
- 联想笔记本重装系统后黑屏怎么处理..2022/09/12
- 电脑怎么重装系统win7教程2022/04/23
- 电脑内存使用率高怎么办2016/09/01
- 学生使用计算机坏了怎么修理的步骤..2022/09/24
- 联想售后服务重装系统多少钱..2023/04/18
- 打印机暂停,如何解决?2023/12/22


 关注微信公众号


