esd系统怎么用pe安装
- 分类:教程 回答于: 2022年01月21日 09:00:28
esd系统文件其实跟我们常见的iso系统文件类似,只不过是格式不同。有网友下载了esd系统镜像文件,不知道esd系统怎么用pe安装。下面就教下大家pe安装esd系统的方法。
工具/原料:
系统版本:esd格式的系统镜像文件
品牌型号:笔记本/台式电脑
软件版本:小白一键重装系统 v2290
工具:一个8g以上的空白u盘
方法/步骤:
1、首先在电脑上安装好小白一键重装系统软件,参照方法制作好u盘pe系统启动盘。具体步骤:小白u盘启动pe系统制作方法。

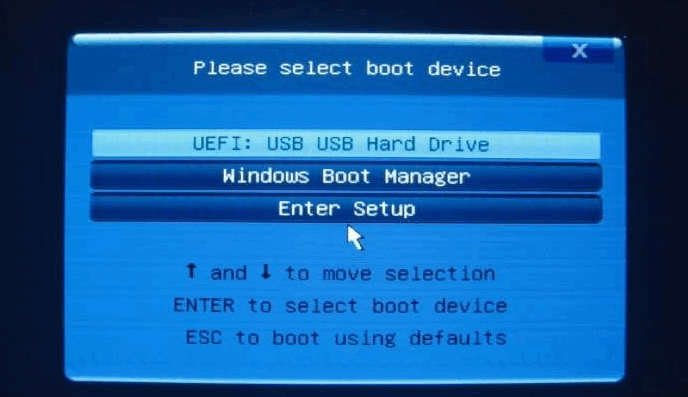
2、然后将esd格式的系统镜像文件放在u盘启动盘文件目录下,插入启动盘进入电脑开机设置 U 盘启动进入 Windows PE 系统。
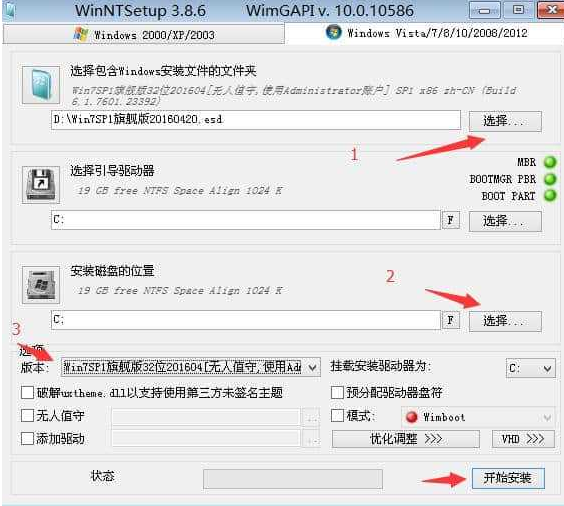
3、一般 Windows PE 系统中都会包含 Dism++ 以及 WinNTSetup 这两款软件,都可以安装esd系统。我们先打开WinNTSetup,按照图示操作。(如果没有的话,可以先在电脑上下载好软件的安装包放在u盘启动盘文件目录下,进入pe系统后导入安装软件即可使用)
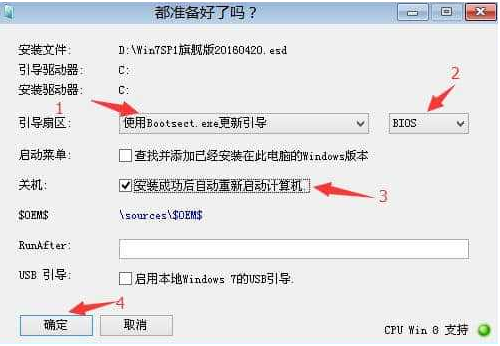
4、设置完成后直接选择开始安装,然后会弹出对话框,再选择即可等待安装完成。
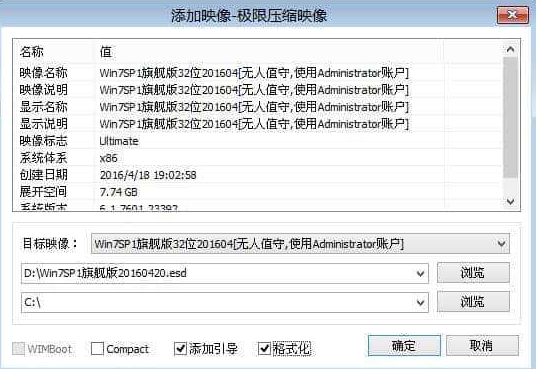
5、如果是Dism++软件的话,打开 Dism++ 然后选择文件,释放镜像。
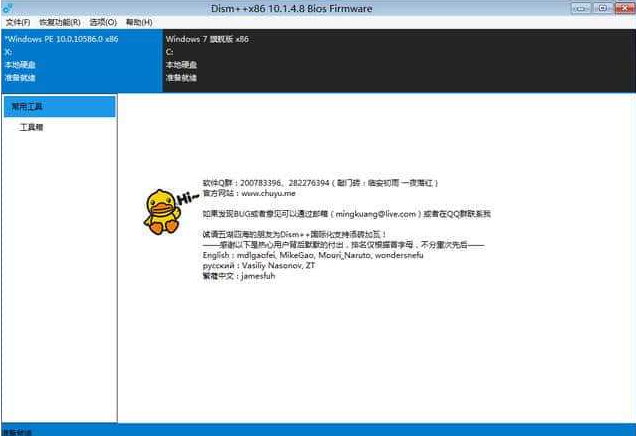
6、在这里选择您的ESD格式的系统,然后安装到C盘等待安装完成即可。
总结:
安装好小白一键重装系统软件,插入u盘制作启动pe系统盘;
将esd文件放入u盘目录,插入启动盘进入电脑,启动进入pe系统;
如使用WinNTSetup软件安装esd,则参照图示操作即可;
如使用Dism++软件的话,打开 Dism++ 然后选择文件,释放镜像;
选择您的ESD格式的系统,然后安装到C盘即可。
 有用
26
有用
26


 小白系统
小白系统


 1000
1000 1000
1000 1000
1000 1000
1000 1000
1000 1000
1000 1000
1000 1000
1000 1000
1000 1000
1000猜您喜欢
- 光速一键系统重装使用教程..2016/08/04
- 电脑配置查看器2023/12/08
- 一键重装系统坏处有哪些?2016/10/28
- 电脑自己怎么重装系统2022/11/11
- 重装系统后没有声音怎么办..2023/04/29
- "驱动精灵:让电脑运行更顺畅"..2023/06/07
相关推荐
- u盘安装操作系统图文教程2017/03/15
- 充电宝如何充电2023/11/25
- ps抠图怎么操作2024/10/20
- win7系统重装方法2017/03/23
- 详解为什么电脑一开机就蓝屏以及解决..2024/09/27
- 电脑cpu温度多少正常2023/04/13


 关注微信公众号


