uefi安装centos7教程
- 分类:教程 回答于: 2022年01月18日 11:30:00
win7系统和win10系统是大家听到见到最多的电脑系统了,而centos7系统想必没有多少小伙伴听说过,那么uefi要怎么安装centos7呢?下面小编就给大家带来uefi安装centos7教程.
一.制作CentOS7安装盘
还是老套路,开局先制作安装盘,UltraISO软碟通,上图
(1) 打开UltraISO软件,选择“文件”-> “打开”选择linux系统镜像(iso文件)并“打开”。
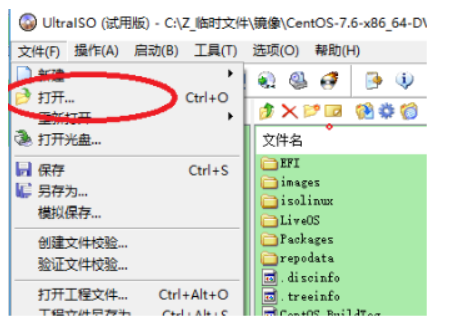
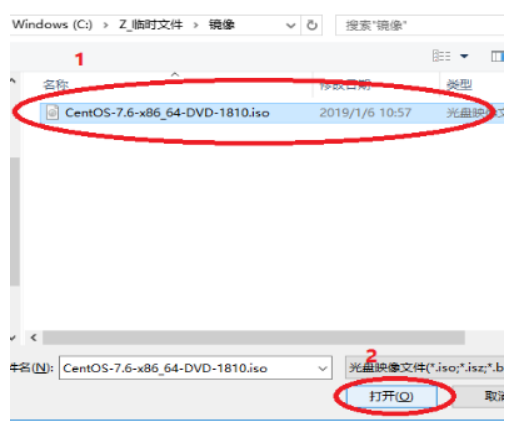
(2) 插入U盘,选择“启动”-> “写入硬盘镜像”,硬盘驱动器选择做为系统盘的U盘,其他选项不需要改动。

(3) 点击”写入”,等待刻录完成即可。

二.启动信息修改
1. 将系统U盘插入电脑,开机。
1) 如果空盘则可以就直接进入到系统选择界面,如果有其它系统,则必须进入到EFI启动菜单选择U盘启动。
2) 如果EFI启动菜单中找不到CentOS启动项,或者选择u盘启动无法正常启动时。可以使用指定文件启动,启动文件在:/EFI/BOOT/BOOTX64.EFI
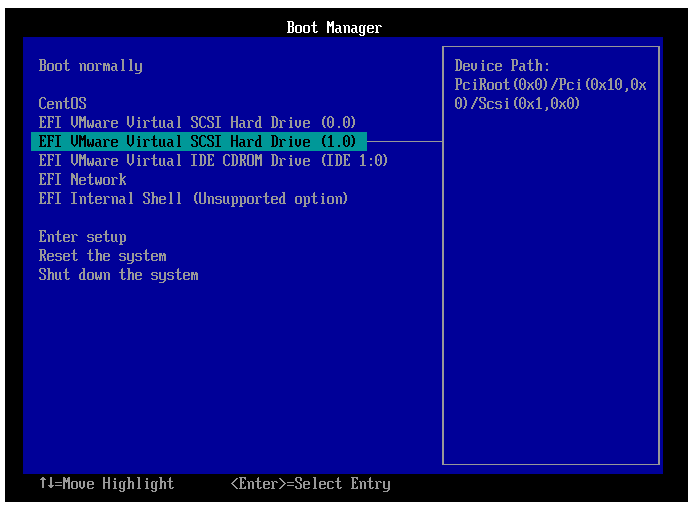
2. 修改启动信息:查看启动盘设备名。
1) 将光标移动到 Install CentOS 7 选项,按 e 键进入启动信息编辑模式。

2) 将原有启动信息 linuxefi /images/pxeboot/vmlinuz inst.stage2=...quiet,修改为 linuxefi /images/pxeboot/vmlinuz linux dd quiet。修改完成后按 ctrl+x 使用新的启动信息启动系统。
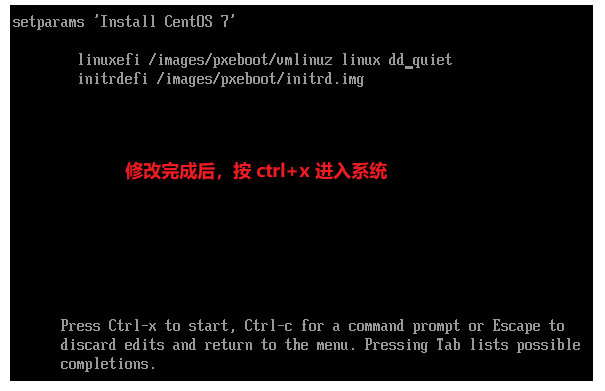
3) 进入系统后显示出安装盘的设备名:sdb4。对应的位置就是/dev/sdb4,记住这个设备名,下一步手动指定设备位置时会用到。记住设备名后,按 ctrl + alt + del 重启。

3. 修改启动信息:指定安装盘位置,指定分区表为gpt
1) 重启后依旧进入安装选择界面,与上一步相同,按e键修改启动信息
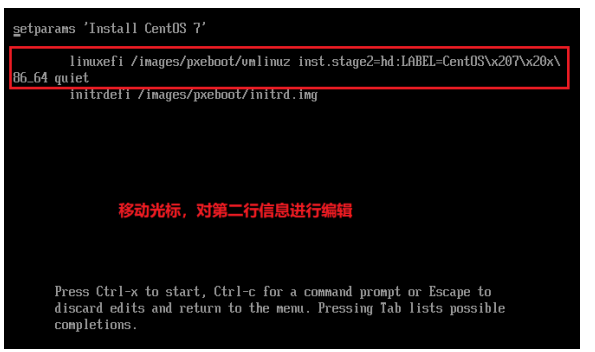
2) 修改启动信息
01.手动指定启动盘位置:将 hd: 到 quiet 之间的字符替换为/dev/sdb4
02.指定磁盘分区表类型为 gpt :在 quiet 之后添加 inst.gpt (重点是这个,指定分区表为gpt)
修改后如下,按ctrl+x启动系统(sdb4为启动盘设备,要按照1.1步骤中查到的写):
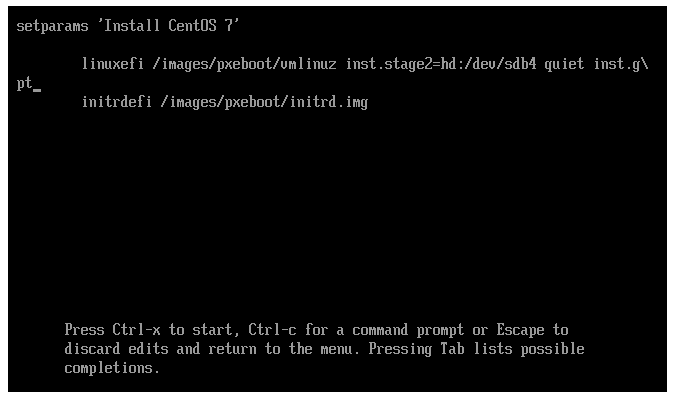
3) 如果成功自检无报错,正常跳转到安装界面则代表可以进行下一步安装系统。如果检测界面不能正常跳转,按 esc 后出现dracut:/# 命令行界面,则代表系统无法找到安装盘位置,需要检查手动指定位置是否正确。
3. 安装系统
选择语言
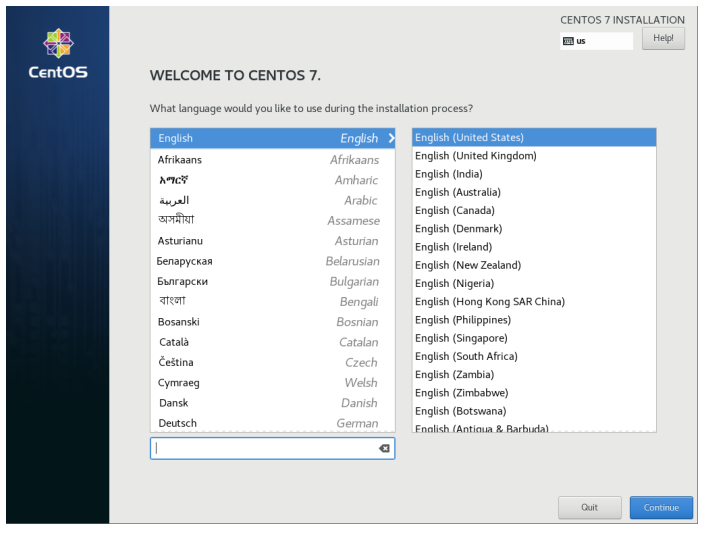
按Continue进行下一步
2. 硬盘分区
1) 选择硬盘选项进行硬盘分区

2) 选择磁盘,点击i will configure partitioning (我将配置分区),然后点击Done,进入分区配置界面。

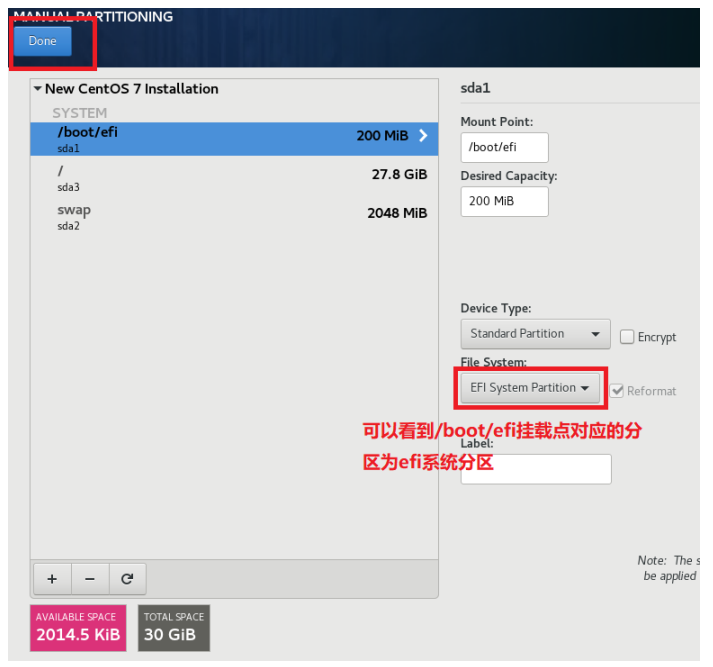
3) 1.选择分区为标准。2.添加分区。3.选择挂载点。4.分区大小。5.确认添加分区
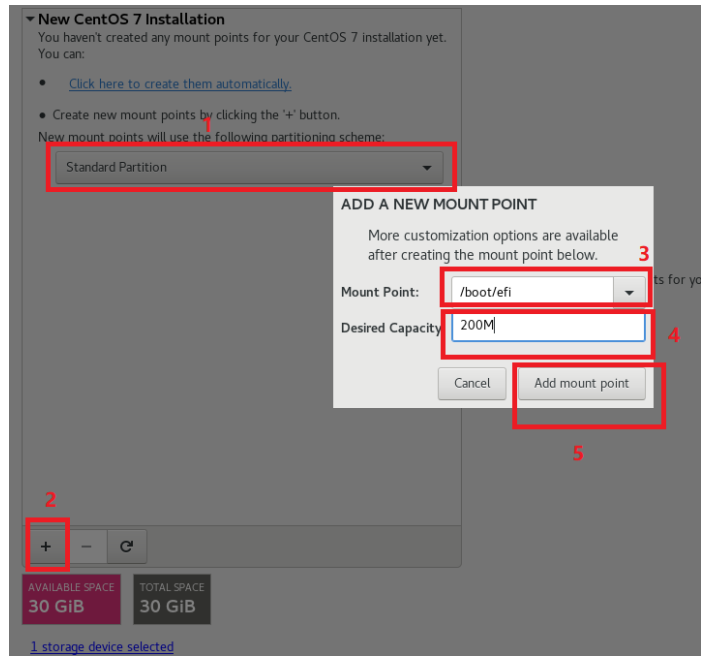
01. 区别于传统bios启动模式,UEFI启动模式必须分配一个文件系统为[EFI系统]的分区,并且挂载点为/boot/efi。
02. 创建分区时,分区大小位置输入超过剩余可用空间即可分配剩余的全部空间,例如999999G
4)创建好分区后按Done,进入格式化。
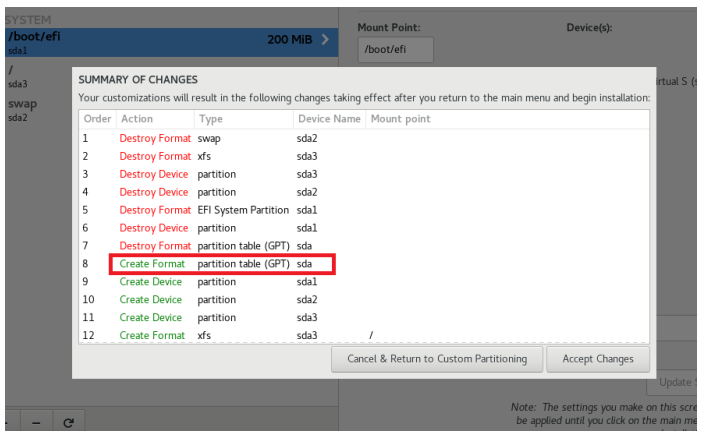
可以看到分区表变为GPT格式,点击accept changes进行格式化。
三.选择软件包
1) 点击蓝色选项选择软件包
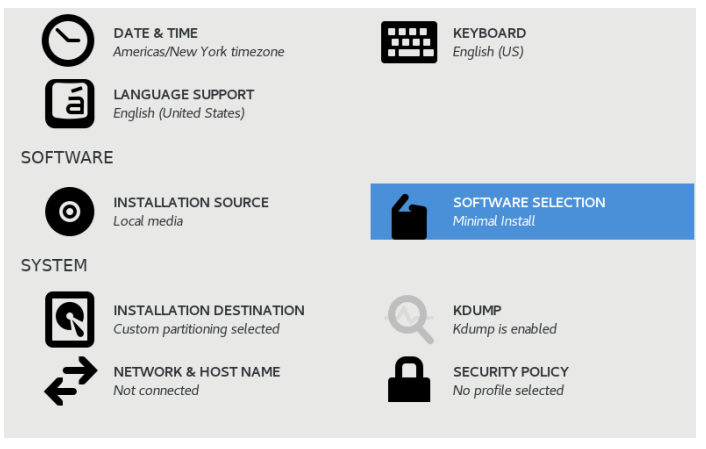
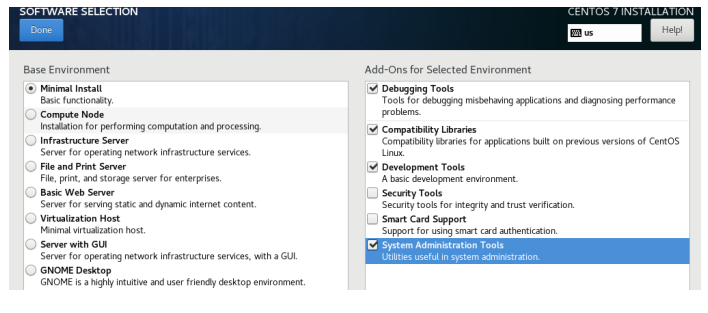
2) 选择左侧:Minimal Install(最小化安装),右侧:调试工具、兼容库、开发者工具、系统管理工具。选择好点击Done完成。
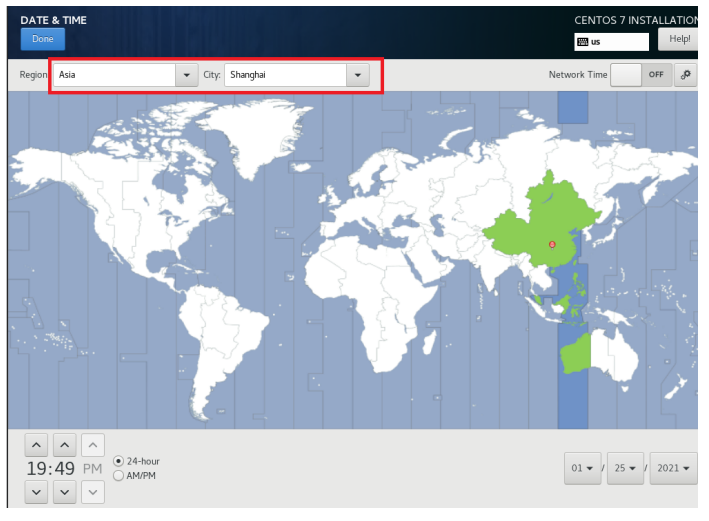
4. 选择时区为上海并点击Done完成
5. 安装系统并设置root密码
一切准备就绪点击Begin Installation 安装系统,然后点击ROOT PASSWORD 设置root密码,过于简单点击两次Done即可。

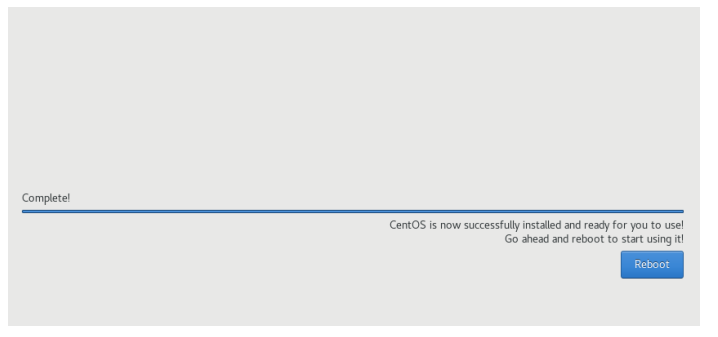
6. 等待安装完成点击reboot即可
以上就是uefi安装centos7教程,希望能帮助到大家.
 有用
26
有用
26


 小白系统
小白系统


 1000
1000 1000
1000 1000
1000 1000
1000 1000
1000 1000
1000 1000
1000 1000
1000 1000
1000 1000
1000猜您喜欢
- 苹果笔记本重装系统磁盘被锁定怎么解..2022/09/08
- 彩虹一键重装系统图文教程..2016/08/09
- "驱动精灵:让电脑运行更顺畅"..2023/06/09
- 分享系统重装大师软件哪个好..2023/04/11
- 好用一键重装系统软件2022/08/06
- 宏碁笔记本如何重装win7系统..2022/04/25
相关推荐
- 内存卡怎么恢复数据教程2023/04/28
- itunes重装系统如何操作2023/02/21
- 笔记本电脑配置知识大全2022/11/03
- WIN7 SP1 64位旗舰版系统2016/11/07
- WIN764与WIN732的区别2016/11/12
- 电脑怎么截图快捷键截图方法..2022/06/23


 关注微信公众号


