教大家新安装的windows11怎么激活
- 分类:教程 回答于: 2021年07月14日 09:00:02
看到windows11的预览版出来后,许多网友都安装了这个系统体验,不过安装之后就不知道如何激活了,其实有的小伙伴可能在激活win10的时候有用过命令提示符的方法,小编测试过这个方法也同样可以激活win11,下面就教大家如何操作吧。
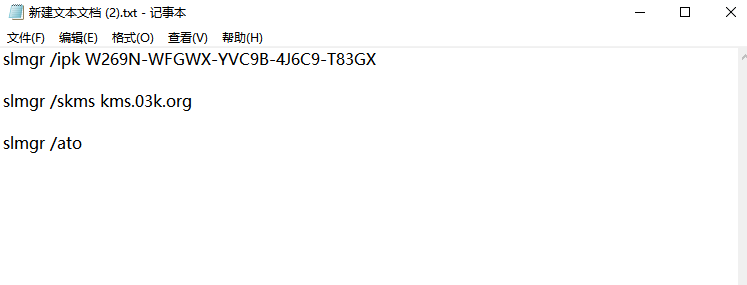
1、在桌面新建一个文本文档,把以下代码复制进去,如图所示: slmgr /ipk W269N-WFGWX-YVC9B-4J6C9-T83GX slmgr /skms kms.03k.org slmgr /ato。

2、点击文件选择“另存为”,在弹出的界面中,将保存位置选择在桌面,保存类型改为所有文件,文件名改为.bat格式的文件,然后点击“保存”按钮。

3、右键点击在桌面上双击刚保存的文件,选择【管理员身份运行】,之后会弹出“成功地安装了产品密钥”提示,点击“确定”按钮。

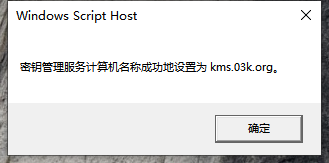
4、接着会弹出“密钥管理服务计算机名称成功设置为kms.xspace.in”提示,点击“确定”按钮。

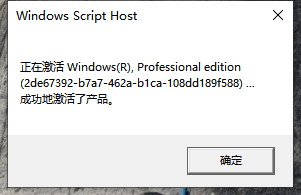
5、随后就会弹出“成功地激活了产品”提示,点击“确定”按钮。

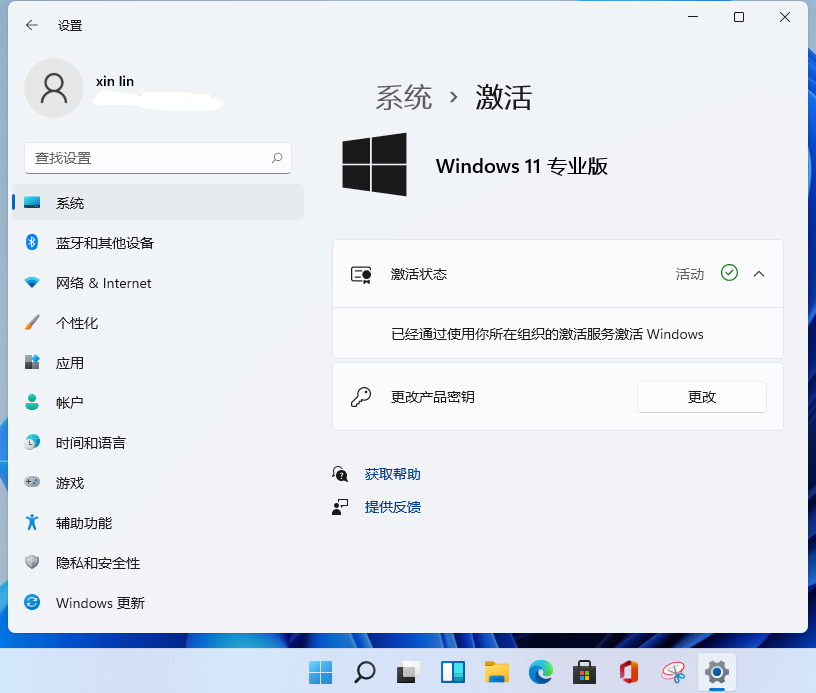
6、这时我们打开计算机系统属性,就可以看到windows已激活。

大家就可以按照上述方法进行win11系统激活了,如果你的win10系统还没有激活的话也可以试试哦。
 有用
26
有用
26


 小白系统
小白系统


 1000
1000 1000
1000 1000
1000 1000
1000 1000
1000 1000
1000 1000
1000 1000
1000 1000
1000 1000
1000猜您喜欢
- 小白系统还原镜像文件下载教程..2022/12/05
- 海尔电脑一键重装系统xp详细步骤..2019/10/07
- 空间QQ:如何利用空间QQ增强社交互动与..2024/09/05
- 分享win10镜像重装系统教程2021/01/05
- 电脑主板坏了能修吗分享2022/10/13
- u盘winpe制作教程2017/02/12
相关推荐
- onekey一键还原,小编教你onekey一键还..2018/01/11
- 重装系统如何备份重要文件..2022/08/04
- "驱动精灵:让电脑运行更顺畅"..2023/06/02
- win7更新显卡驱动后花屏怎么办?..2015/11/28
- 小白系统官网首页显示的重装教程..2022/12/10
- office2013激活工具如何使用2022/10/19


 关注微信公众号


