u盘uefi装win8.1系统图文教程
- 分类:教程 回答于: 2016年11月08日 00:00:00
现在win8.1系统的用户有很多,所以很多朋友都问小编u盘uefi装win8.1系统的方法是什么,其实uefi装w8.1的方法小编这里肯定是有的,为了帮助大家小编也特地整理了uefi装w8.1教程出来,下面就来看看这篇u盘uefi装win8.1系统图文教程吧。
工具/原料:
至少8g大小的u盘,win8.1系统镜像(非gohost版本)
带UEFI模式的笔记本。
方法/步骤:
再次强调,这种方法很简单,但是会清除掉原来磁盘上的所有数据。所以如果要采用这种方式,请先做好磁盘内容的备份。
下载安装ultro软碟通。(最好用注册版和破解版 )
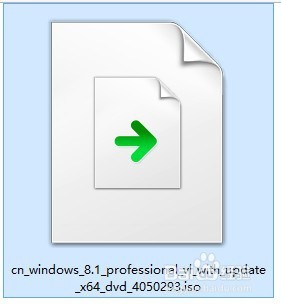
下载win8.1系统镜像。
u盘uefi装win8.1系统图文教程图1
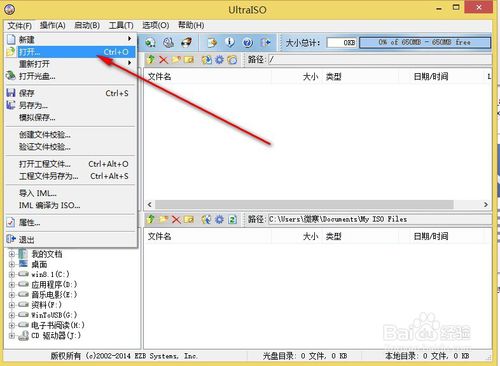
插入u盘。打开ultro软碟通。
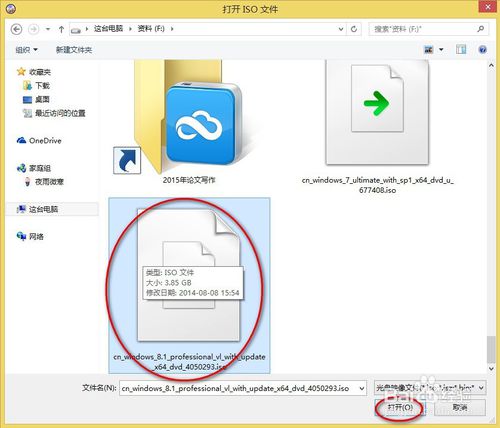
依次“文件 ”-“打开”。在电脑上找到之前下载的win8.1 ISO镜像。
u盘uefi装win8.1系统图文教程图2
u盘uefi装win8.1系统图文教程图3
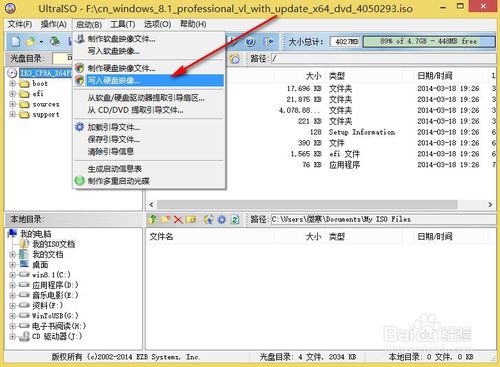
完成上一部操作后,再依次点击“启动”-“写入硬盘映像”
u盘uefi装win8.1系统图文教程图4
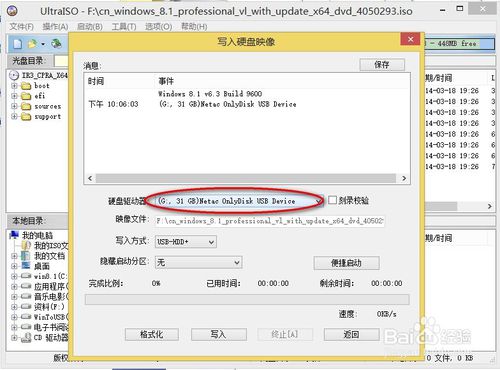
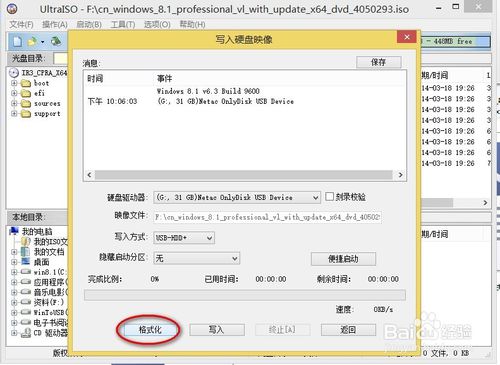
这时会弹出“写入硬盘映像”窗口,确认下硬盘驱动器是不是我们插入的u盘。
一般默认会自动识别插入的u盘。
u盘uefi装win8.1系统图文教程图5
确认是我们插入的u盘后,其它不用做更改,默认就可以。
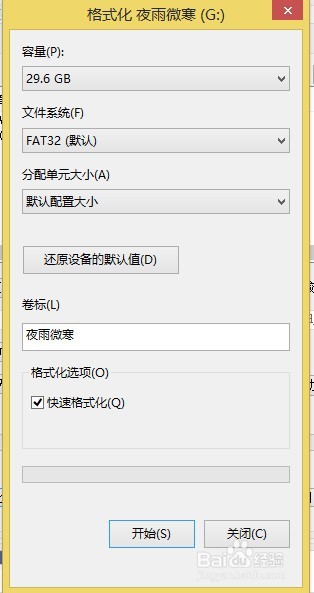
然后选择“格式化”
格式化选项里最好,选择FAT32模式。
u盘uefi装win8.1系统图文教程图6
u盘uefi装win8.1系统图文教程图7
u盘uefi装win8.1系统图文教程图8
u盘uefi装win8.1系统图文教程图9
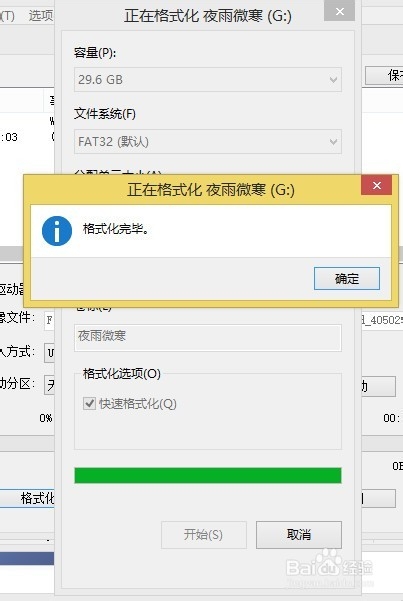
格式化完成后,关闭格式化窗口就可以了。
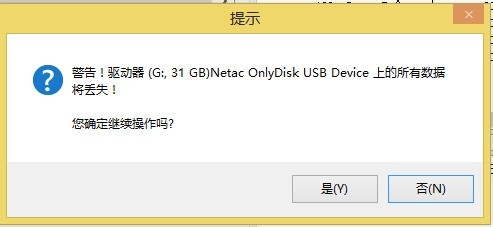
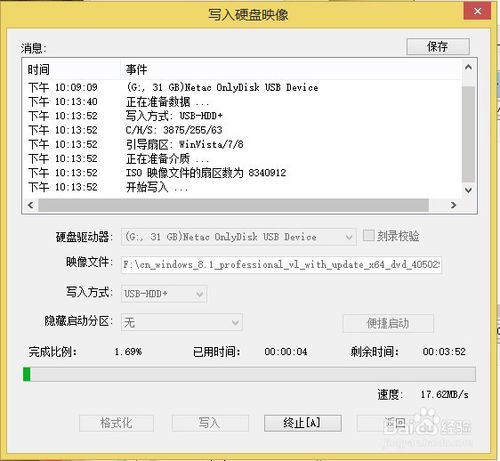
然后选择”写入“
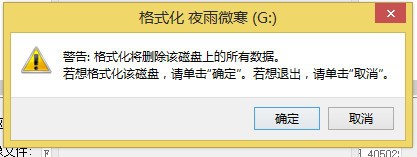
这时会弹出一个警告窗口,确定就可以了。
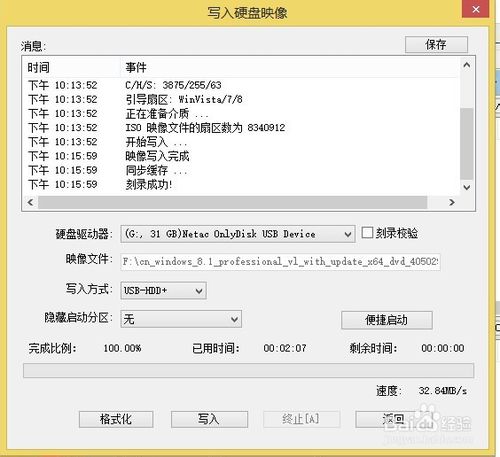
恢复完成后,选择返回,并关闭窗口就可以了。
到这个地方,可以在UEFI模式下识别的win8.1启动u盘就制作完成了。
u盘uefi装win8.1系统图文教程图10
u盘uefi装win8.1系统图文教程图11
u盘uefi装win8.1系统图文教程图12
把u盘插入到需要安装win8.1的笔记本或者台式机的usb接口。
开机设置成u盘为第一启动,不懂的朋友可以参照如何用u盘重装系统。并保存退出。
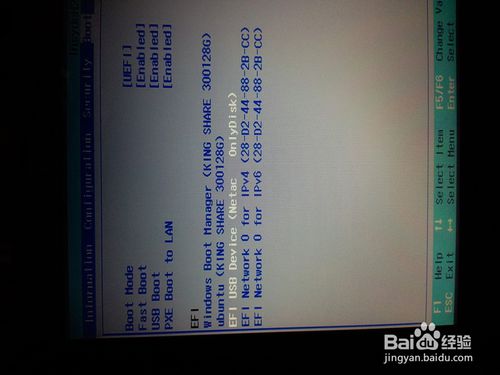
u盘uefi装win8.1系统图文教程图13
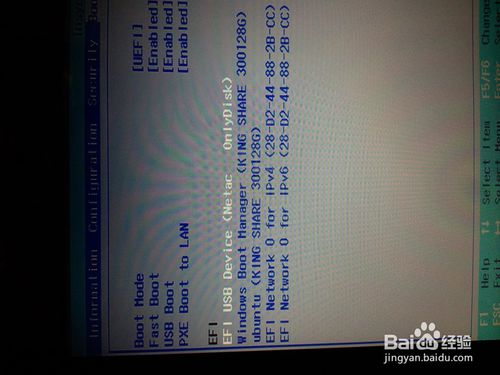
u盘uefi装win8.1系统图文教程图14
再次重新启动电脑就会进入win8.1的安装界面。出现这个界面时不要直接点击”下一步“
按”Shift"+”F10“组合键,调出命令对话框。
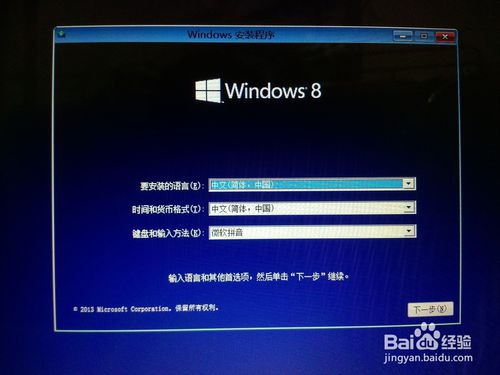
u盘uefi装win8.1系统图文教程图15
输入 “diskpart",然后按回车键。
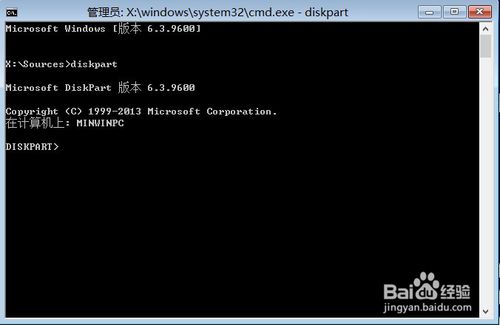
u盘uefi装win8.1系统图文教程图16
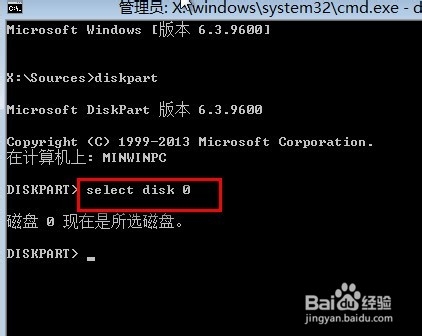
输入”select disk 0",然后按回车键.
u盘uefi装win8.1系统图文教程图17
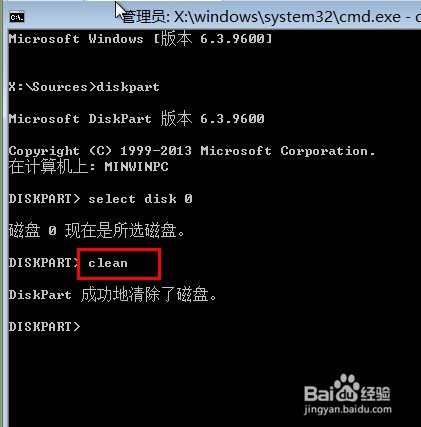
输入“clean",,然后按回车键.
这一步会删除硬盘所有的分区和数据。
u盘uefi装win8.1系统图文教程图18
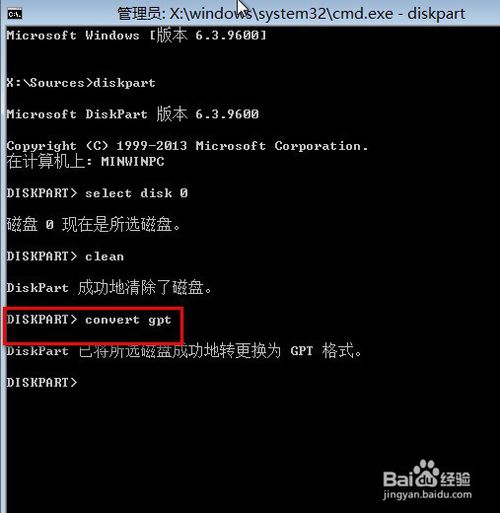
输入”convert gpt",,然后按回车键.
这个时候,会有提示“已将磁盘成功地更换为GPT模式”
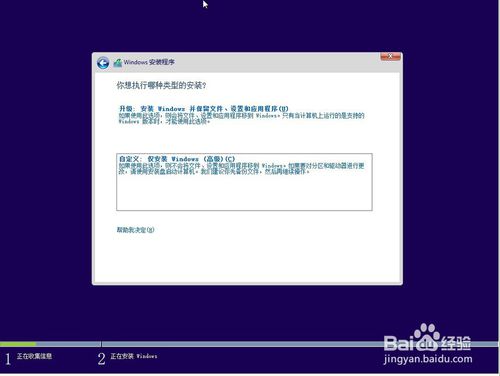
这个时候就可以关闭命令提示行窗口,进入win8的安装界面,按提示完成安装即可。
u盘uefi装win8.1系统图文教程图19

u盘uefi装win8.1系统图文教程图20
u盘uefi装win8.1系统图文教程图21
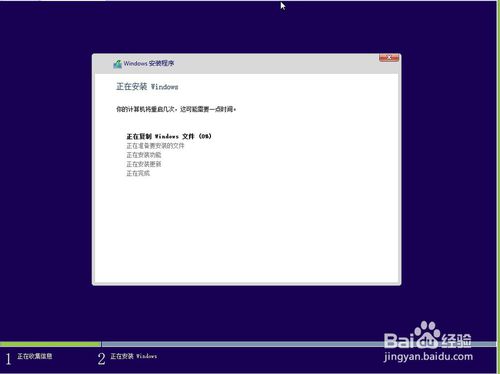
u盘uefi装win8.1系统图文教程图22
上面这篇u盘uefi装win8.1系统图文教程的方法还可以,基本上属于一键重装系统的了,但是上面这个uefi装w8.1系统方法还不是特别完善,小编推荐大家试试小白一键重装大师,这款软件是当今最好的一键重装软件,在uefi方面的技术成就无人可及。
 有用
26
有用
26


 小白系统
小白系统


 1000
1000 1000
1000 1000
1000 1000
1000 1000
1000 1000
1000 1000
1000 1000
1000 1000
1000 1000
1000猜您喜欢
- win10如何一键重装系统win7教程..2018/11/22
- 红旗操作系统怎么安装 红旗linux系统..2022/12/25
- 台式电脑开不了机怎么解决进入安全模..2022/10/23
- 电脑游戏手柄怎么设置2015/06/05
- 电脑横机使用指南:提高效率的关键技巧..2024/08/29
- windows32位系统重装2016/11/03
相关推荐
- Excel单元格斜线:提升数据可视化效果的..2024/01/27
- 电脑操作系统32位和64位的区别..2022/03/04
- 顺心一键重装系统介绍2023/04/22
- xp安装版下载后如何安装2023/05/03
- win7网络适配器设置技巧2016/08/24
- QQ会员新价格调整,多种套餐选择,畅享..2024/04/06


 关注微信公众号


