萝卜家园u盘启动盘制作工具使用教程
- 分类:教程 回答于: 2016年10月29日 00:00:00
萝卜家园u盘启动盘制作工具,是一键制作u盘启动盘和维护的工具,当然,使用u盘启动工具进行萝卜家园u盘启动制作是最简单的方法,完全是傻瓜式的操作。如果你不知道制作u盘启动盘步骤怎么操作的话,就跟着小编一起学习萝卜家园u盘启动盘制作工具使用教程。
主要步骤:
第一步:制作前的软件、硬件准备
第二步:用萝卜家园U盘装系统软件制作启动U盘
第三步:下载您需要的gho系统文件并复制到U盘中
第四步:进入BIOS设置U盘启动顺序
第五步:用U盘启动快速安装系
详细步骤:
第一步:制作前的软件、硬件准备
1、U盘一个(建议使用1G以上U盘)
2、下载萝卜家园U盘装系统软件:萝卜家园U盘装系统工具下载主页
3、下载您需要安装的ghost系统
第二步:用萝卜家园U盘装系统软件作启动盘
1、运行程序之前请尽量关闭杀毒软件和安全类软件(本软件涉及对可移动磁盘的读写操作,部分杀软的误报会导致程序出错!)下载完成之后Windows XP系统下直接双击运行即可,Windows Vista或windows7/8系统请右键点以管理员身份运行。
点击进入萝卜家园U盘装系统-程序下载和运行

萝卜家园u盘启动盘制作工具使用教程图1
2、插入U盘之后点击
萝卜家园u盘启动盘制作工具使用教程图2
按钮,程序会提示是否继续,确认所选U盘无重要数据后开始制作:
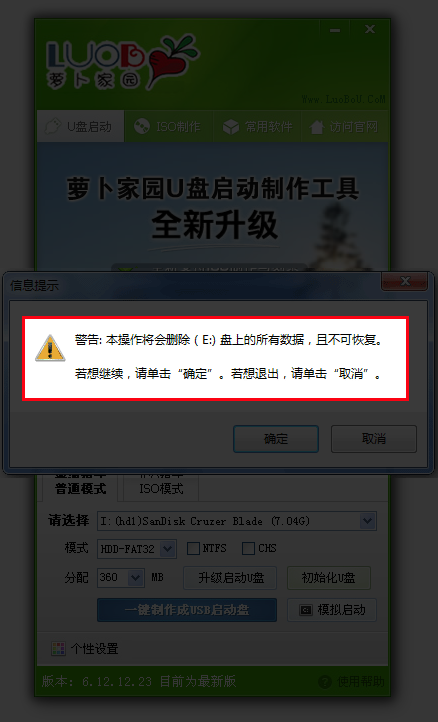
萝卜家园u盘启动盘制作工具使用教程图3
制作过程中不要进行其它操作以免造成制作失败,制作过程中可能会出现短时间的停顿,请耐心等待几秒钟,当提示制作完成时安全删除您的U盘并重新插拔U盘即可完成启动U盘的制作。
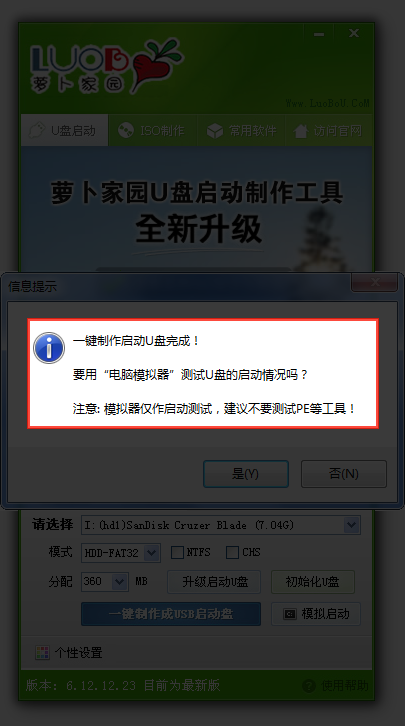
萝卜家园u盘启动盘制作工具使用教程图4
第三步:下载您需要的gho系统文件并复制到U盘中
将您自己下载的GHO文件或GHOST的ISO系统文件复制到U盘“GHO”的文件夹中,如果您只是重装系统盘不需要格式化电脑上的其它分区,也可以把GHO或者ISO放在硬盘系统盘之外的分区中。
第四步:进入BIOS设置U盘启动顺序
电脑启动时按“del”或“F8”键进入BIOS设置具体设置请参阅 萝卜家园U盘装系统设置U盘启动教程
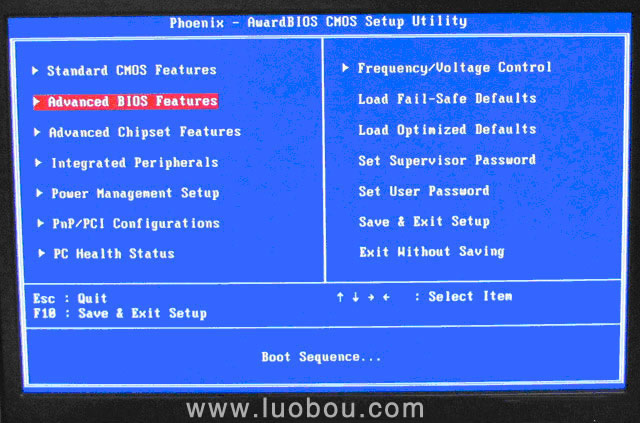
萝卜家园u盘启动盘制作工具使用教程图5
第五步:用U盘启动快速安装系统
(第一种方法)进PE用智能装机工具安装
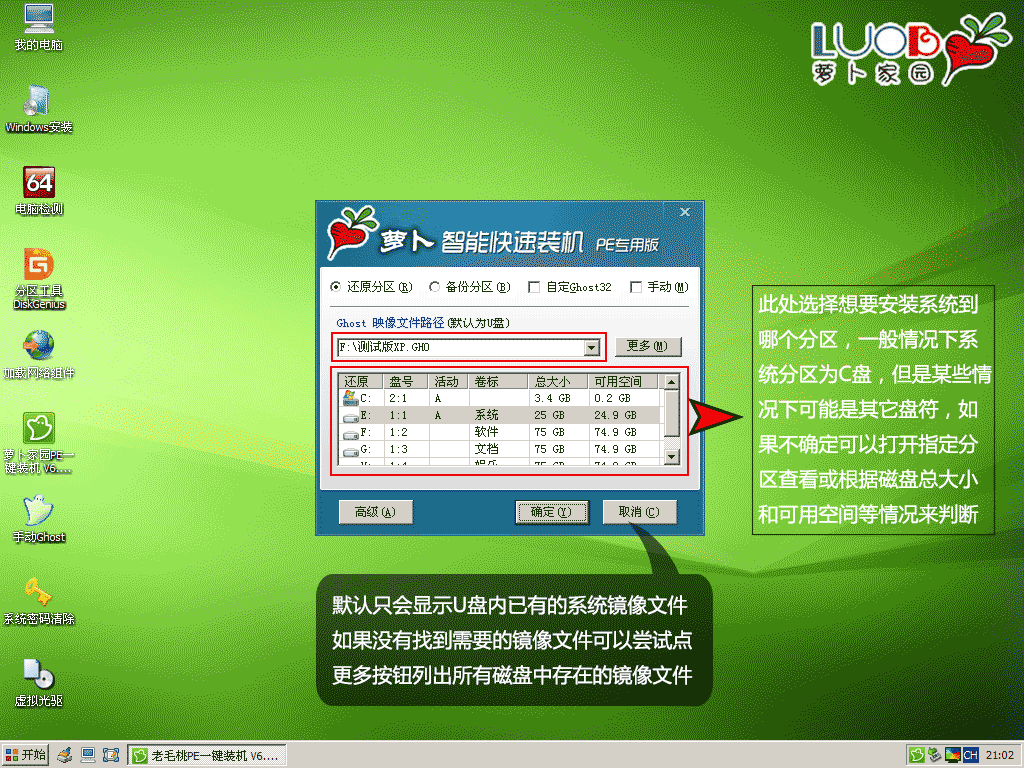
萝卜家园u盘启动盘制作工具使用教程图6
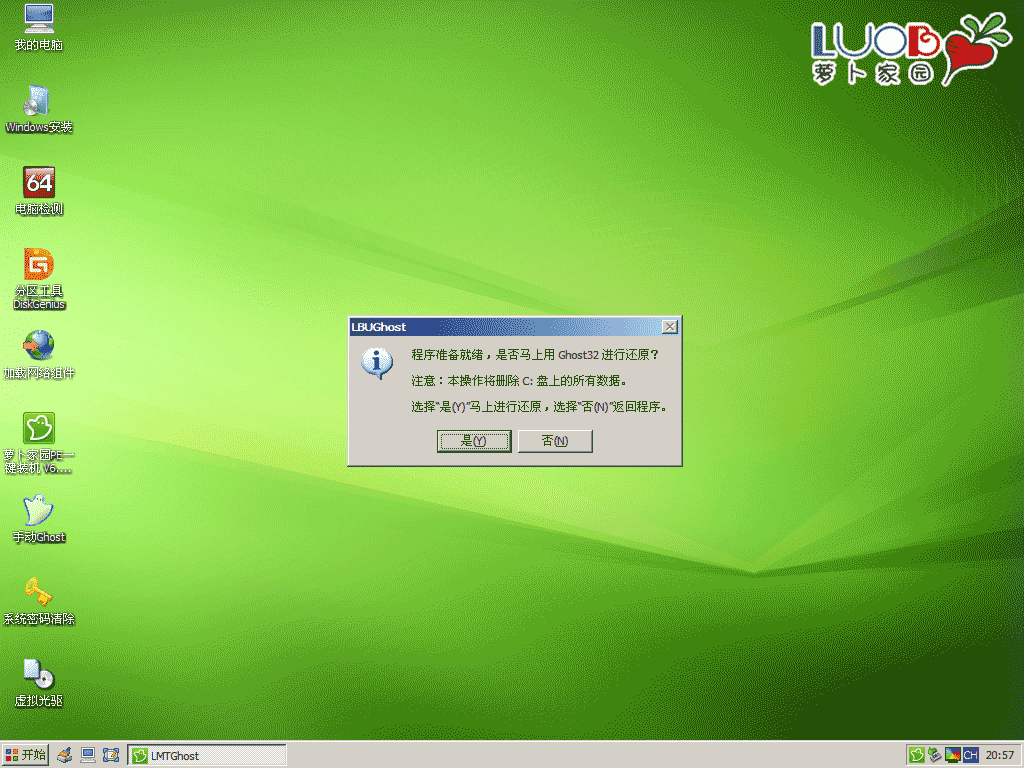
萝卜家园u盘启动盘制作工具使用教程图7
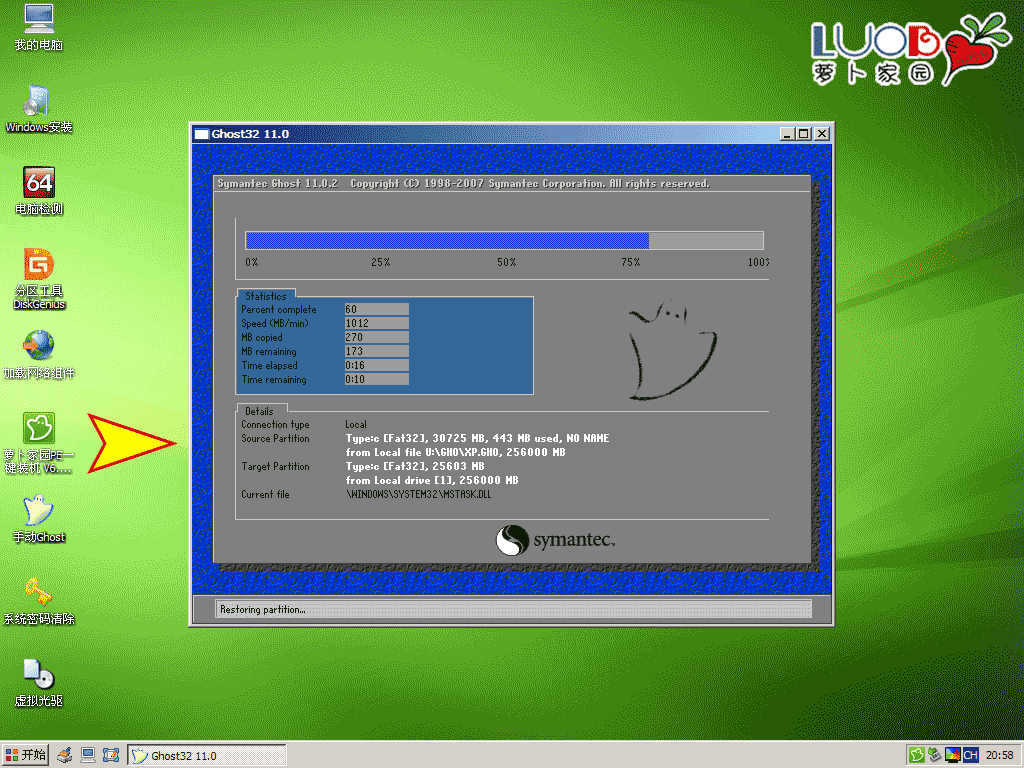
萝卜家园u盘启动盘制作工具使用教程图8

萝卜家园u盘启动盘制作工具使用教程图9
(第二种方法)不进PE安装。
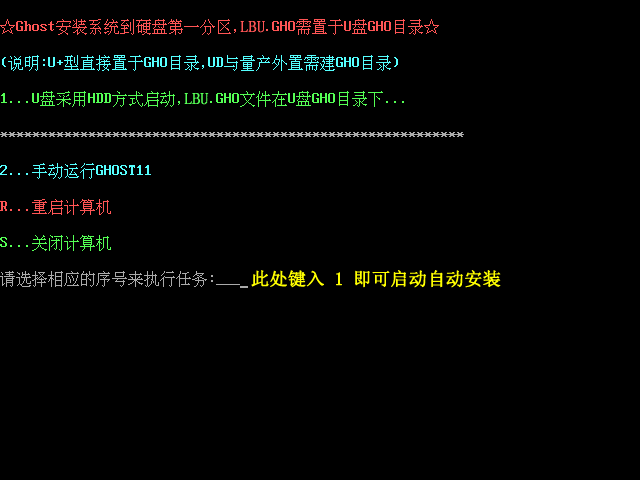
把U盘GHO文件夹中希望默认安装的GHO系统文件重命名为“LBUP.GHO”。
插入U盘启动后点击“不进PE安装系统GHO到硬盘第一分区”即可进入安装系统状态了:
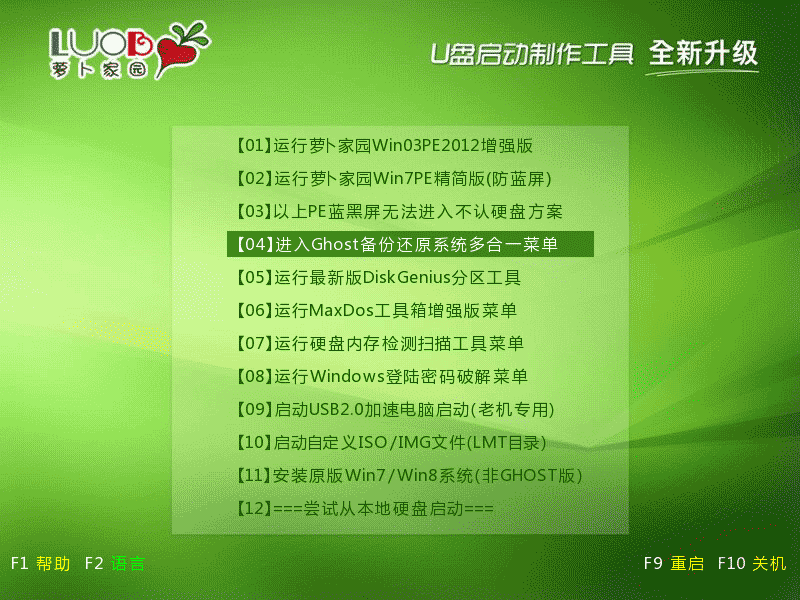
萝卜家园u盘启动盘制作工具使用教程图10
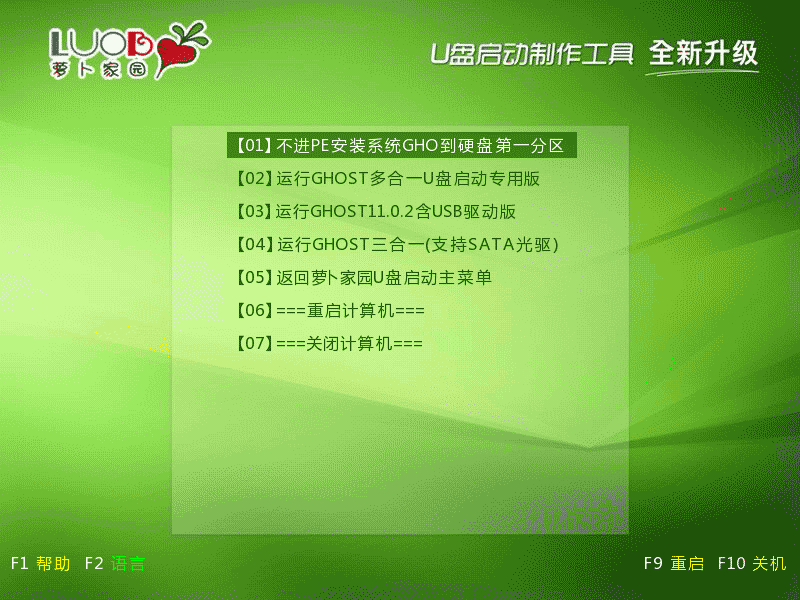
萝卜家园u盘启动盘制作工具使用教程图11
萝卜家园u盘启动盘制作工具使用教程图12
综上所述的全部内容就是相关萝卜家园u盘启动盘制作工具使用教程了,其实制作u盘启动盘是非常简单的,相信聪明如你,只要你按照上述的教程多去操作几遍的话,很快就能够学会制作u盘启动盘,进行后续的系统重装了,祝你成功!更多相关xp系统安装u盘教程,尽在我们的官网等着您!
 有用
51
有用
51


 小白系统
小白系统


 1000
1000 1000
1000 1000
1000 1000
1000 1000
1000 1000
1000 1000
1000 1000
1000 1000
1000 1000
1000猜您喜欢
- u盘w732位系统下载最简单安装方法..2016/11/10
- win1064一键重装教程2016/11/07
- u盘格式化数据恢复如何操作..2023/04/24
- 电脑城装机版Ghost windows7系统下载..2017/06/08
- 小编教你电脑卡win10重装系统详细教程..2021/03/03
- 421页pdf百度云资源怎么下载转换..2023/04/08
相关推荐
- 电脑重装了系统开不了机的解决方案解..2024/08/13
- 深度技术Ghost windows7系统装机版制..2017/05/20
- 手把手教你dns服务器未响应导致无法上..2019/03/07
- 如何清理注册表2015/06/09
- 电脑能重装系统吗?深入解析及操作指南..2024/09/16
- 笔记本cpu天梯图,小编教你笔记本cpu天..2018/06/20


 关注微信公众号


