一键ghost重装win7系统教程
- 分类:教程 回答于: 2016年10月13日 00:00:00
今天为大家带来一键ghost重装win7系统教程,接下来为大家介绍的就是重装win7系统教程,共有的两种重装win7系统方法,一种是常规系统下的重装win7系统,另一种是PE环境下一键ghost,这两种教程,希望能帮到你们
方法一,常规系统下一键ghost
1.首先要把镜像解压出来。获得一个后缀名是.gho的文件,注意是文件夹里最大的那个文件。放到C盘以外的分区上。
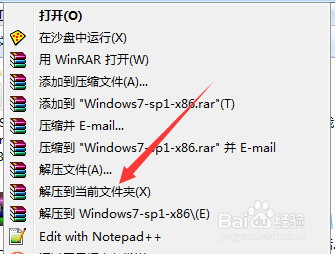
一键ghost重装win7系统教程图1
2.系统下可以使用OneKeyGhost这个工具,自行下载。
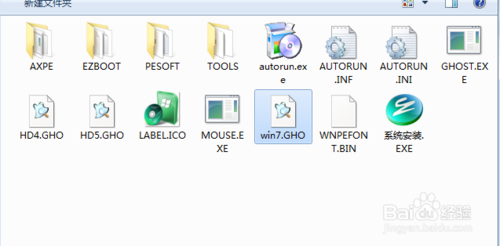
一键ghost重装win7系统教程图2
3.打开,选择还原分区,选择刚才解压出来的gho文件,选中C盘【注意路径中不能有中文!】
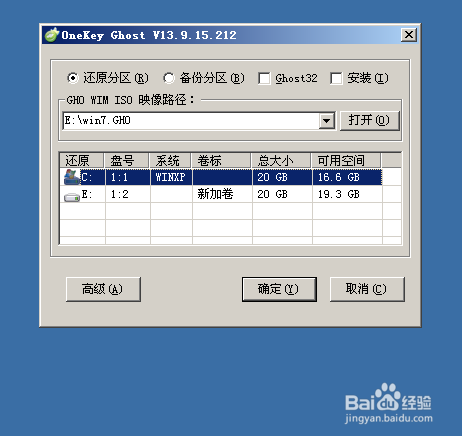
一键ghost重装win7系统教程图3
4.然后点击确定,重启。
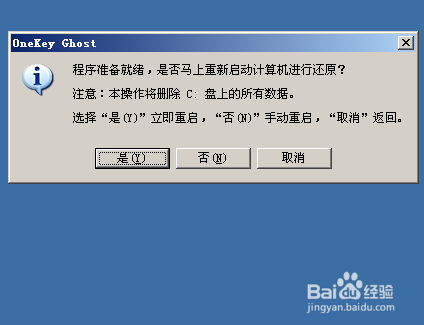
一键ghost重装win7系统教程图4
5.这里不需要操作,自动运行。
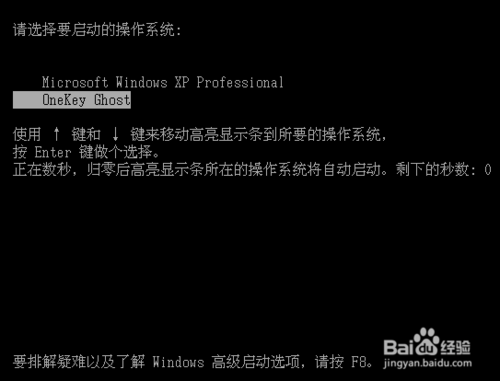
一键ghost重装win7系统教程图5
6.然后就进入ghost还原界面,进度走完系统便重装完成。
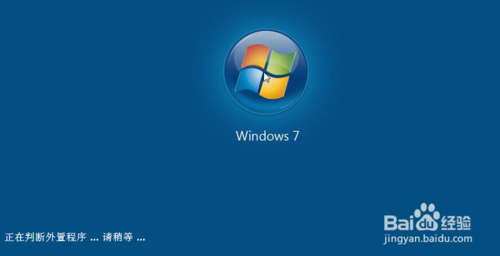
一键ghost重装win7系统教程图6
方法二,PE环境下GHOST
首先是进入PE环境,在PE下同样可以使用上述方法一,下面讲解手动ghost的方法。
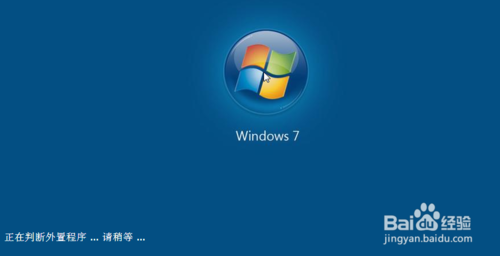
一键ghost重装win7系统教程图7
启动手动GHOST,鬼脸图标。

一键ghost重装win7系统教程图8
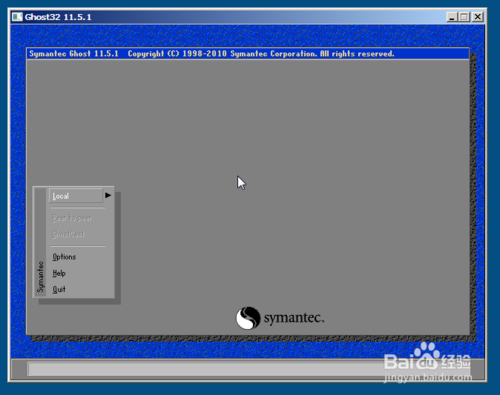
一键ghost重装win7系统教程图9
以此选择 Local → Partition → From Image,可以简单记住123。
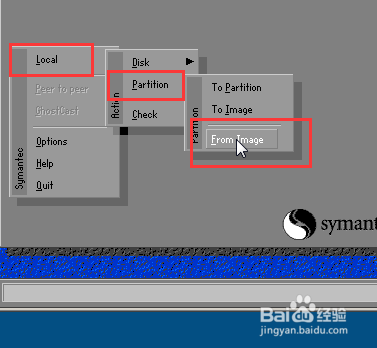
一键ghost重装win7系统教程图10
选择gho镜像。
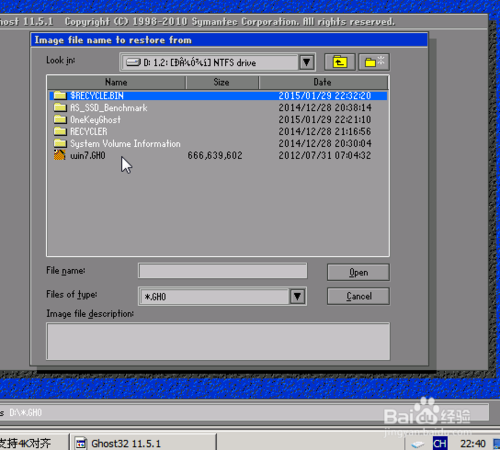
一键ghost重装win7系统教程图11
直接点击OK。
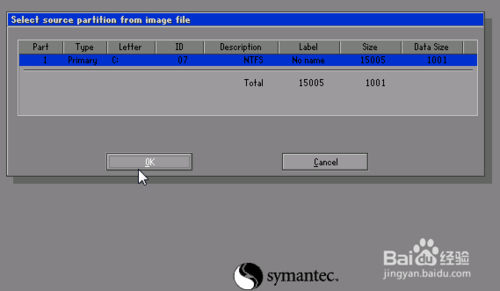
一键ghost重装win7系统教程图12
选择分区,注意看容量辨别,别搞错了。
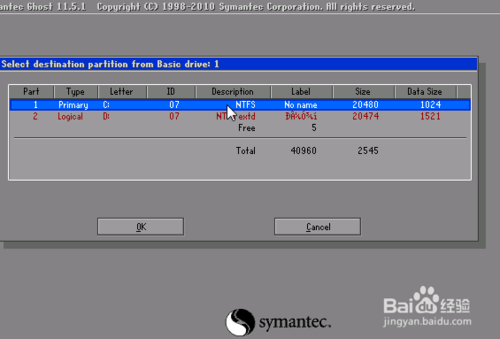
一键ghost重装win7系统教程图13
然后点击YES。
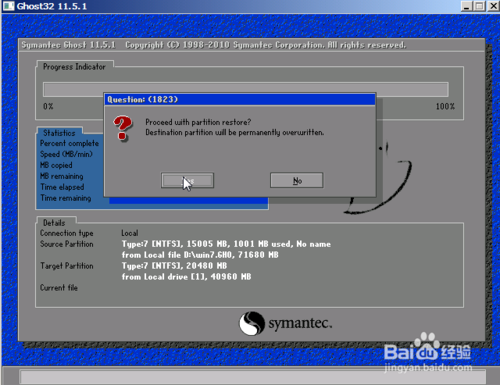
一键ghost重装win7系统教程图14
还原就开始了。
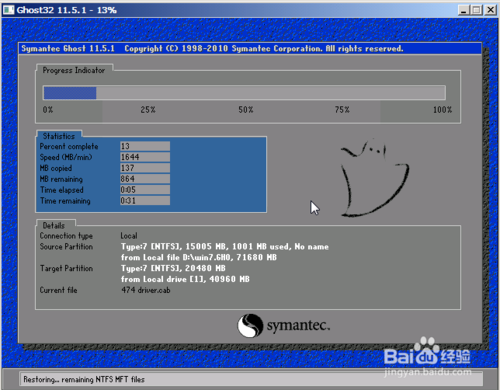
一键ghost重装win7系统教程图15
最后就完成了。这不是错误提示,是询问你是否重启,点击右边的重启即完成了系统的重装/还原。
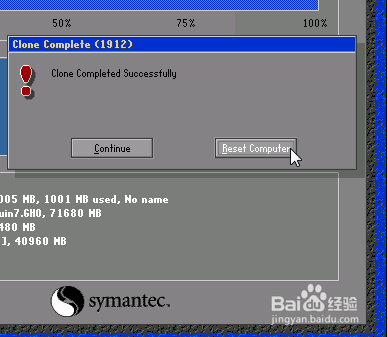
一键ghost重装win7系统教程图16
以上就是小编为大家介绍的一键ghost教程,其实关于装win7系统系统的方法不一定要用ghost来安装,因为使用ghost会给电脑小白带来更多的问题,大家赶紧学习起来吧,好了,win7安装教程到这里就结束了,如果大家还想了解更多那就多关注小白官网吧。
 有用
54
有用
54


 小白系统
小白系统


 1000
1000 1000
1000 1000
1000 1000
1000 1000
1000 1000
1000 1000
1000 1000
1000 1000
1000 1000
1000猜您喜欢
- 电脑经常蓝屏是什么原因怎么办?教你解..2022/10/28
- 黑鲨官网重装系统2022/11/06
- 详解联想电脑怎么进入bios2021/05/15
- 电脑重装系统步骤分享2022/11/23
- 口袋装机系统重装大师装机教程..2021/07/07
- 核心显卡:提升游戏性能的必备装备..2024/04/09
相关推荐
- 简述电脑重装系统必须用u盘吗..2023/03/27
- 易我数据恢复恢复工具有哪些..2024/09/18
- win7简易版和旗舰版区别2017/02/23
- 机械键盘:指尖上的优雅交响,敲出生产力..2024/03/30
- 蓝屏代码如何消除2022/10/01
- 重装系统pe操作步骤详解2016/11/01


 关注微信公众号


